


This fun-fold card uses offset panels to create a double-opening front. Pictured here using Night of Navy and Very Vanilla cardstock as well as featured items from the Stampin’Up! September-December 2023 Mini Catalogue: Shining Brightly Designer Series Paper and the Night Divine Cling Stamp Set
This card can be made with any patterned paper you have on hand and the sentiment area adapted to any usage. You are limited only by your imagination!

The instructions below are given in both metrics and imperial. The metric instructions make an A6 card used in Australia, the UK, Canada, etc. The imperial instructions make an A2 card which is used in the USA. The video tutorial can be viewed here:
Cut Plan
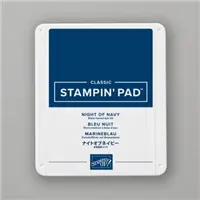
These colours were used for the demo card in this sheet and in the video tutorial. The Base Cardstock is Night of Navy and the Contrast Cardstock is Very Vanilla. The Designer Series Paper (DSP) used was from the Shining Brightly set which contained Night of Navy and Very Vanilla papers detailed with Gold Foil.
Metric (Aussie A6 card)
Base Cardstock:
- Card Base – 180 x 148 scored at 74 along 180 side
- Card Flap – 100 x 128 scored at 20 along 100 side
- Sentiment Mat – 80 x 70
Contrast Cardstock:
- Inside Mat – 100 x 143
- Front Sentiment – 80 x 60
DSP1: Cut 2 – 70 x 143
DSP 2: Cut 2 – 75 x 123
Imperial (USA A2 card)
Base Cardstock:
- Card Base – 7.5 x 5.5 scored at 3.25 along 7.5” side
- Card Flap – 4 x 4.5 scored at 0.5” along 4” side
- Sentiment Mat – 3.5 x 2.75
Contrast Cardstock:
- Inside Mat – 4 x 5.25
- Front Sentiment – 3.5 x 2.25
DSP1: Cut 2 – 3 x 5.25
DSP 2: Cut 2 – 3.25 x 4.25
Instructions
- Cut all cardstock.
- Fold and crease cardbase and front flap along score lines with bone folder.
- Stamp image / decorate Front Sentiment piece.
- Stamp image/sentiment to Inside Mat if desired (optional step).
- Affix Flap to Cardbase by placing adhesive along back of the 20mm (0.5”) flap. With card base open and wrong side of flap facing up, place the 20mm (0.5”) centred vertically on right edge of card base so that fold line aligns with the right edge. Press in place.
- Affix Inside Mat to right side of open card base, covering the flap you have just affixed in place.
- Affix DSP1 to outside and inside of the front of the card base (the side to the left of the fold).
- Affix DSP2 to the outside and inside of the card flap.
- Affix the card front to the centre of the front of the card flap.
- Affix sentiment piece to the centre of the cardstock attached in step 8.
- Embellish as desired.
Download pdf of instructions HERE.
Supply List


Price: $17.50


Marcus, Polly and Hugo, the dogs of Drunk Dog Creative, want to remind you to subscribe to this blog, share with your friends, and follow Drunk Dog Creative on all the socials.
Woof woof. Sit. Stay. Follow us. Good human.
Need supplies?
You can shop for Stampin’ Up! products at https://bridgeta.stampinup.net. You can also click on any of the items in the supply lists in tutorial posts. A percentage of any profit from my SU sales is donated to Dachshund Rescue Australia, so you get great products at a good price and help gorgeous dogs like Hugo find their furever home!
Join my team!
If you spend over $169 why not consider joining my team as an Independent Demonstrator? You will get $265 worth of your choice of products for only $169 and be entitled to a minimum 20% discount on your future orders. Many people join just to be Hobby Demonstrators for the personal discount!


Leave a comment