
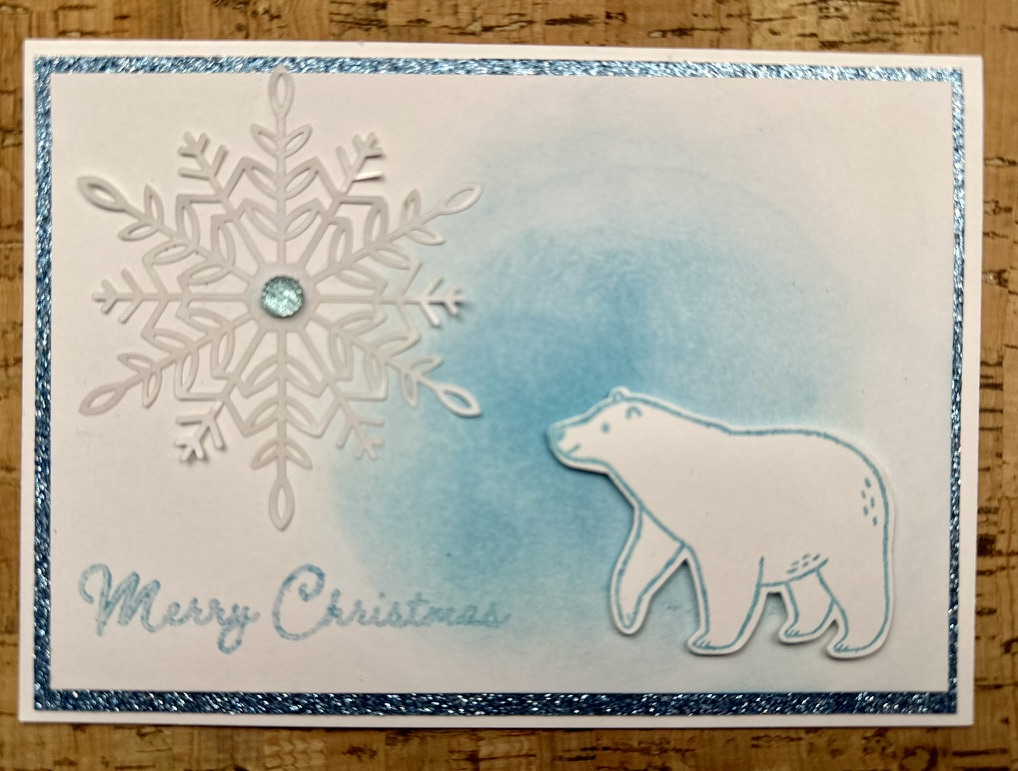
Do you need to make an adorable Christmas card (or 10 or 20) quickly? Well, here it is! This is the Beary Christmas Card I made using just a few products from Stampin’ Up! It is so quick and easy to make that I didn’t film a video tutorial. Trust me, you won’t need it with this one. Feel free to mix up the embellishments and add your own special touch to this card!
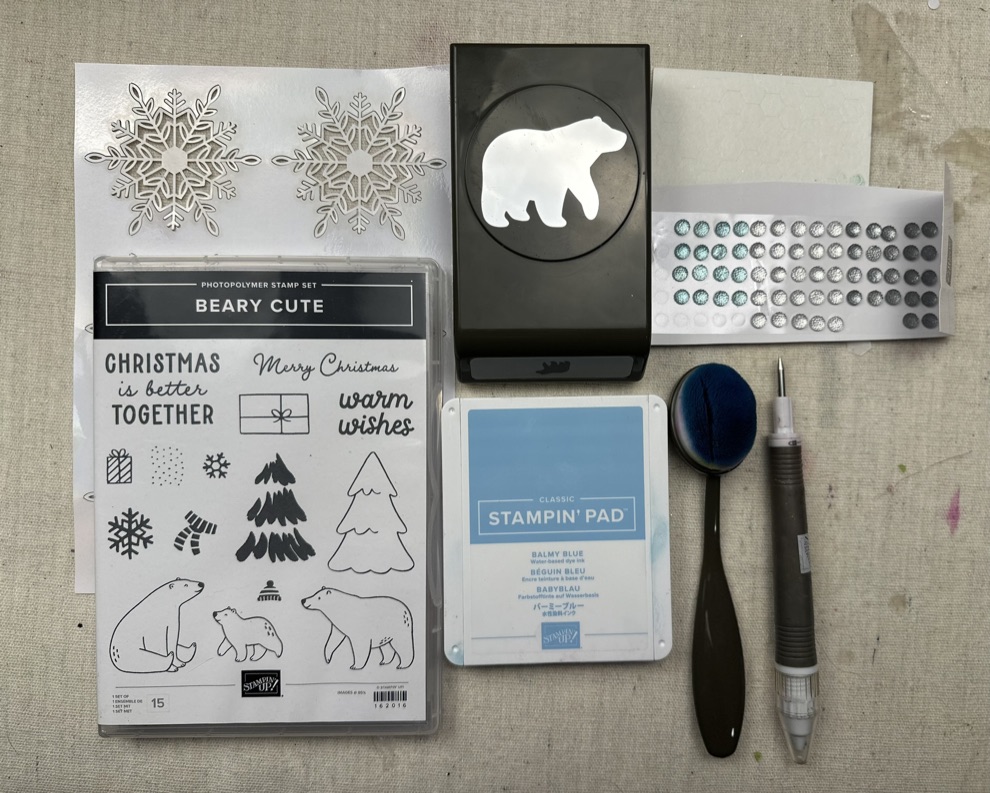
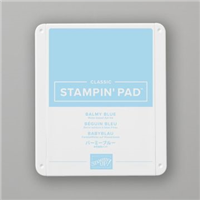
The secret to how easy this card is to make is the monochrome colour scheme. This only needed a few supplies. I used Basic White Thick and Balmy Blue Cardstock and Balmy Blue Ink. I did have some glitter cardstock in my stash that matched so I used that but the front would be just as effected with Balmy Blue Cardstock. This card features the Beary Cute Photopolymer Stamp Set and the Beary Cute Punch. I also used the Faceted Gems Trio Pack and Wonderful Snowflakes. There is a complete supply list at the end of this post. Of course, you can use any colour you want in place of Balmy Blue. Monochrome cards are beautiful in their simplicity but also allow for you to do different variations on the theme. What’s your favourite colours for Christmas? Use them!
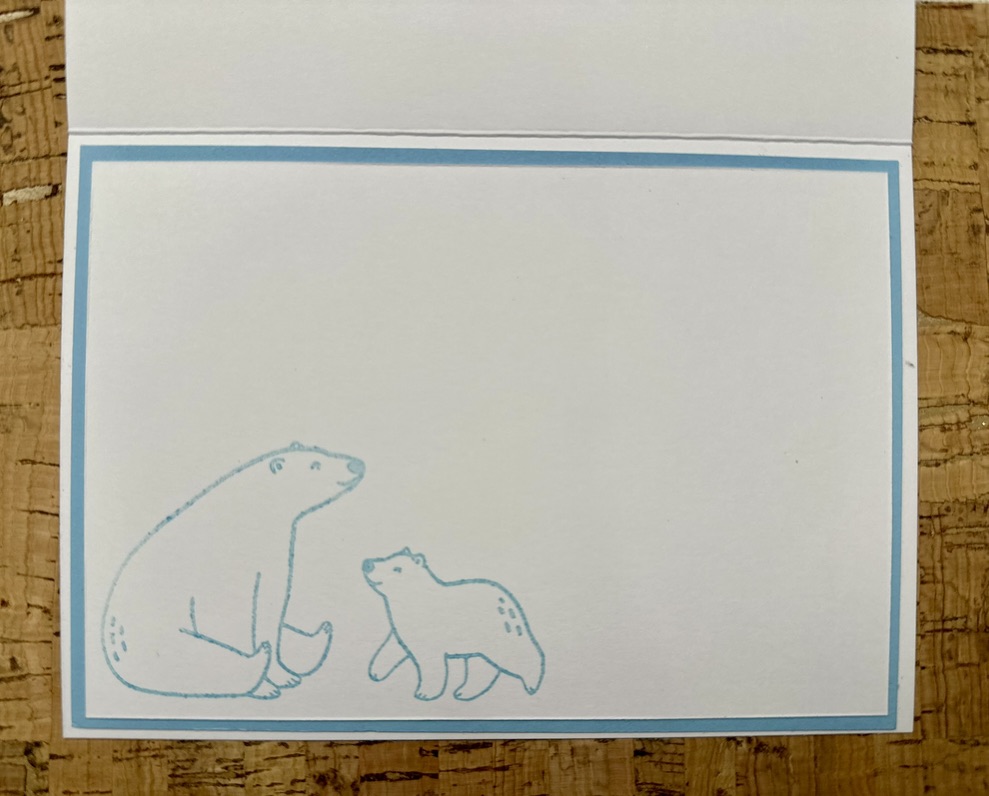
I also created an inside panel with a Balmy Blue mat and Basic White writing area. This is optional as the cardbase is white so you could leave it at that and write on the inside. However, I find that adding the inside panels adds weight to the inside to balance the weight of the cardfront, making the card more stable to stand up and display. It also adds a ‘finished’ look to the card, in my opinion.
Cut Plan – Metric (for an A6 Australian Card Size)
Basic White Thick Cardstock:
- Cardbase – 148 x 210mm scored at 105mm
- Card front – 138 x 95mm
- Writing Panel (inside) – 138 x 95mm (Optional)
- Scraps for Polar Bear
Balmy Blue Cardstock (or Blue Glitter Cardstock):
- Mat for Card Front – 143 x 100mm
- Mat for Inside – 143 x 100mm (optional)
Cut Plan – Imperial (for an A2 USA Card Size)
Basic White Thick Cardstock:
- Cardbase – 8.5″ x 5.5″ scored at 4.25″
- Card front – 3.75″ x 5″
- Writing Panel (inside) – 3.75″ x 5″ (optional)
- Scraps for Polar Bear
Balmy Blue Cardstock (or Blue Glitter Cardstock):
- Mat for Card Front – 4″ x 5.25″
- Mat for Inside – 4″ x 5.25″ (optional)
Instructions:
- Stamp main polar bear on scrap Basic White Thick cardstock with Balmy Blue ink.
- Punch bear out using the Polar Bear Punch. Set aside.
- Using a blending brush, lightly rub Balmy Blue ink in a circular motion on the right side of the card front, keeping it closer to the bottom than the top (see photo at the top of this post).
- Stamp the sentiment to the lower left corner of the card front using Balmy Blue ink – I used the “Merry Christmas” from the Beary Cute Stamp set.
- Affix the card front to the Balmy Blue (or blue glitter) Mat.
- Affix the Mat to the Cardbase.
- Using 2 Dimensionals, attach the polar bear to the Card Front to the right in the lower right corner.
- Attach the Wonderful Snowflake to the upper left corner of the Card Front.
- Affix a Balmy Blue Faceted Gem to the centre of the snowflake.
Optional Steps for the Inside of the Card:
- Stamp the mother and baby bears onto the inside writing panel using Balmy Blue ink.
- Affix the writing panel to the inside mat (Balmy Blue cardstock).
- Affix the inside panel to the inside of the card.
Supply List
You can shop for Stampin’ Up! supplies at bridgeta.stampinup.net or click on the links below to easily add these items to your cart. Remember, I donate part of all profits from sales to Dachshund Rescue Australia. 🙂


Subscribe to the Drunk dog Creative Blog
Get new posts delivered straight to your inbox!


Leave a comment