
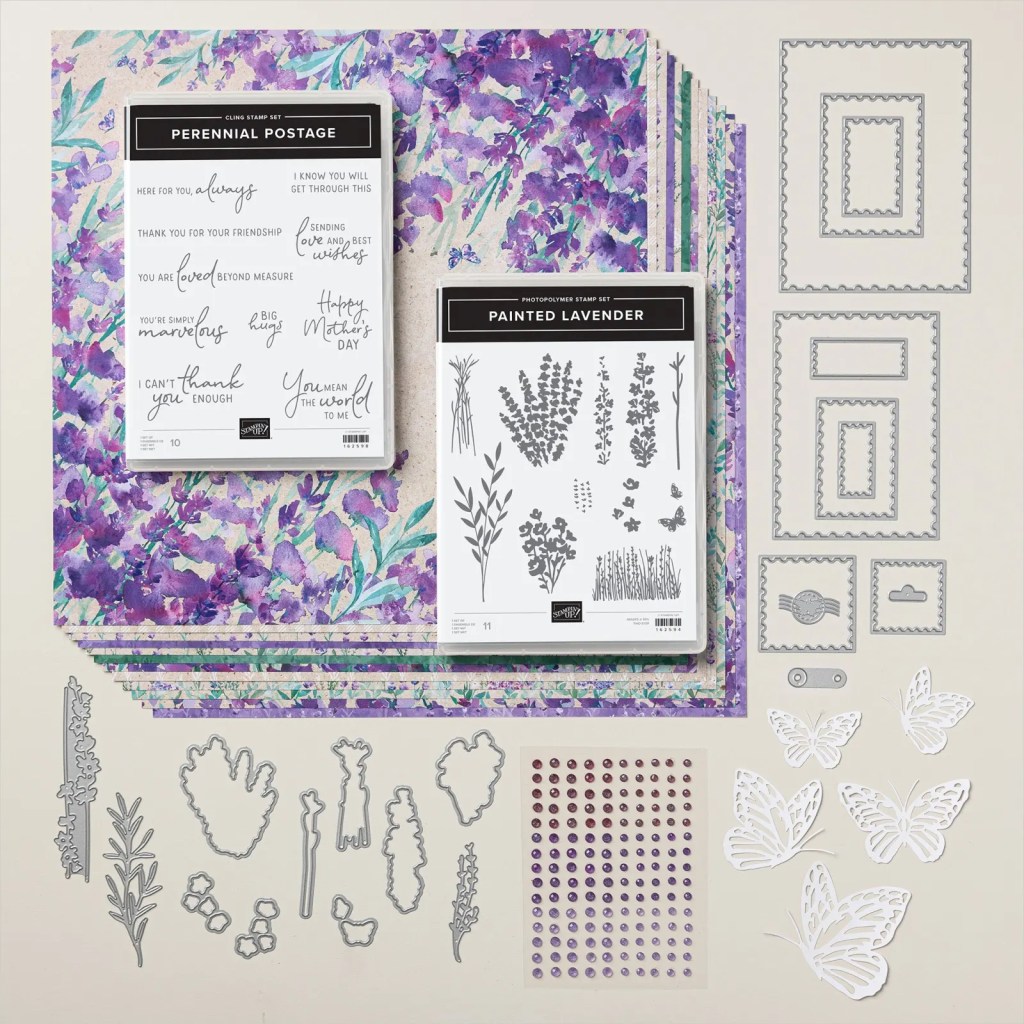
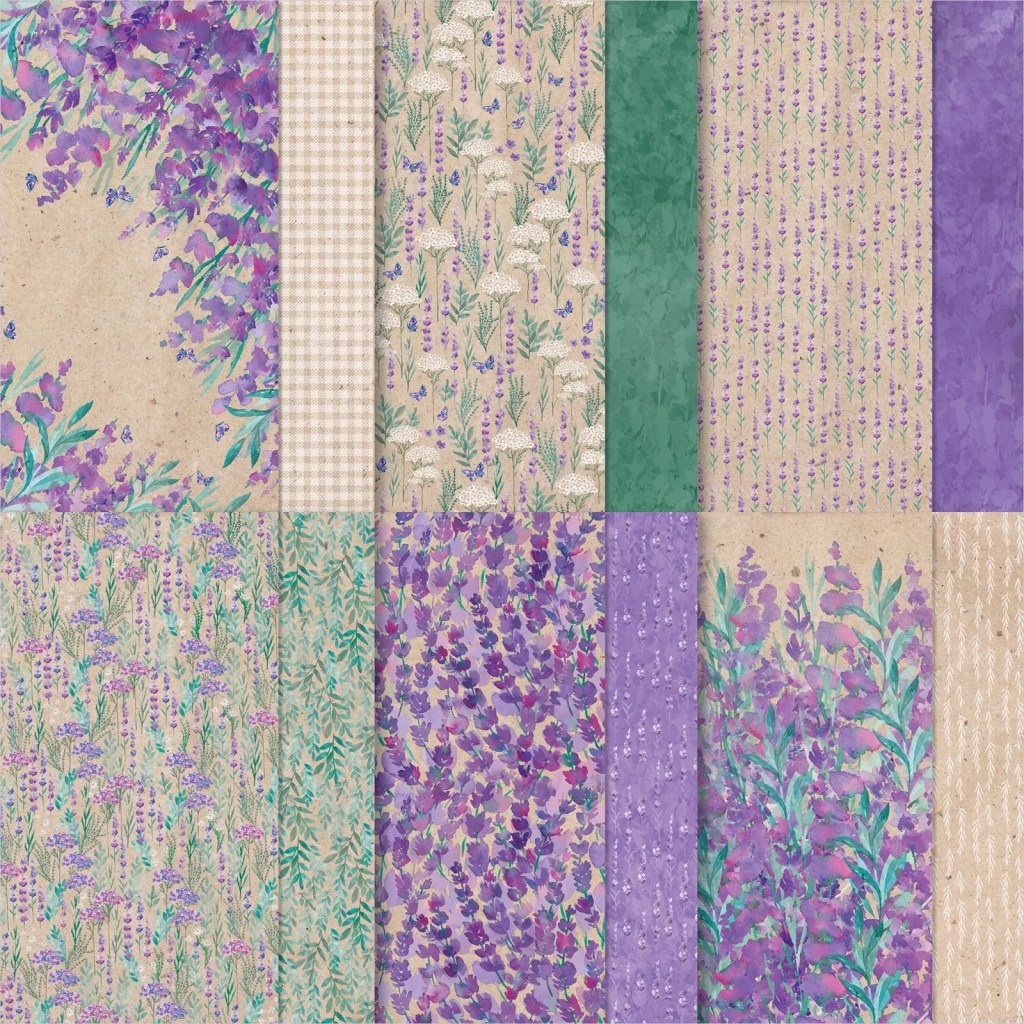
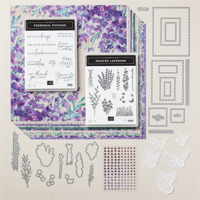
Featuring the Gorgeous Perennial Lavender Suite from Stampin’ Up! Available until April 2024 or while supplies last.
I really hope my mother doesn’t see this post! Why? Because if she does, she’ll know what her Mother’s Day Card is going to look like. When the new Perennial Lavender Suite arrived at my doorstep, I knew immediately it was going to be perfect for her. I had been working on a pop-up design and this suite seemed ideal to use for it!
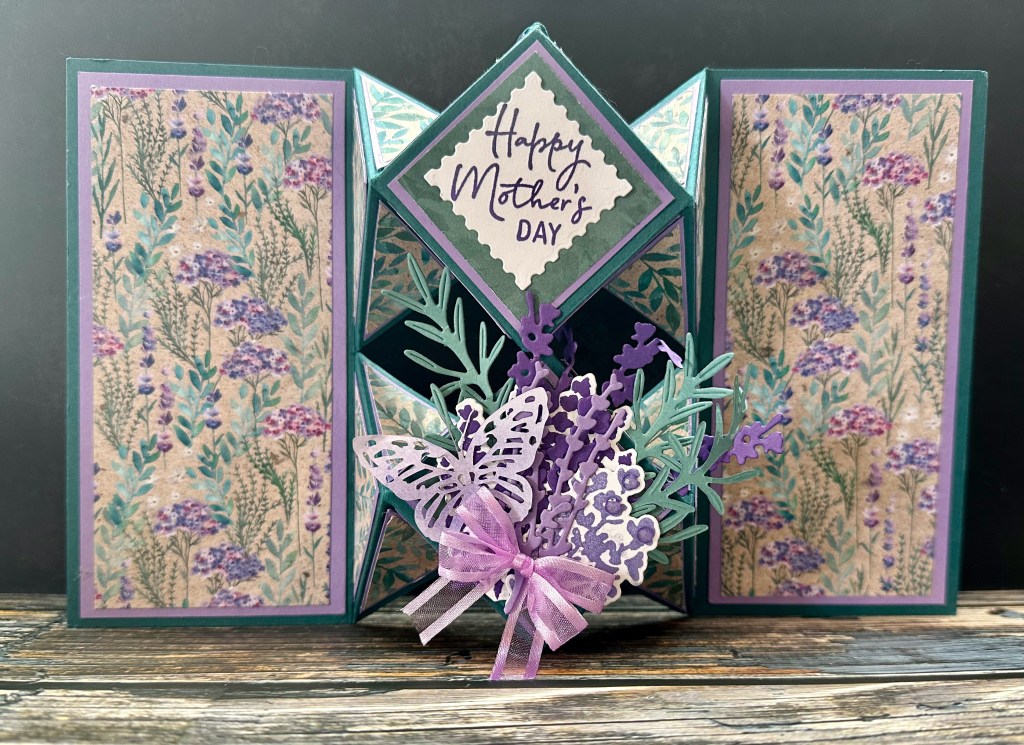

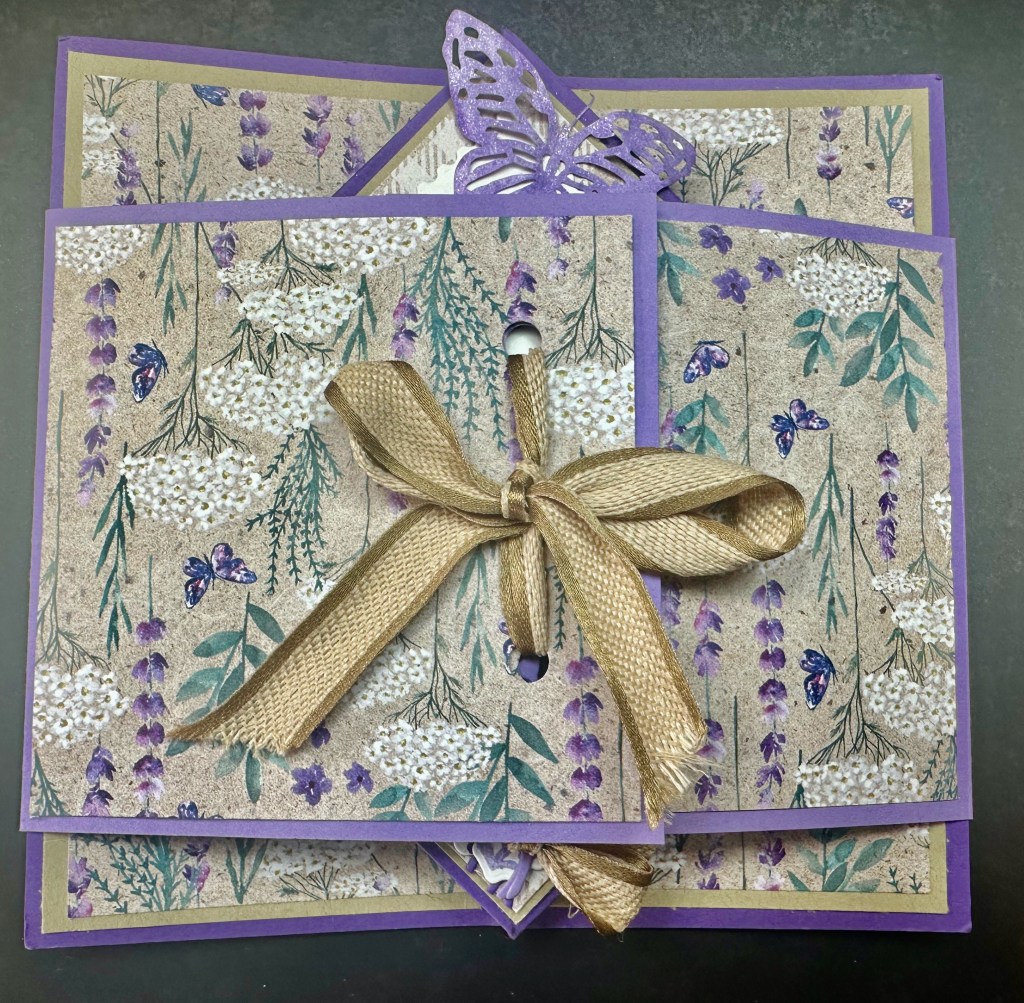
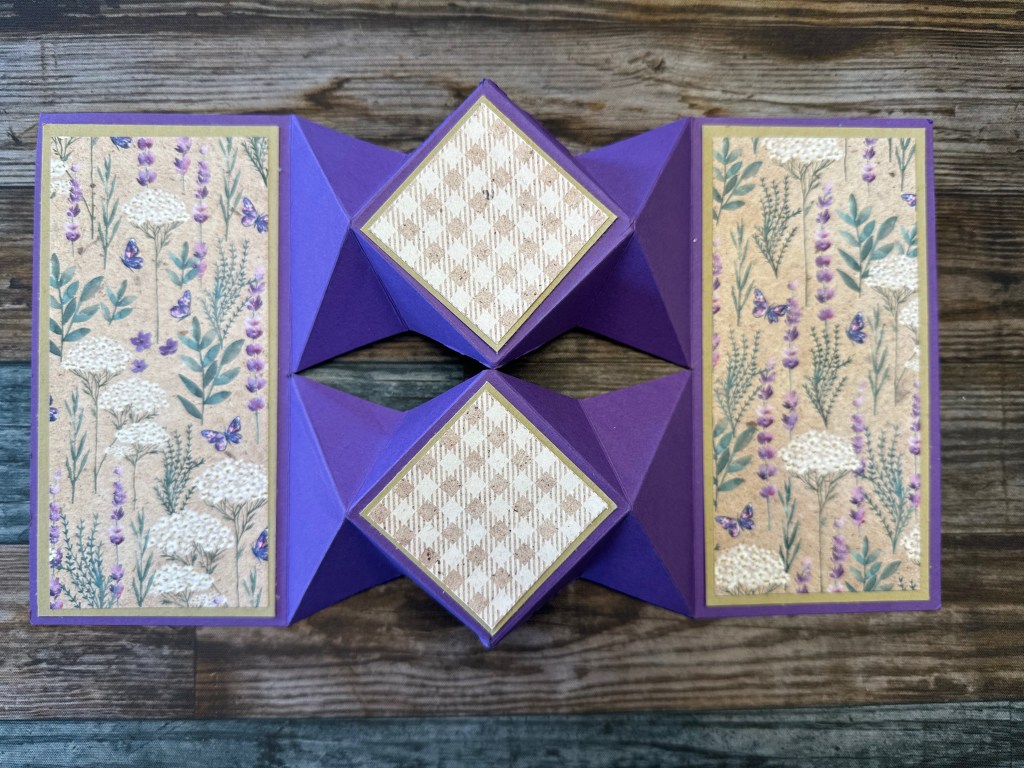
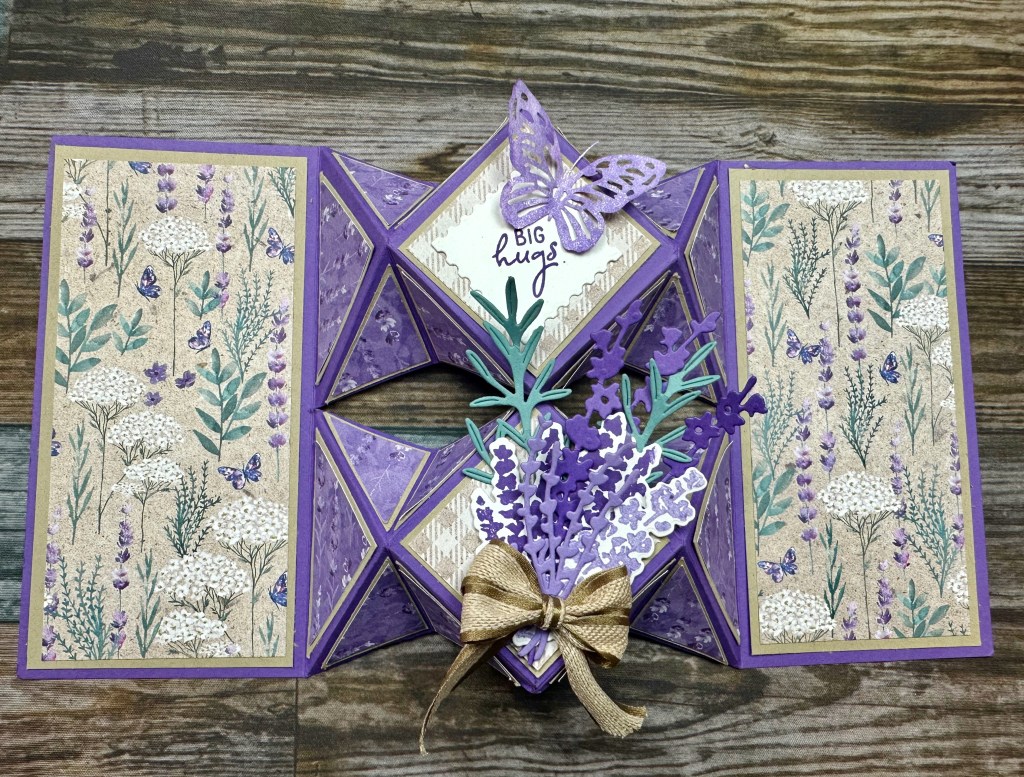
This 6×6″ card design is not hard, but it IS fiddly – especially if you add mats to all the little triangular shapes of the pop up mechanism. These are optional of course and while they do really add the ‘wow factor’ to the card, they are also fiddly and time consuming to cut and paste. However, if you watch the video, I give you some great techniques for making it easier! I also included a technique I use to build small 3-D layered embellishments like the flower bouquet on the front of the card. I also included instructions for how to make a band to keep the card closed and protected when you put it in an envelope.

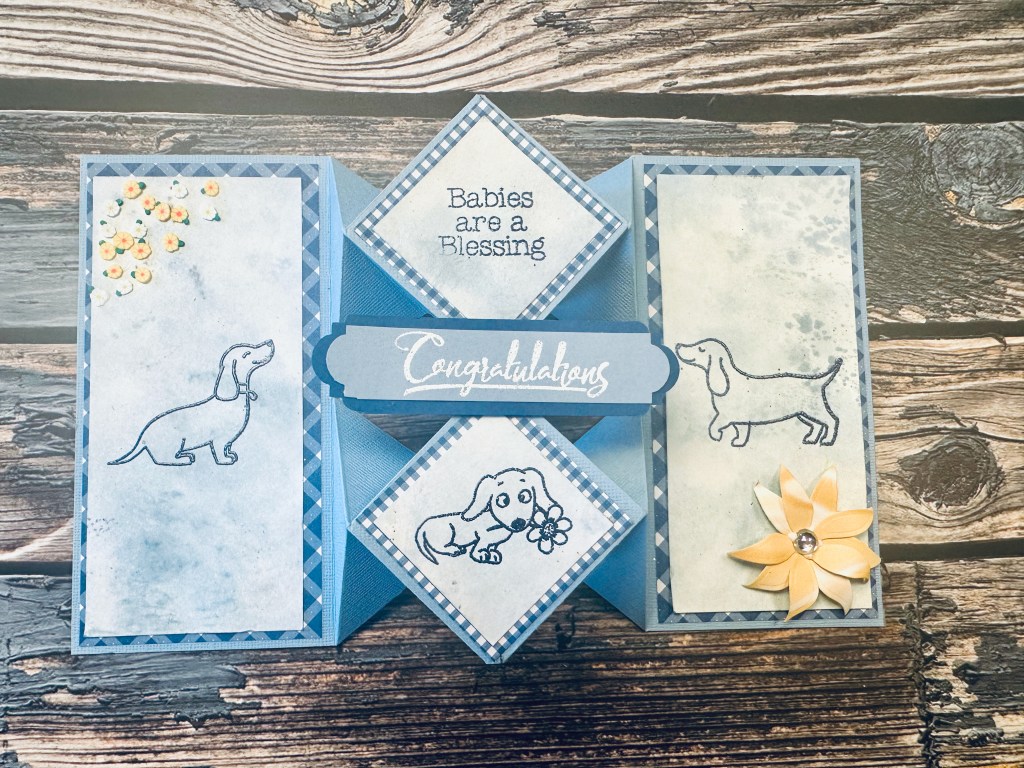
The basic structure of the card allows you to do so much to it to make it uniquely yours. You can leave the pop-up mechanism unmatted, use only one layer of mats, or double mat it like in some of the photos here. You can leave the front diamonds plain – use white or vanilla cardstock with images stamped or drawn on them – or build them up into 3-D elements. You can put sentiments on the sides or even across the middle, tying the pop-up diamonds together. You can use any papers/combination of papers you want and any embellishments you want. You are only limited by your imagination!
Instructions:
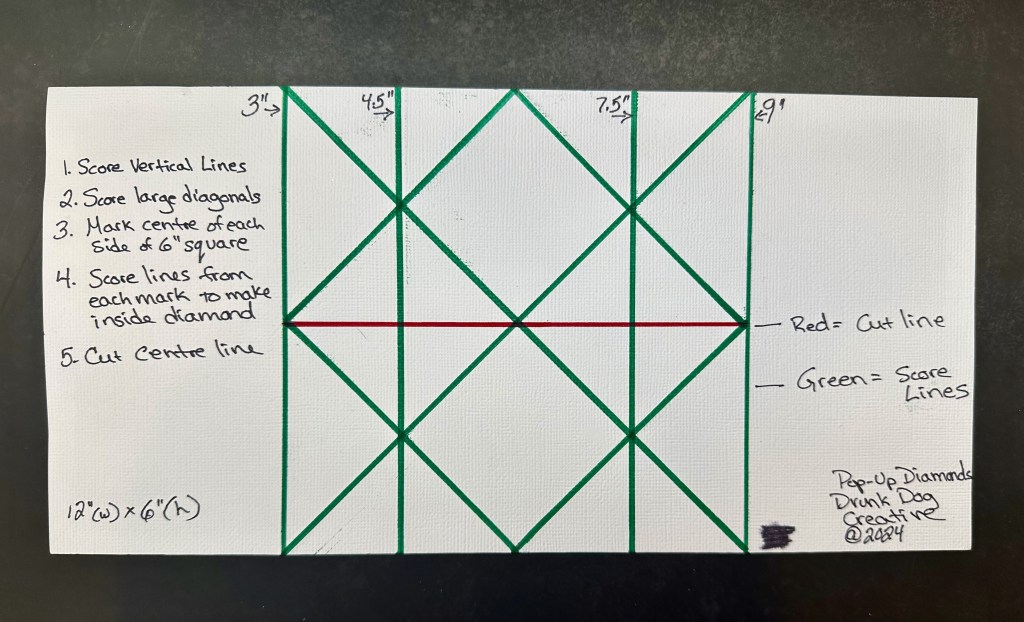
Since this is a6x6″ square card, the cut plan and instructions are in Imperial measurements. I could supply the metrics, but the conversion means working with odd measurements with lots of decimal placements. Most of us Aussies have rulers and other equipment that gives us both metrics and imperial so I hope you’ll forgive me for only using Imperial for this one.
You really need to watch the video for the instructions to make this card. It’s a little too hard to put it into words, but very easy to show you. You can access the video here:
Cut Plan
Card Base – 12″ x 6″ cardstock. I used Stampin’ Up! 12×12″ cardstock in Pretty Peacock (for the card in the video) and Gorgeous Grape for the other card pictured in this tutorial. The card base has to be scored and cut in a specific way. I’m going to inlcude a photo below to show you the score and cut lines, but please watch the video for tips on how to make this easier to do!
Optional Band
Cardstock – 10.25 x 4″ scored at 4″ from one end and 4.5 x 4″ scored at 0.5″ from one end.
DSP – cut 2 – 3.75 x 3.75″
Mat 1 – Contrast Cardstock
Side Panels: Cut 2 – 2.75″ x 5.75″
Front Diamonds: Cut 2 – 1 -7/8″ x 1-7/8″
Pop-up Mechanism (optional): Cut 3 – 2.5″ x 2.5″
- Cut 1 square along diagonal to make 2 triangles, cut each triangle in half – 4 large triangles.
- Cut 2 squares along diagonal to make 4 triangles, cut each triangle in half then in half again – 16 small triangles.
Mat 2 – Designer Series Paper
Side Panels: Cut 2 – 2.5″ x 5.5″
Front Diamonds: Cut 2 – 1.75″ x 1.75″
Pop-up Mechanism (optional): Cut 3 – 2.25″ x 2.25″\
- Cut 1 square along diagonal to make 2 triangles, cut each triangle in half – 4 large triangles.
- Cut 2 squares along diagonal to make 4 triangles, cut each triangle in half then in half again – 16 small triangles.
Decorative Options
- Leave pop-up mechanism as plain cardstock with no mats.
- Use just Mat 1 for the pop-up mechanism
- Use both mats for the pop-up mechanism
- Use mats on the front diamonds
- Leave front diamonds plain and stamp sentiments or images on mat 1 or 2 instead of using cardstock or DSP.
- Create 3-D embellishments to affix to the front diamonds.
Basic Instructions
It’s really important to watch the video. I know it’s a long one (but there’s lots of technique tips that will help you enormously with this card and with other projects). This is complicated mechanism – not hard to do once you’ve done it, but very hard to explain in words! So.. please.. watch the video. THANK YOU!
- Cut and score all cardstock and DSP as per cut plan – please see the video for help on this and for tips to make it easier to do.
- Use a bone folder to burnish all folds. squeeze top and bottom edges of each of the four pop-up mechanisms to fold the card into it’s shape – again, please watch the video for how to do this, including how to burnish the folds that do not go all the way across.
- If using mats, affix all Mat 2 pieces to Mat 1 pieces.
- Affix Matted pieces in place on the card base.
- Decorate the front diamonds.
- Assemble the band (if using).
- Finished!
Supply List
Scroll through the items below and click on them for more information. The link will take you to the product’s page on the Stampin’ Up! Australia website. You can also browse and buy products by going to bridgeta.stampinup.net. I donate a portion of all profits to Dachshund Rescue Australia.


Marcus, Polly and Hugo, the dogs of Drunk Dog Creative, want to remind you to subscribe to this blog, share with your friends, and follow Drunk Dog Creative on all the socials.
Woof woof. Sit. Stay. Follow us. Good human.
Need supplies?
You can shop for Stampin’ Up! products at https://bridgeta.stampinup.net. You can also click on any of the items in the supply lists in tutorial posts. A percentage of any profit from my SU sales is donated to Dachshund Rescue Australia, so you get great products at a good price and help gorgeous dogs like Hugo find their furever home!
Join my team!
If you spend over $169 why not consider joining my team as an Independent Demonstrator? You will get $265 worth of your choice of products for only $169 and be entitled to a minimum 20% discount on your future orders. Many people join just to be Hobby Demonstrators for the personal discount!


Leave a comment