
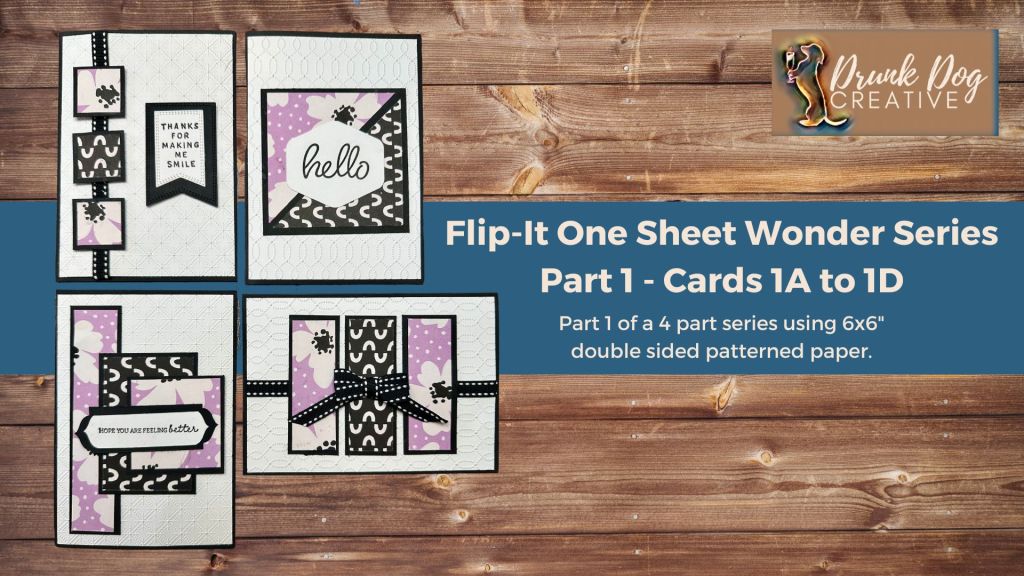
This is the first of a 4 part series on One Sheet Wonders. Each part is self-contained and gives you 4-5 cards from one 6×6″ piece of double sided patterned paper. All four parts together give you 18 cards from one 12×12″ piece of double sided patterned paper. Each part is a standalone tutorial.
I just love the idea of a ‘One Sheet Wonder’ but I’ve only ever made one and never tried to create one myself. When I knew what the new 2024-2026 InColor collection was going to look like, I knew I had to try to design one to showcase at least one of the gorgeous colours. I actually ended up designing FOUR different 6″x6″ One Sheet Wonders. Because 4 of the 6×6″ sheets makes ONE 12″x12″ One Sheet Wonder! So then you have the option to use 6×6″ paper or a 12×12″ paper and you end up with designs for 18 cards from one 12×12″ paper or 4 6×6″ papers!
This blog post is Part 1 in the 4 part series with the other tutorials being released over the coming weeks. The tutorial video highlights the gorgeous new colours which I was able to get on pre-order as a Stampin’ Up! Independent Demonstrator – these are going to be available to you on 1 May 2024! Some of the examples in this blog post use other Designer Series Paper (our double sided patterned papers) and other coloured cardstock, but you can see some of the new colours in each video in the series.


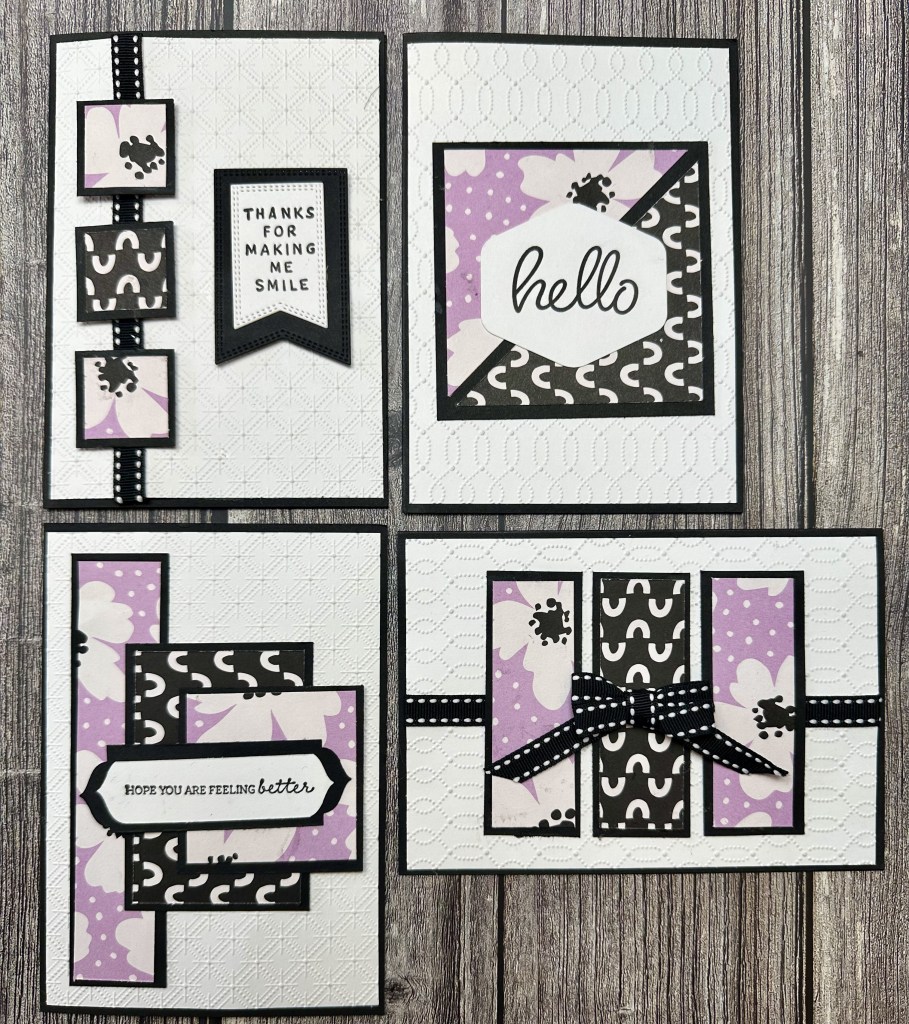
Part 1 shows you how to create FOUR cards from one sheet of DSP. The cut plans below are given for both Metric (A6) and Imperial (A2) cards. The video speeds through the cutting because it’s best to just follow the cut plan and cut your papers any way you’re comfortable with. If you are working in Imperial, it’s best to fast forward through the cutting demonstration (which is in metric) to the assembly directions on the video. The cut plans are included in the video but I also have them here so that you can print them out and keep them… much easier than pausing the video and trying to work off of a screen shot!
Video
Watch the video for instructions, but especially for tips and tricks and ideas for embellishments and sentiments. The Assembly instructions are the same whether you are working in Metric or Imperial.
Supplies
After 1 May 2024, I will add a supply list which will include links to the new products used in the video.
- Coloured Cardstock (3 sheets)
- Contrast Cardstock (usually white, vanilla or beige) (2 sheets)
- 6″x6″ Designer Series Paper
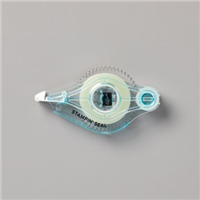
- Glue
- Adhesive Tape
- Paper Trimmer
- Bone Folder
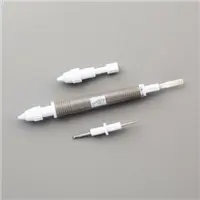
- Take Your Pick Tool
- Embelishments – ribbon, bows, adhesive embellishments, stamps, ink pad, dies, 3D embossing folder, etc.
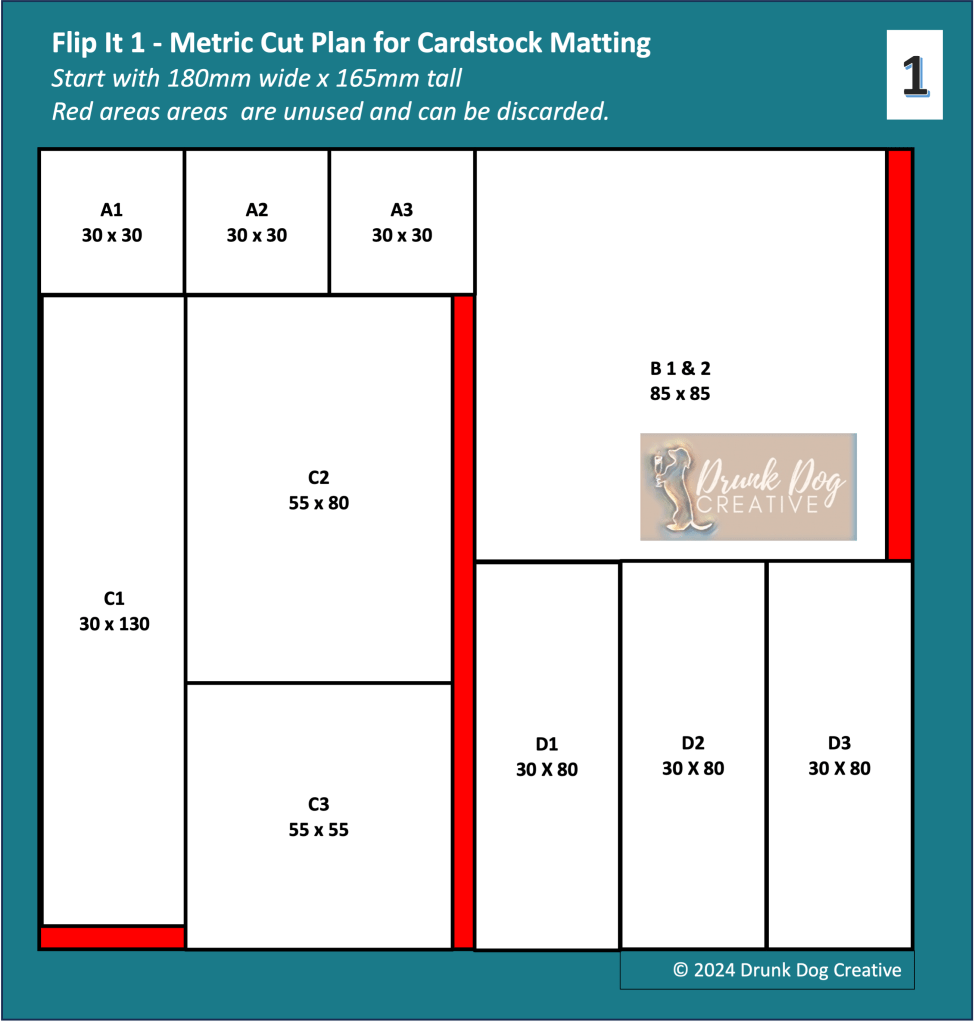
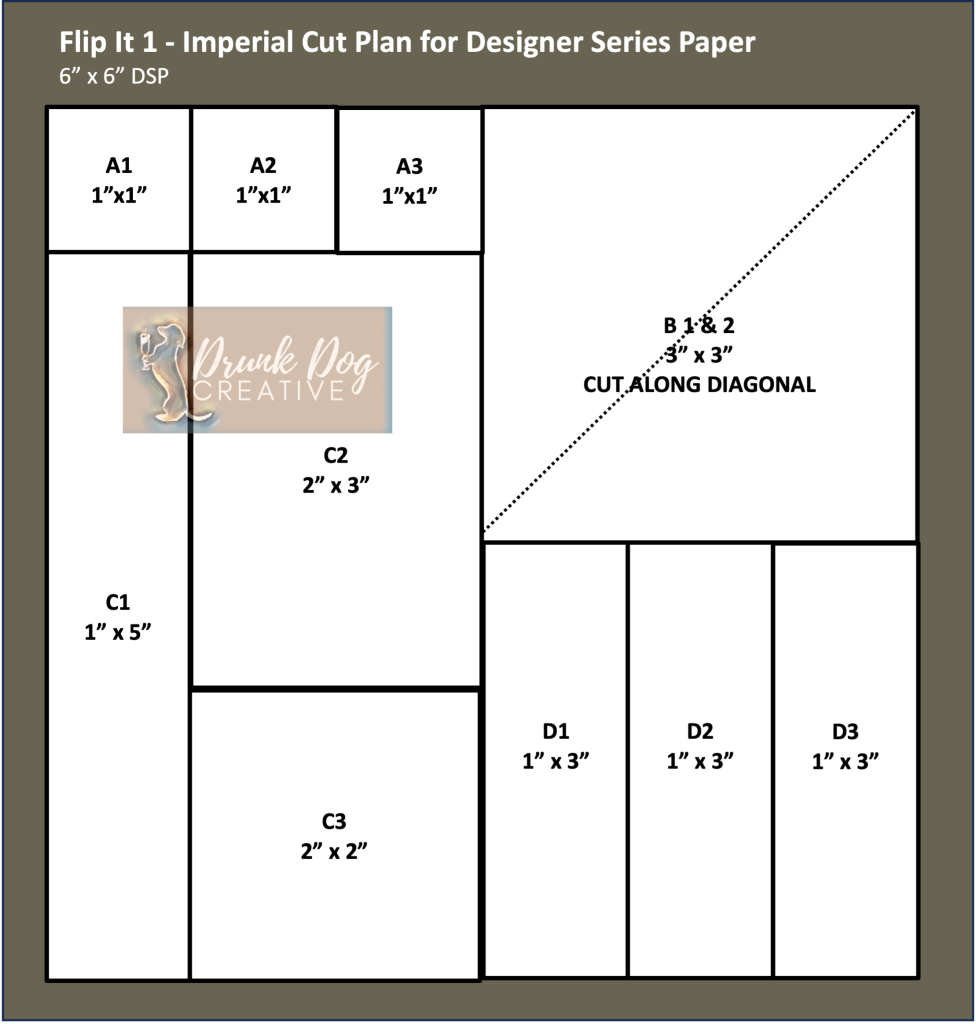
Metric Cut Plans
Card Base: 210mm x 148mm – scored at 105mm on long edge.
Card Front: 100mm x 143mm – leave plain or emboss with a 3D embossing folder
Inside Writing Panel: 95mm x 138mm

Imperial Cut Plans
Card Base: 8.5″ x 5.5″ scored at 4.25″ along long edge
Card Front: 4″ x 5.25″ – leave plain or emboss with a 3D embossing folder
Inside Writing Panel: 3.75″ x 5″

Assembly

- Cut and score card bases and card fronts
- Optional: 3D emboss card fronts, or stamp background images, and/or add ribbon.
- Affix Card Fronts to Card Bases.
- Cut DSP and Cardstock according to their respective cut plans above.
- Affix DSP pieces to their corresponding cardstock Matting pieces. Flip some of the DSP pieces over to use the pattern on both sides and to give visual interest to the card. This is the ‘Flip-It’ part of the Flip-It One Sheet Wonder design!
- Affix pieces to CardFront as per the above photo of the card layouts.
- Add additional optional items such as bows, adhesive embellishments, die cut and stamped sentiments, or sentiments stamped directly on the card front.
- Affix Inside Writing Panel to inside of card.
FInished! Happy Inking!
Supply List


Marcus, Polly and Hugo, the dogs of Drunk Dog Creative, want to remind you to subscribe to this blog, share with your friends, and follow Drunk Dog Creative on all the socials.
Woof woof. Sit. Stay. Follow us. Good human.
Need supplies?
You can shop for Stampin’ Up! products at https://bridgeta.stampinup.net. You can also click on any of the items in the supply lists in tutorial posts. A percentage of any profit from my SU sales is donated to Dachshund Rescue Australia, so you get great products at a good price and help gorgeous dogs like Hugo find their furever home!
Join my team!
If you spend over $169 why not consider joining my team as an Independent Demonstrator? You will get $265 worth of your choice of products for only $169 and be entitled to a minimum 20% discount on your future orders. Many people join just to be Hobby Demonstrators for the personal discount!


A note about Australian vs USA card sizes….
So, as you can probably tell from my accent in the video… I’m originally from the USA but I live in Australia and have done so for a long time. So, I’m very conscious of the differences between Aussie (and UK/Canada/etc) cards and USA cards and try to cater to both systems in my tutorials. It’s worth explaining why I don’t just ‘convert’ the metrics to imperial. Australia uses the metric system which includes an A4 paper size, while the USA uses the imperial measurement system and has a US Letter paper size. This means we have different standard sizes for cards. Both are based on cutting their standard paper size in half, then folding that in half. For us in Australia, this gives us an A6 card which, when folded, is 105mm wide by 148mm tall. For my friends in the USA, this gives them what they call an A2 card which is 4.25″ wide by 5.5″ tall. If I just converted the Aussie mm into inches, you would get a card that is 4.13″ wide by 5.83″ tall. So you can see it’s a completely different size to the USA card. If I just converted the metrics into imperial, my USA friends would end up with the wrong size card that wouldn’t fit in their envelopes. So, I usually make samples in both sizes and provide the cut plan in metric and imperial, so that whatever country you are in, you get the right size card that will fit your envelopes. When I’m giving instructions for making the card, particularly when demonstrating that in the video tutorials, I only use the Aussie card as an example. The instructions for putting it together are the same regardless of which size you are making. The only time I would NOT include the USA cut plan is if I am CASEing* a card made by another USA based demonstrator and have modified it for the Australian sizing. If I do this, I always include the website for the original card so you can pop over there and find out how to make it for the USA. I am a Professor for my ‘day job’ and in that world, plagiarism (publishing someone else’s work as your own) is highly frowned on so I just won’t do it. I will give credit where credit is due. 🙂
* CASE = Copy and Share Everything – a term we use in the Stampin’ Up! Demonstrator world to share ideas we’ve learned from others but putting our own spin on what we’ve done (and giving credit where it is due).


Leave a comment