
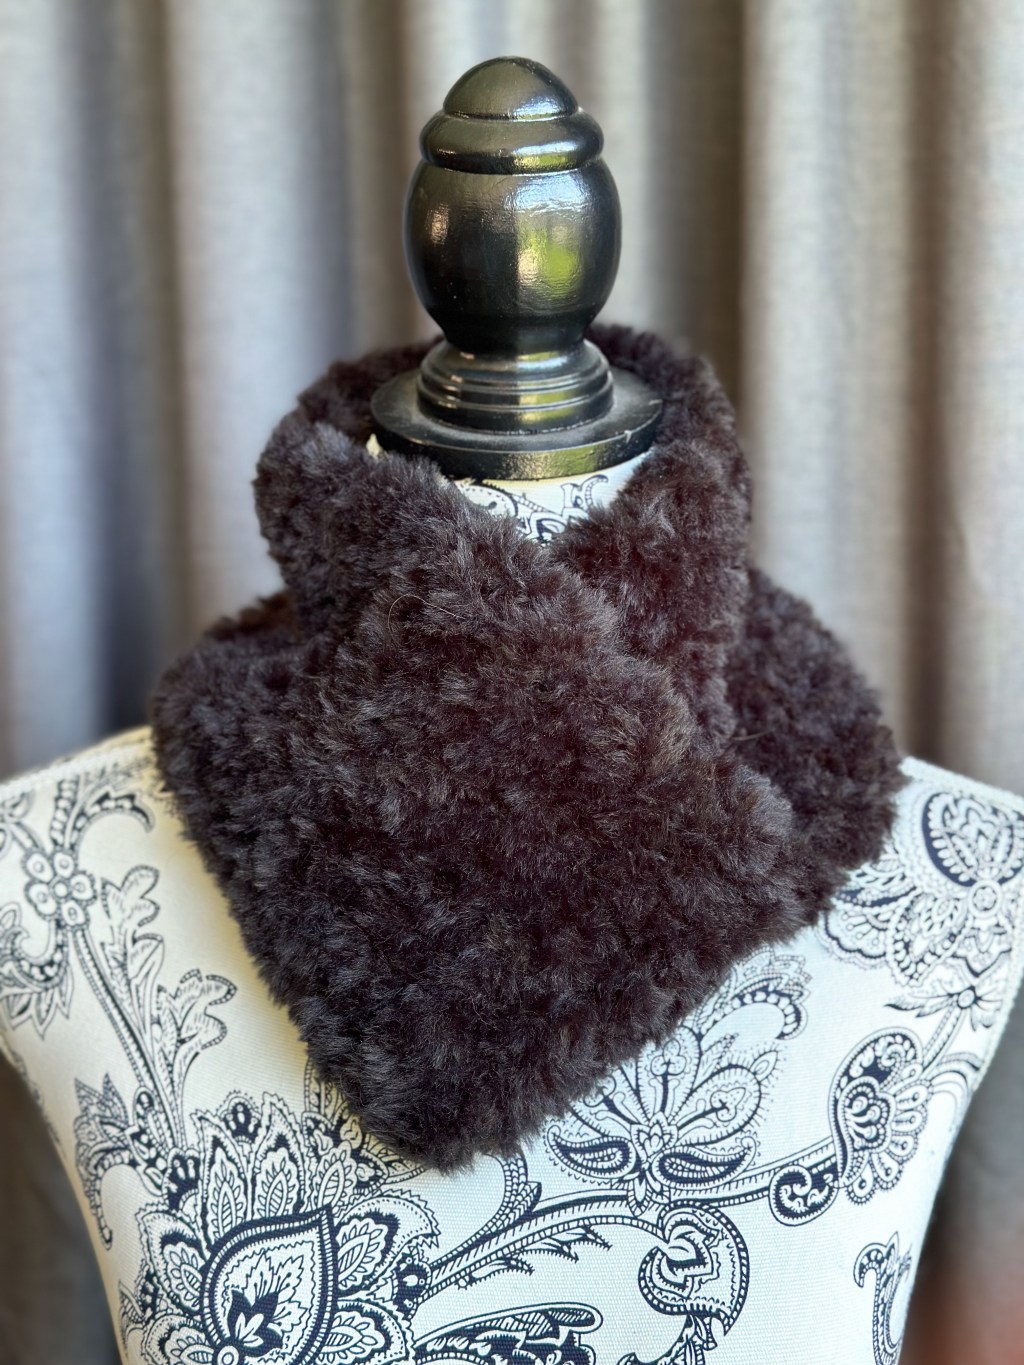
This furry cowl feels so luxurious! It’s like being hugged by a teddy bear. It is incredibly simple and quick to make with only two stitches – chain and single crochet (double crochet in UK terms). It’s super stretchy and slips right over the head with no loose or dangling ends to get caught on anything. I’ve made a bunch of these as gifts for my equestrian friends because of its safety factor. Even if you’re not a rider, this is an amazingly warm, comforting, and safe cowl.
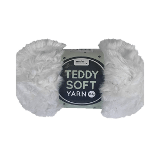
You just need furry yarn, a size 10mm crochet hook, and a yarn needle. In the cowl pictured here, I used Makr Teddy Soft from Lincraft but I’ve also used Moda Vera Otis Faux from Spotlight – both stores are Australian stores. In the USA, Hobby Lobby carries two similar yarns by Yarn Bee – Fur the Moment and Husky. Hobbi (online) have several furry yarns in their collection. The Makr Teddy Soft is 100grams and has about 60 metres of yarn.
Below is a youtube video tutorial and written instructions. Happy hooking!
Video Tutorial
Written Instructions
The instructions below are in US crochet terms. There is a free pdf available on Ravelry with your choice of US or UK terms.
download nowSupplies
- 1 ball of Makr Teddy Soft – 100g/60m (or equivalent)
- 10mm crochet hook
- Yarn needle
Gauge
In single crochet (USA) : 6 stitches x 5 rows will give you a 10x10cm (4×4″) square.
Sizing
The finished rectangle, before joining, measures approximately 16.5cm x 69cm (6.5″ x 27″).
Abbreviations
ch = chain
sc = single crochet
Instructions
Ch 11
Row 1: sc into second ch from hook, sc in each ch to end, turn. (10 sts)
Row 2: ch 1 (does not count as a stitch), sc in each st across, turn. (10 sts).
Rows 3-39: Repeat Row 2 for approximately 37 more rows (measuring around 69cm (27”). End on an ‘odd’ numbered row. Pull the remaining yarn through the loop on the hook to fasten off, leaving a long tail.
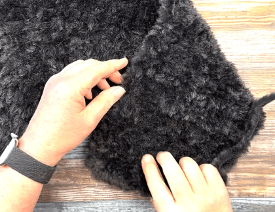
NOTE: The furry yarn is tricky to work with as you really can’t ‘see’ the stitches. You have to work by feel. So do count your stitches each row to make sure you haven’t doubled up or omitted one!
Shaping
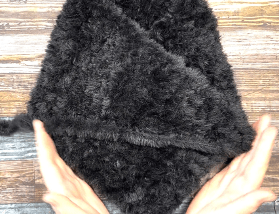
Lay your rectangle of furry fabric flat with the first row on your right and the row you just finished on your left. The tail of yarn should be on the top edge. Take the right edge and pull it toward the centre, overlapping the fabric to form an angle. Take the top left and cross it over the piece you just folded so that it’s edges all match, creating a v-shape at the bottom. Take the long tail and sew and overcast stitch (or any stitch you want) along the two edges of the v shape. Weave in ends. Finished!
The shaping can be tricky to describe in words. If that doesn’t make sense, have a look at the video tutorial above or the photos below!


Marcus, Polly and Hugo, the dogs of Drunk Dog Creative, want to remind you to subscribe to this blog, share with your friends, and follow Drunk Dog Creative on all the socials.
Woof woof. Sit. Stay. Follow us. Good human.
AND ON RAVELRY!


Leave a comment