

Glue Trick for Fiddly Bits & How to Get Rid of Annoying Bits in Die Cuts
There are two situations I encounter constantly in papercraft…. affixing fiddly bits to projects and getting small pieces out of die cuts. There are so many solutions out there, and believe me, over the years I’ve tried everything. But two solutions are the ones that work best for me so I thought I would share them with you all. I made some YouTube shorts about these solutions which are embedded below. 🙂
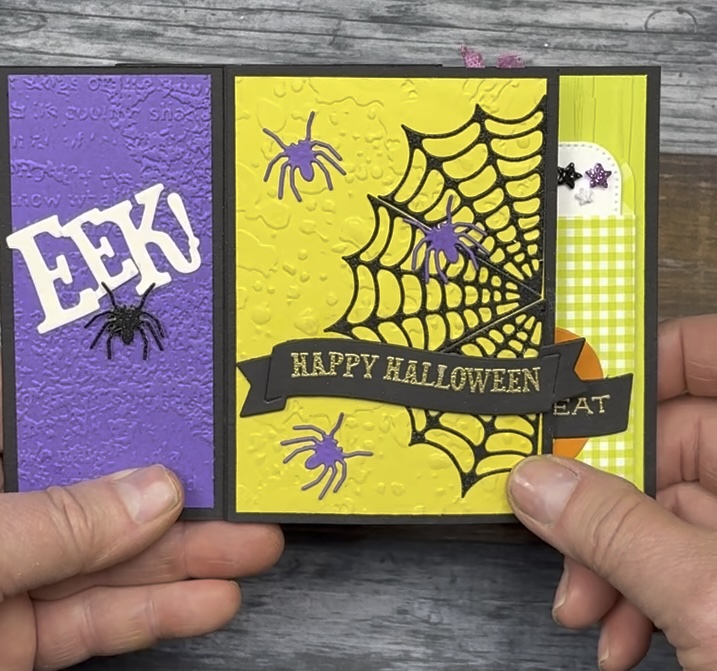
The little cobweb die cuts in the photos and videos below are from a Stampin’ Up! bundle called “Fright Night”. I used this set to make a Tower Fun Fold Card for Halloween. You might want to check out that tutorial HERE.
Glue Trick for Fiddly Bits

If you have tiny pieces, thin pieces, filigree pieces, or just plain fiddly pieces to affix to your papercraft projects, you know how annoying it is to glue them. There are several approaches I take for different situations:
- Use a fine tip glue applicator (my favourite is the Sweet Petunia Glue Press… see my post on different glue and tape rollers HERE). This is great for small pieces but what if you are mass producing cards? Not so great. When you want to go quickly, you do not want to apply a thin line of glue to every single surface of a fiddly bit when there are many many fiddly bits to do…. like the cobwebs in the video! I made 12 cards with 3 cobweb pieces on each. I did NOT want to take the time to use the Glue Press to cover every line on 36 cobwebs die cuts!
- Run the piece through a xyron sticker maker (or other sticker maker). This is a great solution for more solid pieces or one off cards. But it doesn’t work as well for fiddly and tiny pieces like these cobwebs. Plus, it’s really expensive if you’re doing a lot of cards.
- Put double sided adhesive backing on the cardstock before die cutting it. Yep, great idea in some cases. But these cobwebs were glitter board. That is hard enough to die cut and requires multiple passes. Add adhesive to it and the die cutting process becomes difficult (including removing all the cut out bits between the lines of the web!).
So, in this situation, I used a fourth method… my go-to for working with super fiddly bits, especially when there is a lot of them. I put some glue on my silicone craft sheet from Stampin’ Up! and spread it out thin. I lay the fiddly bit on the glue and press gently, then lift with tweezers and place on the project and press down firmly. Sometimes it helps to press down with a clean cloth (like a chux wipe) which has the added advantage of soaking up any excess glue that may have come to the top. Watch the short video below to see how to do this!
Video – Glue Trick for Fiddly Bits
How to Get Rid of Annoying Bits in Die Cuts

This is another constantly annoying situation – you make your die cut but no matter how many times you run it through your machine, there are bits that stick to the design and won’t come off. There’s lots of solutions for this too but they don’t always work in all situations.
- Use wax paper between the die and the paper. Yes, this often works but is best used for thin dies and thin paper. It’s not quite as helpful for thicker cardstock and glitter board (like my cobwebs!). Also, it’s expensive.
- Use a special roller brush with stiff bristles. You run this over the die cut, with the die still on it, to loosen those bits. Again, this does not always work for thicker cardstock or glitter board. If you try to do it without the die still over the diecut, it can crease and crumple the paper or cardstock. I’ve never had much success with this method despite buying two different roller brushes and attempting it all different ways – with and without die, top and bottom and both. Nope. This one has never really worked for me.
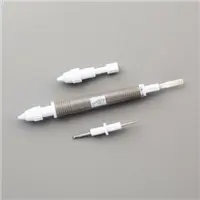
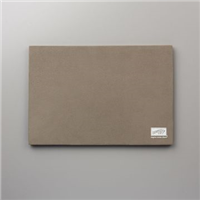
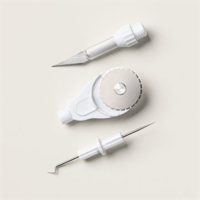
So, what finally worked for me? I use a piercing mat and pick. But instead of trying to flick or lift the bits, I pierce through the bits. Here’s how: put the diecut upside down on the piercing mad and pierce HARD (this is why you need a piercing mat) through the bit so it is impaled on the pick, pull up (or up and to the side if it’s stubborn). You can pierce several pieces in a row then flick or scrape them off the pick and keep going. Watch the quick video below to see this in action.
Personally, I love my Stampin’ Up! Take Your Pick. If you seen many if my videos, you will know just how much I love this tool which is so useful for so many things! See the Supply List below for links to the piercing mat and Take Your Pick that I used.
Video – How to Get Rid of Annoying Bits in Die Cuts

Shop With Me!
If you are in Australia, please feel free to also browse my Stampin’ Up! shop HERE or use the QR code at the left.
Supply List
Below are links to the products I recommend for these techniques. Prices and available are correct as of the publication of this post but are subject to change.


Marcus, Polly and Hugo, the dogs of Drunk Dog Creative, want to remind you to subscribe to this blog, share with your friends, and follow Drunk Dog Creative on all the socials.
Woof woof. Sit. Stay. Follow us. Good human.
Need supplies?
You can shop for Stampin’ Up! products at https://bridgeta.stampinup.net. You can also click on any of the items in the supply lists in tutorial posts. A percentage of any profit from my SU sales is donated to Dachshund Rescue Australia, so you get great products at a good price and help gorgeous dogs like Hugo find their furever home!
Join my team!
If you spend over $169 why not consider joining my team as an Independent Demonstrator? You will get $265 worth of your choice of products for only $169 and be entitled to a minimum 20% discount on your future orders. Many people join just to be Hobby Demonstrators for the personal discount!


Leave a comment