

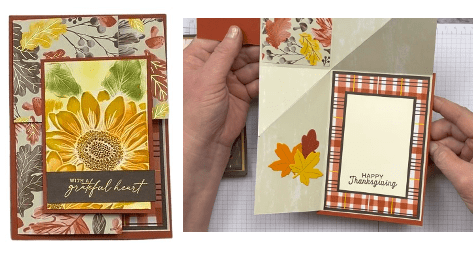
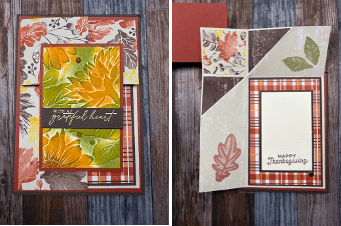
This fun fold card is easy to make and versatile. Display it with an attached fold-up easel or use a regular folded card for more design options. The original design that inspired me to try this was created for a 5”x7” (imperial) card, but I have re-engineered this card so that it is an A6 metric size card with instructions in imperial measures for the Americans who might want to make an A2 version of this card.
The instructions include 3 options for this card design – from ornate (ie fussy) to simple – allowing you to choose whether you want to make the corner pull base from plain cardstock and cut pieces of DSP to decorate all the sections, or whether you want to use DSP to create the corner pull and let the paper speak for itself. The third option uses a mat on the cardbase with a smaller corner pull base allowing you to minimize wastage of your DSP.
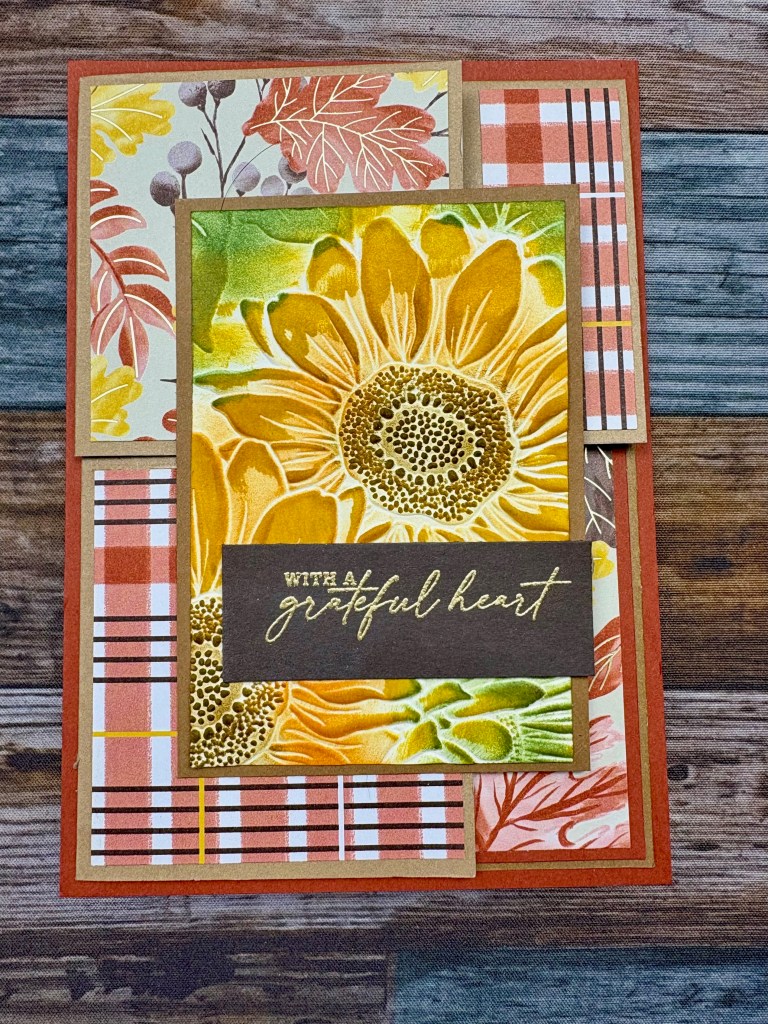


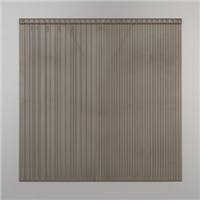
I made these cards using the Gathering Together DSP from Stampin’ Up! This is available to purchase on its own or as part of the beautiful Gathering Together Suite Collection that includes the 3D Sunflower Embossing Folder that I used for the card front. You can find these products by clicking the links above, or browse my Stampin’ Up! shop HERE or using the QR code to the left.


Video Tutorial
If you would like written directions for this tutorial that you can keep on file, there is a downloadable pdf available for a nominal fee from my Etsy shop HERE. Your purchase helps support the cost of doing these tutorials and maintaining this blog and a percentage of it goes to charity.
Instructions
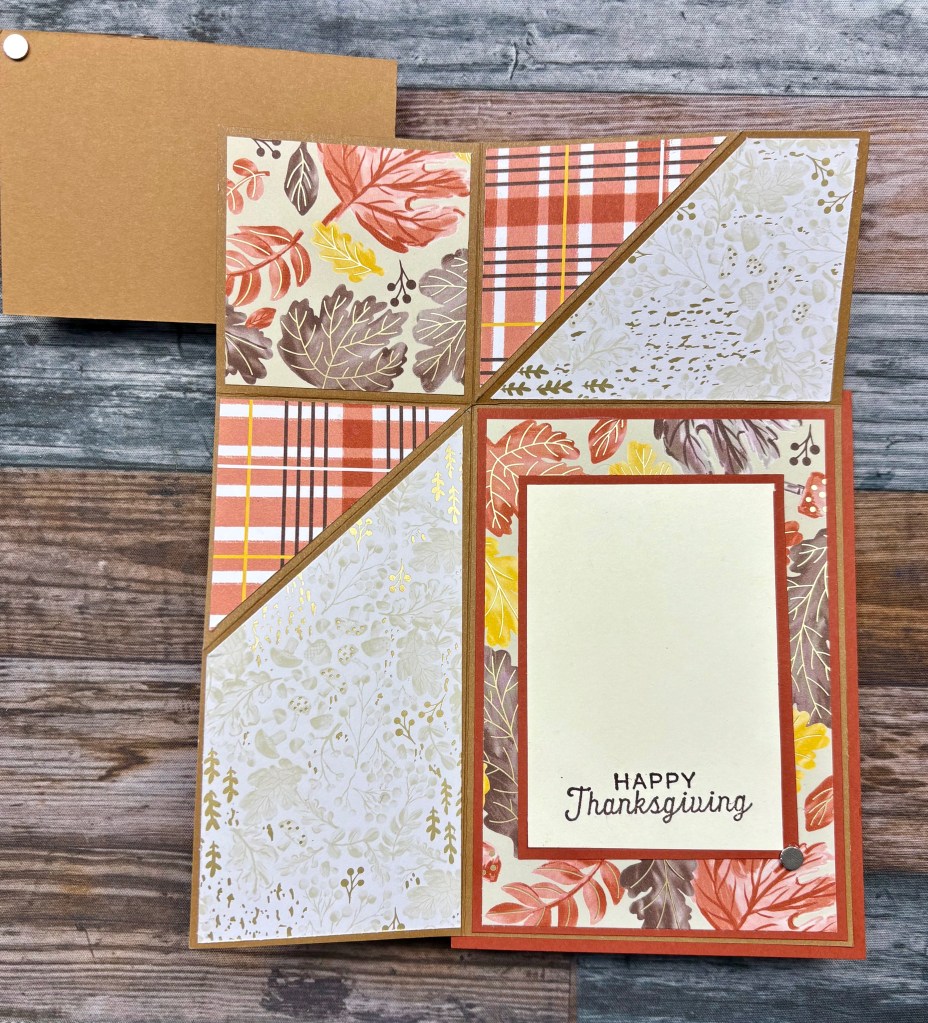
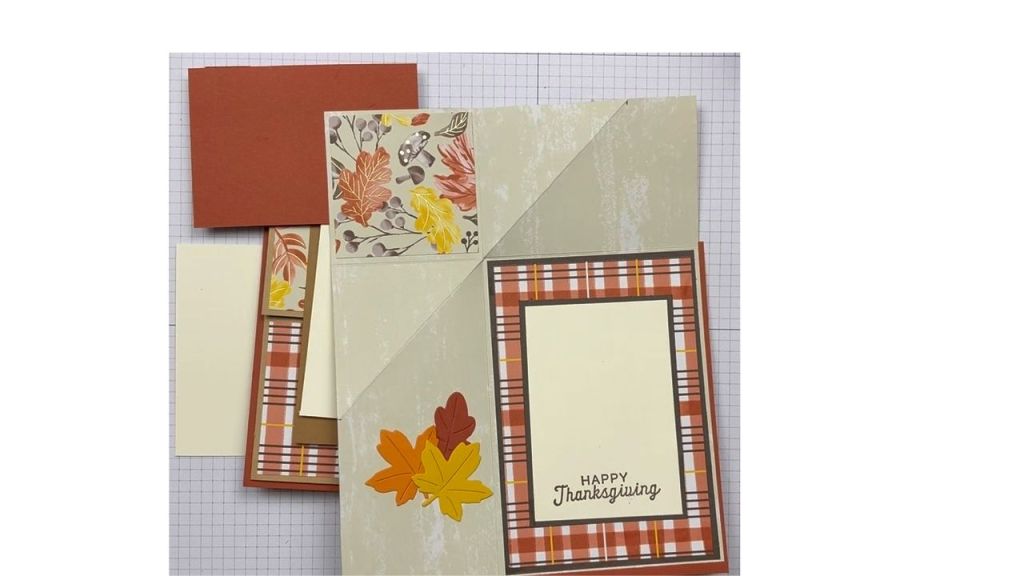
The card pictured below is Option A. The numbering system shown here is used throughout all three Options. DSP stands for Designer Series Paper which is what Stampin’ Up! calls it’s two-sided patterned papers.

Cut Plan – Option A
This option is for the most ornate (ie fiddly) version of this card. It uses cardstock as the Corner Pull Base and uses pieces of DSP to decorate each part of the Corner Pull Base.
| Piece # | Piece Name | Number To Cut | Metric (mm) For AUS, UK, EU, etc | Imperial (inches) USA |
| 1 | Card Base | 1 | 105 x 148 | 4 ¼ x 5 ½ |
| 1b | Optional Card Base. This is a traditional card base and replaces pieces 1 and 14. | 1 | 210 x 148 | 8.5 x 5.5 |
| 2 | Corner Pull Base | 1 | 168 x 210 | 6 ¾ x 8 ¼ |
| Outside of Card | ||||
| 3 | Card Front Mat | 1 | 70 x 100 | 2 ½ x 3 ¾ |
| 4 | Card Front | 1 | 65 x 95 | 2 ¼ x 3 ½ |
| 6 | Front Left Mat (DSP) | 1 | 63 x 67 | 2 ½ x 2 ½ |
| 7 | Front Top Right Mat (DSP) | 1 | 25 x 63 | 1 x 2 ½ |
| Inside of Card | ||||
| 8 | Inside Mat 1 | 1 | 95 x 133 | 3 ¾ x 5 |
| 9 | Inside Mat 2 (DSP) | 1 | 90 x 133 | 3 ½ x 4 ¾ |
| 10 | Mat for Writing Panel | 1 | 70 x 100 | 2 ½ x 3 ¾ |
| 11 | Inside Writing Panel | 1 | 65 x 95 | 2 ¼ x 3 ½ |
| 5 | Top Right Corner Mat (DSP) | 2 | 63 x 63 | 2 ½ x 2 ½ |
| 12 | Inside Top Right DSP (optional)** | 1 | 95 x 63 | 3 ¾ x 2 ½ |
| 13 | Inside Left DSP (optional)** | 1 | 63 x 135 | 2 ¾ x 5 ¼ |
| Outside of Card | ||||
| 14 | Easel | 1 | 100 x 290 | 10 x 4 |
| 15 | Optional Belly Band | 1 | 250 x 60 | 10 x 3 |
** An additional cutting step is needed for pieces 12 and 13. It is in the instructions below.
Cut Plan – Option B
This plan uses DSP (patterned paper) as the Corner Pull Base. Because DSP is usually patterned on both sides, you do not need pieces 5, 6, 7, 12 and 13, though one piece 5 on the inside top right corner adds a nice touch. If you don’t want the paper’s patterns to do all the work, you can always add stamps, ephemera or embellishments to different spaces.
| Piece # | Piece Name | Number To Cut | Metric (mm) For AUS, UK, EU, etc | Imperial (inches) USA |
| 1 | Card Base | 1 | 105 x 148 | 4 ¼ x 5 ½ |
| 1b | Optional Card Base. This is a traditional card base and replaces pieces 1 and 14. | 1 | 210 x 148 | 8.5 x 5.5 |
| 2 | Corner Pull Base | 1 | 168 x 210 | 6 ¾ x 8 ¼ |
| Outside of Card | ||||
| 3 | Card Front Mat | 1 | 70 x 100 | 2 ½ x 3 ¾ |
| 4 | Card Front | 1 | 65 x 95 | 2 ¼ x 3 ½ |
| 1 | 63 x 63 | 2 ½ x 2 ½ | ||
| Inside of Card | ||||
| 8 | Inside Mat 1 | 1 | 95 x 133 | 3 ¾ x 5 |
| 9 | Inside Mat 2 (DSP) | 1 | 90 x 133 | 3 ½ x 4 ¾ |
| 10 | Mat for Writing Panel | 1 | 70 x 100 | 2 ½ x 3 ¾ |
| 11 | Inside Writing Panel | 1 | 65 x 95 | 2 ¼ x 3 ½ |
| 5 | Corner Mat (DSP) (optional for top right corner) | 1 | 95 x 63 | 3 ¾ x 2 ½ |
| Outside of Card | ||||
| 14 | Easel | 1 | 100 x 290 | 10 x 4 |
| 15 | Optional Belly Band | 1 | 250 x 60 | 10 x 3 |
Cut Plan – Option C
In this option, the DSP forms the corner pull base but it is a smaller size and mounts on both a card base and a mat. This allows two cards to be made from one 12×12 sheet of DSP so that you waste less DSP. This also has less bits and pieces, so is a simpler layout. You can decorate the inside top and left panels with stamps, ephemera or embellishments if you wish.
| Piece # | Piece Name | Number To Cut | Metric (mm) For AUS, UK, EU, etc | Imperial (inches) USA | |
| 1 | Card Base | 1 | 105 x 148 | 4 ¼ x 5 ½ | |
| 1b | Optional Card Base. This is a traditional card base and replaces pieces 1 and 14. | 1 | 210 x 148 | 8.5 x 5.5 | |
| 1.5 | Card Mat | 1 | 100 x 143 | 4 x 5 ¼ | |
| 2 | Corner Pull Base | 1 | 150 x 193 | 6 x 7 ¼ | |
| Mats | |||||
| 3 & 10 | Card Front Mat and Small Inside Mat | 2 | 65 x 100 | 2 ¼ x 3 ½ | |
| 4 & 11 | Card Front and Inside Writing Panel | 2 | 60 x 95 | 2 x 3 ¼ | |
| 8 | Inside Large Mat | 1 | 90 x 133 | 3 ½ x 4 ¾ | |
| 9 | Inside Mat 2 (DSP) | 1 | 85 x 128 | 3 ¼ x 4 ½ | |
| 5 | Inside Top Left DSP (optional) | 1 | 50 x 50 | 2 x 2 | |
| 16 | Inside Top Left Triangles (optional) | 1 | 50 x 50 Then cut diagonally in half | 2 x 2 Then cut diagonally in half | |
| Outside of Card | |||||
| 14 | Easel | 1 | 100 x 290 | 10 x 4 | |
| 15 | Optional Belly Band | 1 | 250 x 60 | 10 x 3 | |
Scoring Plan
| Piece # | Piece Name | Metric (mm) For AUS, UK, EU, etc | Imperial (inches) USA |
| 2 (options A & B) | Corner Pull Base | Score horizontally 68mm from top Score vertically 68mm from left edge These two form a cross shape in the upper left of the Corner Pull Base. Measure 68mm from each score line (along top edge and down the left edge) and score diagonally from mark to mark. You will now have 3 score lines all intersecting with each other. Watch the video if you need more clarity on this. | Follow directions for metric but use 2.75” as your measurement. |
| 2 (Option C) | Corner Pull Base | Score horiztonally 55mm from the top edge. Score vertically 55mm from the left edge. Measure 55mm from each score line and score diagonally from mark to mark. | Follow directions for metric, but use 2.25″ as your measurement. |
| 14 | Easel | Score at 120, 240, 260 and 280 mm. | Score at 4”, 8”, 8.75” and 9.5” |
| 15 | Optional Belly Band | Score at 75mm and 185mm from the left. | Score at 2.75” and 7” from the left. |
Options:
Cut Plan if omitting the Easel and Using a Normal Card Base
Omit Easel. Replace Card Base (1) with 1 piece 210 x 148, scored at 105mm (8.5” x 5.5” scored at 4.25” for Imperial A2 card).

Tips
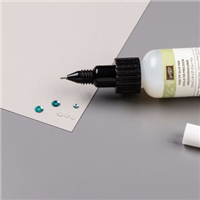
If using Designer Series Paper (DSP), it is a good idea to play around with your combinations to ensure you have them in the order you want them before you cut them. You can use the same DSP for every spot, or a different one for every spot, or anything in between! Use your own creativity to create the look that makes your heart sing!
For the Corner Pull Base, it is better to use lighter weight Cardstock. Normal cardstock can be too heavy here and make it more difficult to keep the card closed (though I’ve included solutions for that in the instructions). I used the two-tone 12”x12” cardstock from Stampin’ Up! For the Corner Pull Base and the matching normal cardstock for the Card Base and Easel. That worked perfectly!
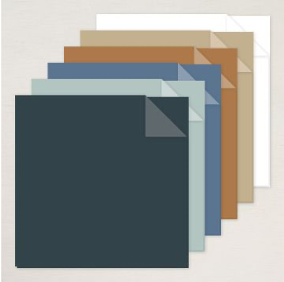
The two-toned cardstock from Stampin’ Up! comes in every colour in the SU range. It also comes in colour packs with multiple colours in each pack. Check out the range at bridgeta.stampinup.net!
Assembly
Using the Corner Pull Base (piece 2) – fold the top and left flaps forward toward the front (toward you) and burnish with a bone folder. Fold the diagonal score line toward the back (away from you). Burnish with the bone folder. Open all folds. Fold along all creases, pulling the diagonal line up and pushing the horizontal lines down. This should create the square at the top corner. It’s a little tricky the first time. Have a look at the video if you need a visual reference. Press all folds again with a bone folder.
For Option A: affix DSP pieces (5, 6, 7, 12, and 13) to their corresponding place on the Corner Pull Base. For the optional DSP for the inside Top and Left Columns (12 and 13), you need to make additional cuts as follows so that it takes into account the fold running through that space and keeps the integrity of the angle:
- Put each DSP (10 and 12) in place on the Corner Pull Card Base. Mark with a pencil on the DSP, the two spots where the score lines are on the underlying cardstock. One should be on a corner point of the DSP.
- Measure and mark 2mm (1/8” for USA cards) on each side of the marked spots.
- Cut a diagonal from right-most mark to right-most mark.
- Then cut a diagonal from left-most mark to left-most mark (two cuts are needed to separate the piece into the appropriate size and angle to fit the base.
- There will be a 4mm piece cut out of the middle of the DSP rectangle to separate it into two angled pieces.
If you are working with Option B, then adding more DSP to the corners and sides (front and back) is unnecessary as the DSP usually speaks for itself in this case! You can omit some or all of pieces 5, 6, 7, 12, and 13.
Affix Mat 1 and 2 (pieces 8 and 9) to the inside of the Corner Pull Base.
If you are going to stamp images on or decorate the Card Front (piece 4) and/or Inside Writing Panel (piece 11), do that now.
Affix the Inside Writing Panel and the Card Front (pieces 4 and 11) to their respective mats (pieces 3 and 10).
Affix the Inside Writing Panel/Mat to the centre of the large square inside the Corner Pull Base (on top of Mats 1 and 2).
Close the Corner Pull Base and affix the Card Front and its mat to the top left square ONLY (do not glue anywhere else!), positioning it so that it covers the inside writing panel.
With the Corner Pull Base closed, affix to the Card Base (piece 1) for Options A and B, or Mat (Piece 1.5) for Option C.
Note: If you are omitting the Easel and using a normal folding card base, then affix the Corner Pull Base to Card Base (piece 1b) for Options A & B, or Mat (piece 1.5) for Option C, and skip Steps 9 and 10.
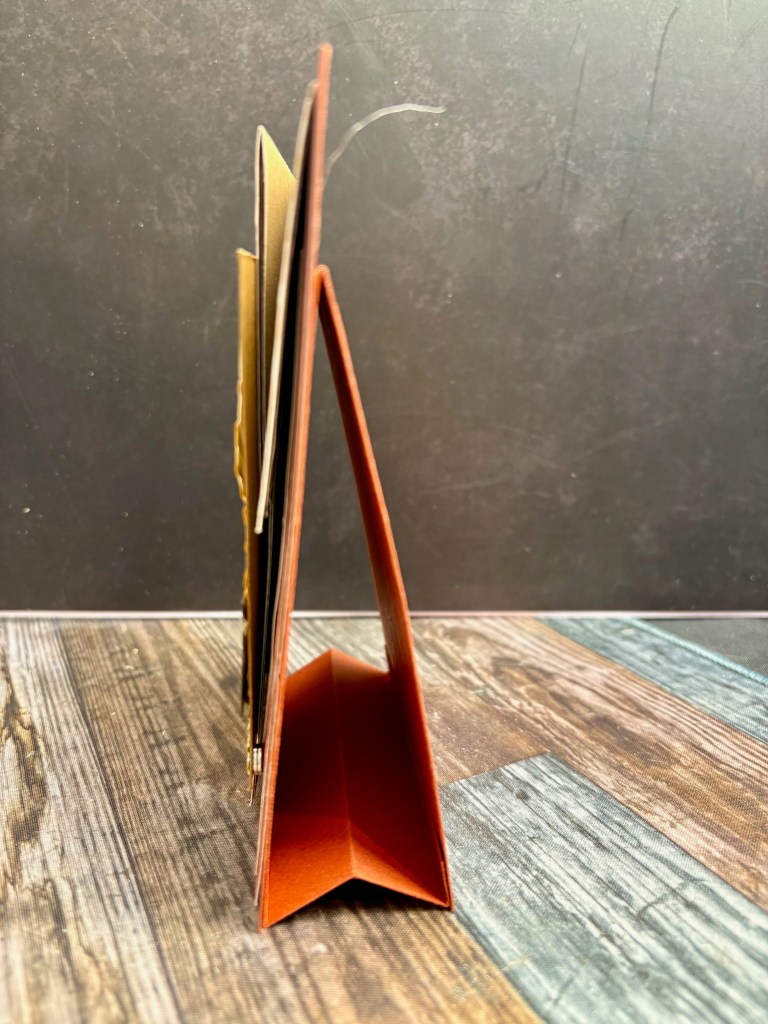
The Easel:
- Crease all score lines on the Easel with a bone folder. Fold a mountain fold along the first score line (at 120mm).Fold another mountain fold at the next score line (at 240mm).Do a valley fold at the next score line (at 260mm)Do a mountain fold at the next score line (at 280mm)
- Place adhesive on the remaining 10mm edge. With the smaller sections folded and adhesive facing up, fold at first fold and press that edge to the adhesive to create the easel. The video may be helpful here.
- Affix the Easel to the back of the Card Base, centering it horizontally and aligning the bottom edge with the bottom of the Card Base.
Add any further embellishments that you wish!
Optional: Belly Band or Magnet Closure
If the card does not stay closed enough for your liking, you can add a belly band or a tiny magnet to keep it closed. I’ve done a YouTube Short to quickly demonstrate how to use magnets to keep the card closed. I used two 5mm x 1mm magnets for this. You can usually find them on Amazon and/or Ebay. The video for how to do this is at https://youtube.com/shorts/mKn65OQT0Bw?si=JMWmhWP0-4UkKw86
For the Belly Band, fold on score lines and crease with a bone folder. Affix one edge to the other, overlapping them. Decorate however you wish. Slip over the card.

Supply List
I am not going to include a supply list for the specific products used to make this fun fold card because this type of card can be made with so many different papers, stamps, embellishments, etc. Use what you already have in your stash and let your imagination run free!
However, I always recommend that everyone should have in their stash some basic papercraft tools, so I’ve compiled a list below. You can check them out at bridgeta.stampinup.net.


Marcus, Polly and Hugo, the dogs of Drunk Dog Creative, want to remind you to subscribe to this blog, share with your friends, and follow Drunk Dog Creative on all the socials.
Woof woof. Sit. Stay. Follow us. Good human.
Need supplies?
You can shop for Stampin’ Up! products at https://bridgeta.stampinup.net. You can also click on any of the items in the supply lists in tutorial posts. A percentage of any profit from my SU sales is donated to Dachshund Rescue Australia, so you get great products at a good price and help gorgeous dogs like Hugo find their furever home!
Join my team!
If you spend over $169 why not consider joining my team as an Independent Demonstrator? You will get $265 worth of your choice of products for only $169 and be entitled to a minimum 20% discount on your future orders. Many people join just to be Hobby Demonstrators for the personal discount!


Leave a comment