

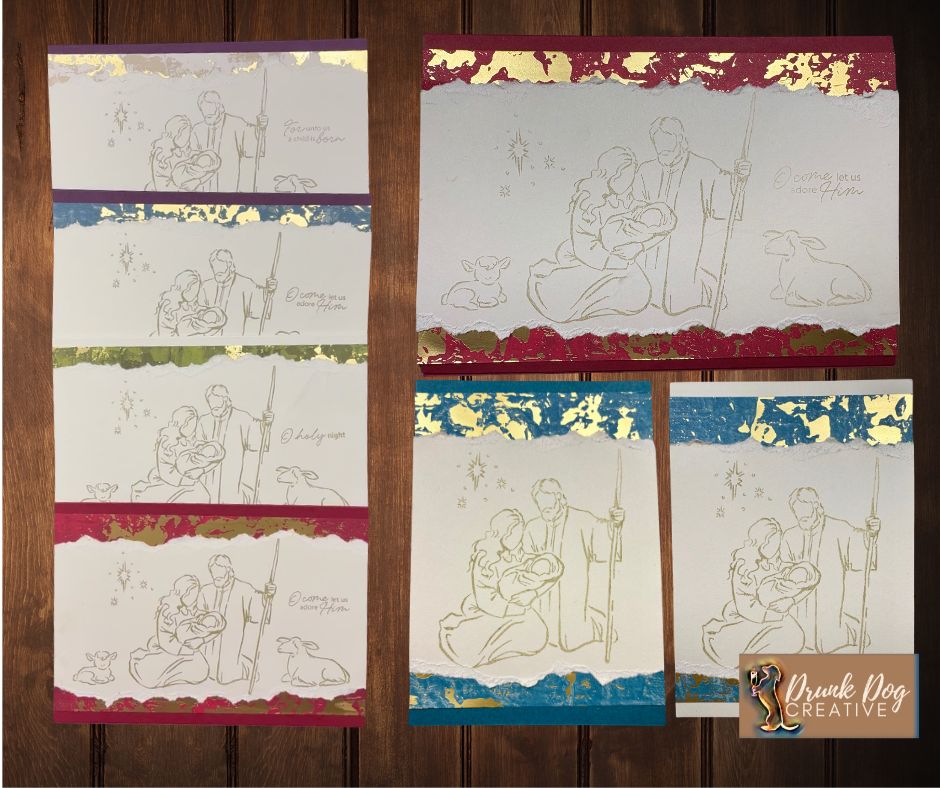
Add Texture and Elegance to Your Cards
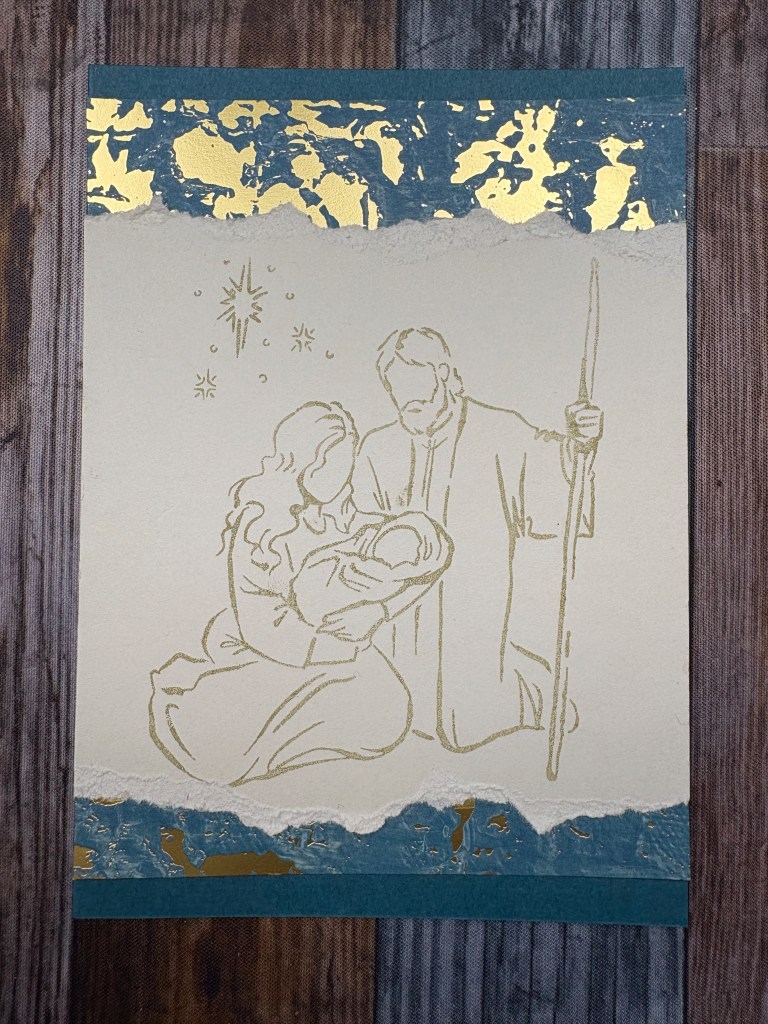
The Torn Paper Technique is a simple yet striking way to add texture, depth, and a handmade feel to your greeting cards. This technique involves tearing the edges of cardstock to create a soft, organic border that contrasts beautifully with clean lines and stamped images.
Reasons to love this technique:
- Visual Interest: Breaks up rigid lines and creates a more natural flow.
- Dimension: Adds layers without needing bulky materials.
- Versatility: Perfect for vintage, rustic, or elegant themes — especially holiday and religious cards.
- Simplicity: No special tools needed — just your hands and paper!
This technique is especially effective when paired with metallic accents and soft stamped imagery, making it perfect for Christmas and nativity-themed cardmaking.

Below you will find a YouTube Mini Tutorial and all the instructions needed to make these cards in both the large format (7 x 5″) and in standard card format (A6 for metric countries and A2 for the USA). If you would like an add-free pdf of these instructions, you can purchase one for a nominal fee at my Etsy shop. The PDF can be found HERE. Your purchase helps support the cost of running this website.

YouTube Mini Tutorial
Cut Plan for 7″ x 5″ Card Size
The cut plan and instructions for this card are only in Imperial. This is a standard card size that exists around the world. The metric equivalent (straight conversion) is too fussy with odd numbers (like 101.6mm for 4”), and most people outside the USA have equipment that measures in inches as well as millimeters. This is a card size most of us can deal with.


| Number To Cut | Imperial (inches) USA | |
| Card Base | 1 | 10 x 7 score at 5 |
| Front and Inside Panels | 2 | 7 x 4 |
| DSP | 4 | 7 x 1 |
CUT PLAN – A6 (metric) or A2 (imperial) Size


| Number To Cut | Metric (mm) For AUS, UK, EU, etc | Imperial (inches) USA | |
| Card Base | 1 | 210 x 148 mm score at 105 | 8.5 x 5.5 score at 4.25 |
| Front and Inside Panels | 2 | 105 x 130 | 4.25 x 5 |
| DSP | 4 | 105 x 25 | 4.25 x 1 |
A Note About Paper Choices
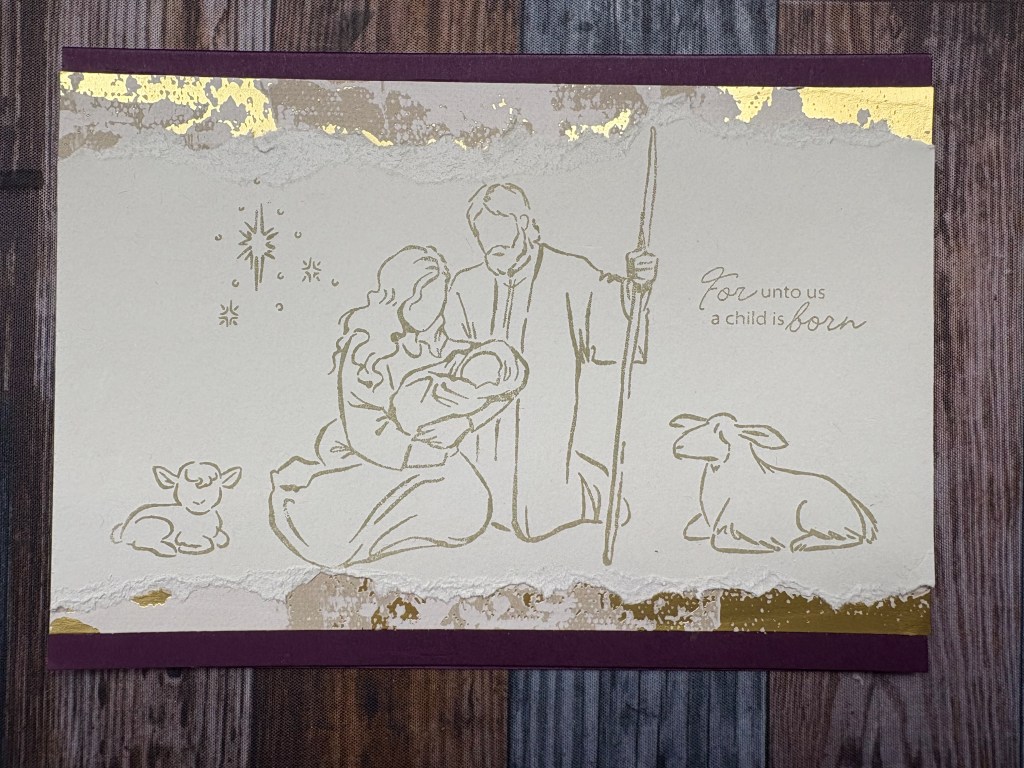
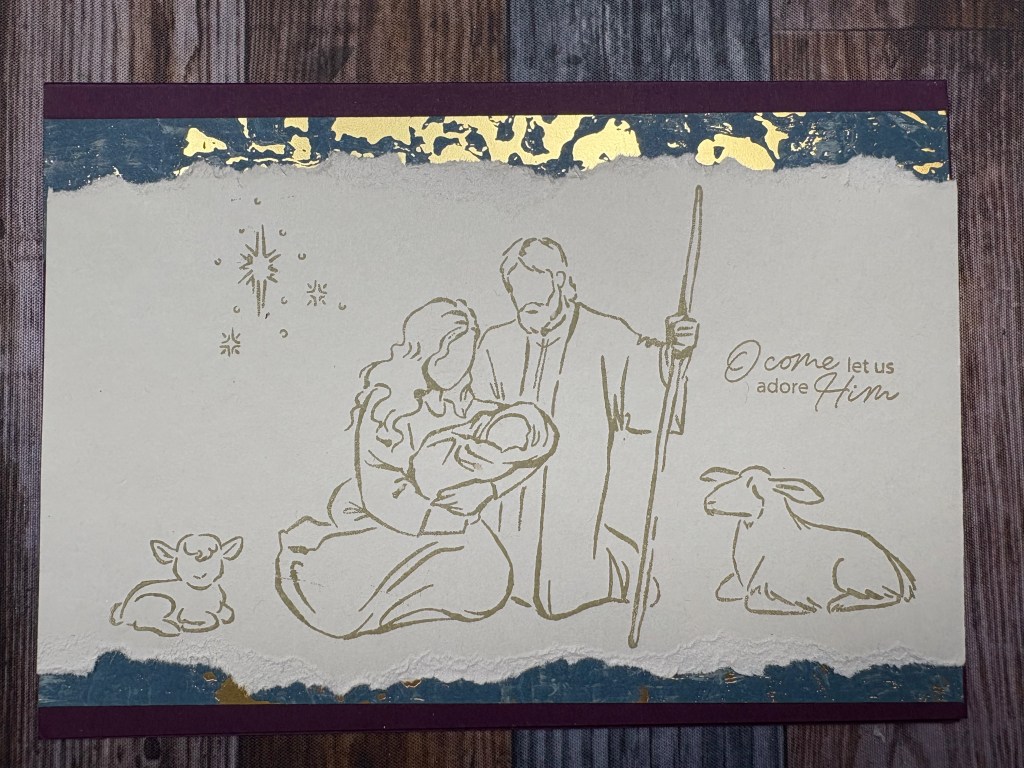
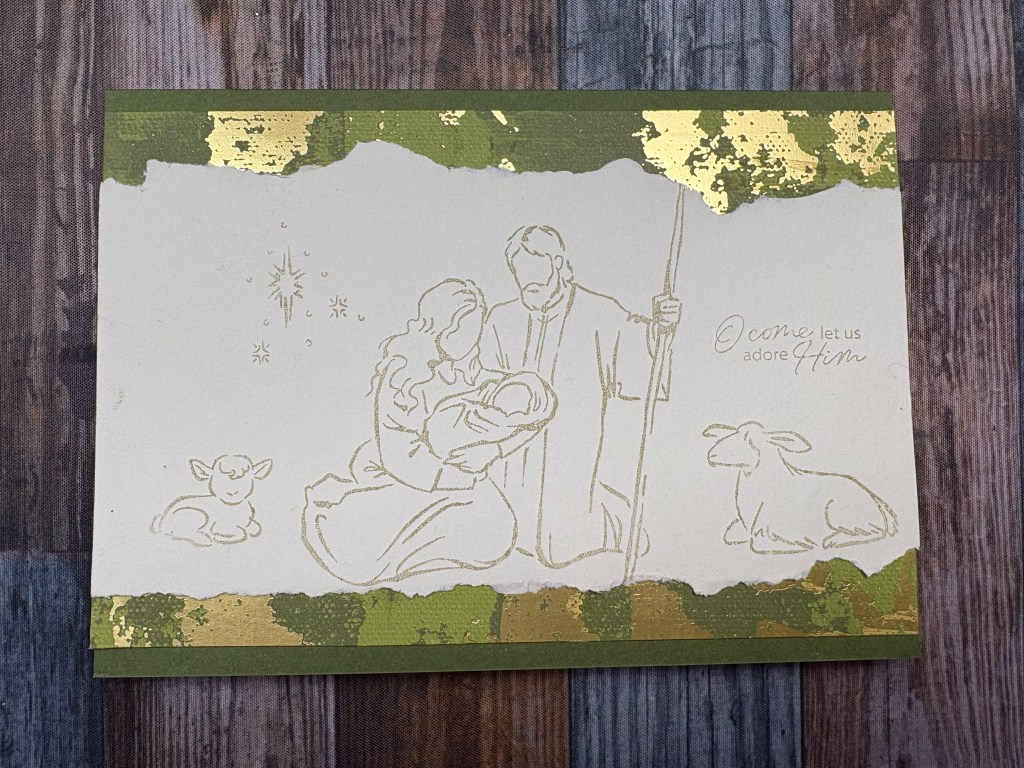
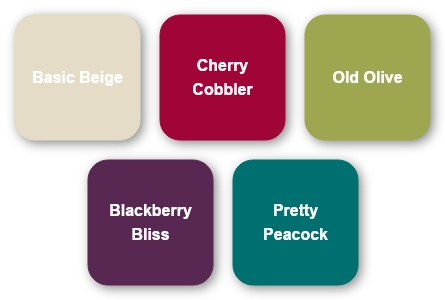
The cards featured in this tutorial were made for Christmas but this technique can be used with any colours and stamps for any occasion. This car works best using a neutral light coloured cardstock for the panels such as Basic Beige (featured), Very Vanilla, and Basic White. The DSP can be anything you want. For the festive spirit of Christmas I chose an elegant foiled pattern… Season of Elegance. The CardBase should contrast with the netural light panels but either blend with or contrast with the DSP chosen. In this case I’ve paired the Season of Elegance DSP with the coordinating colours (Old Olive, Cherry Cobbler, Basic Beige, Pretty Peacock) or contrasted them (Blackberry Bliss). You are really only limited by your own imagination.

Assembly
A note about hand tearing the panels…
It is ok for the tear to be irregular – this is what gives it the textured variety we are looking for. Tearing it against a straight line (like a ruler) makes the tear too neat for this look. An alternative is to use a deckle trimmer but again, this leaves a neater edge than hand tearing.
Usually it is helpful to tear the cardstock before stamping the image, but with this particular stamp set (A Child is Born by Stampin’ Up!) it was better to stamp the image and then work the tear so it was shallower around the staff rather than risk tearing too much and the image not fitting. The other option is to make your panels a bit taller and tear off more.
Instructions
- Stamp image on Front Panel.
- Tear by hand along the top and bottom of the panel.
- For the 7 x 5” card, aim to tear about ¼” at each end. For the A6 (metric) card, aim to tear about 15mm at each end.
- For the A2 (imperial) card, aim to tear about ½” at each end.
- Tear by hand along the top and bottom of the inside panel, using the same margins as in step 2 above.
- Stamp sentiments or images on the inside panel.
- Affix 2 of the DSP strips to the front of the Card Base approximately 10mm (1/4”) from the top and bottom.
- Affix the Front Panel to the Card Base, centering it so it slightly overlaps the DSP strips.
- Repeat steps 5 and 6 to the inside of the card with 2 DSP strips and the Inside Panel.
- Optional: Decorate with embellishments.

Supply List
Below is the supply list for the products used to make the cards pictured (including the range of cardstock colours). The prices and availability are accurate at the time of publication but are, of course, subject to change. You can browse my Stampin’ Up! shop at bridgeta.stampinup.net or click on the QR Code at the right.


Price: $29.00


Marcus, Polly and Hugo, the dogs of Drunk Dog Creative, want to remind you to subscribe to this blog, share with your friends, and follow Drunk Dog Creative on all the socials.
Woof woof. Sit. Stay. Follow us. Good human.
Need supplies?
You can shop for Stampin’ Up! products at https://bridgeta.stampinup.net. You can also click on any of the items in the supply lists in tutorial posts. A percentage of any profit from my SU sales is donated to Dachshund Rescue Australia, so you get great products at a good price and help gorgeous dogs like Hugo find their furever home!
Join my team!
If you spend over $169 why not consider joining my team as an Independent Demonstrator? You will get $265 worth of your choice of products for only $169 and be entitled to a minimum 20% discount on your future orders. Many people join just to be Hobby Demonstrators for the personal discount!


Leave a comment