

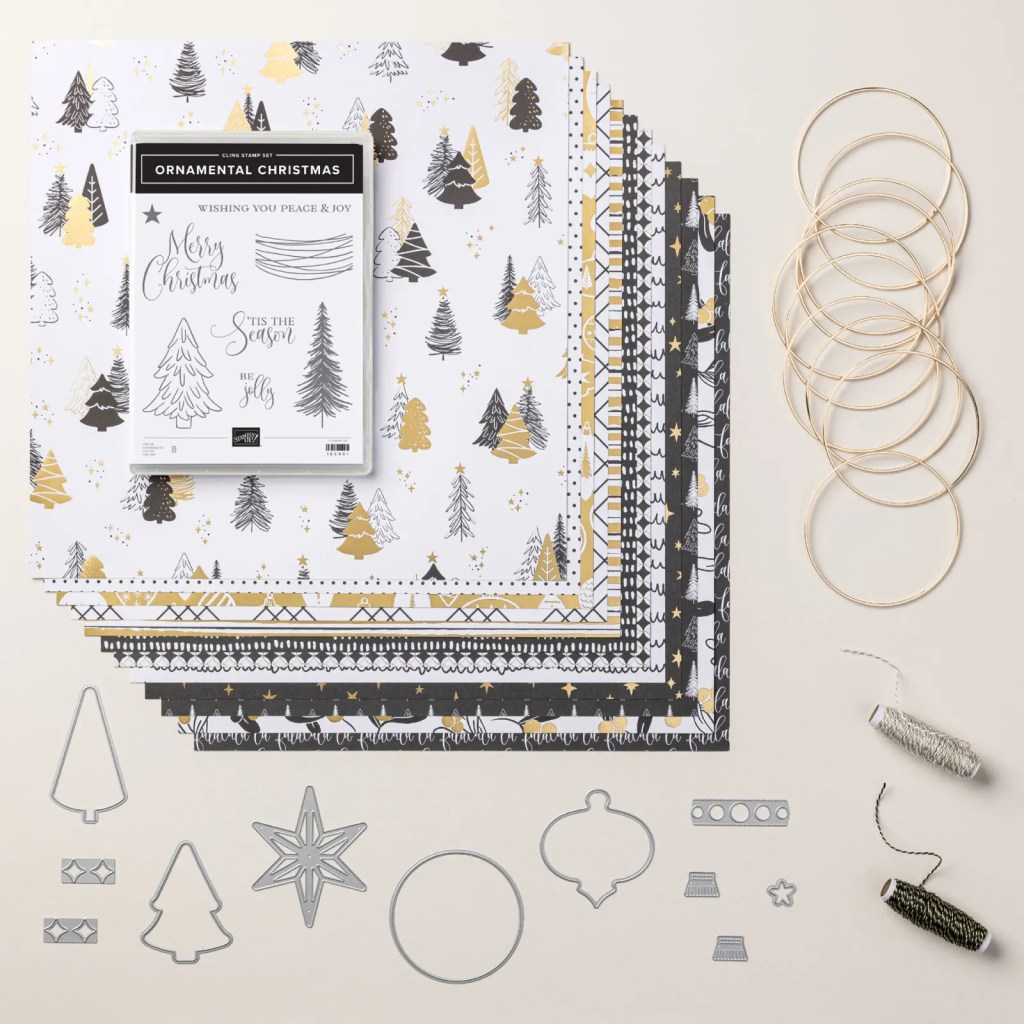
This is a beautiful Christmas Card I designed for the Peaceful Garden and the Modern Christmas Suites from Stampin’ Up! It is based on a tutorial I did in 2023 which you can find HERE. I just tweaked a couple of things. 😁

Because I’ve lost my voice due to recent thyroid cancer surgery (they got it all!), the video included here is just a short to show you how it is all put together. The measurements and instructions are below. The instructions are all for a metric A6 card. If you want to make this design in Imperial measures for a USA A2 card, please see the original post (HERE) where I share a link to the original American demonstator’s tutorial where I got the idea from. I’m a Professor for a day job where plagiarism is a profound sin…so I always give credit where it is due!

Video
This video shows you the assembly of the card. Full written instructions are below.
Cut Plan
| Metric Measure in mm | |
| Card Base | 210 x 148 scored at 105 |
| Card Front | 100 x 143 |
| Inside Mat | 100 x 143 |
| Inside Writing Panel | 85 x 128 |
| Tab | 25 x 125 scored at 25 from right edge |
| Scraps | scraps for die cuts and front sentiment |
Assembly
Instructions here are for the Peaceful Garden Suite including the die cuts and the Designer Series Paper (DSP). Following the instructions are alternate ideas using the Modern Christmas Suite. For other ideas check out the original Circle Fun Fold Post. That original design uses a larger, centred circle and wider tab. Both versions can be adapted for any occassion by changing the DSP and changing how you decorate the circle. 😁

- Position Card Front on Card Base (with card open) with REPOSITIONABLE/REMOVABLE glue tape or if you’re very confident, hold it in place.
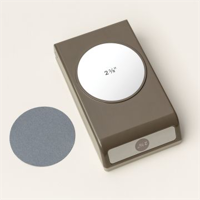
- Use a 2-3/8″ circle punch to cut through both layers. Keep both circles punched out to use later. You can also use a die to cut the circles out.
- Now permanetly affix the Card Front to the Card Base, ensuring circle cutouts match up exactly. Precision is very important here.
- Fold Tab at score line and either use a punch or scissors to create a fancy edge on the left edge.
- Affix the Inside Mat to the Card Base but do so using only an X shape of glue or glue tape. You need to be able to slip the tab under it.
- Place adhesive on the folded end of the tab and slip it between the Card Base and the Inside Mat, centering it in the circle opening. It is important that it is centred.
- Bring tab through circle and close card front.
- Affix the cardstock circle to the tab, making sure the glue or glue tape does not accidentally go anywhere other than on the tab.
- Affix the patterned circle to the BACK of the cardstock circle – again making sure they absolutely align. Precision is important.
- Decorate the Inside Writing Panel (ie stamp a sentiment) and affix it in place on the Inside Mat. I used the Merry Christmas and star stamps from the Ornamental Christmas stamp set included with the Modern Christmas Suite but the Peace on Earth stamp set included with the Peaceful Garden Suite has appropriate sentiments too!
- Taking the scrap paper, die cut the two doves and the small olive branch.
- Affix one dove with the small olive branch to the cardstock circle on the front of the card. Affix the other dove to the inside of the card.
- Stamp a sentiment on another small piece of cardstock and affix to the Card Front. Add ribbon or other embellishments.
For the Modern Christmas Suite:
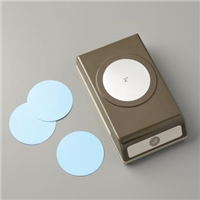
Make as above but instead of using die cuts, use a 2″ circle punch or die to cut images from the Designer Series Paper and centre those over the Cardstock circle.


Supply List
Product availability and pricing is accurate at the time of publication but is subject to change. If you are in Australia, you can also browse products or shop at bridgeta.stampinup.net.


Marcus, Polly and Hugo, the dogs of Drunk Dog Creative, want to remind you to subscribe to this blog, share with your friends, and follow Drunk Dog Creative on all the socials.
Woof woof. Sit. Stay. Follow us. Good human.
Need supplies?
You can shop for Stampin’ Up! products at https://bridgeta.stampinup.net. You can also click on any of the items in the supply lists in tutorial posts. A percentage of any profit from my SU sales is donated to Dachshund Rescue Australia, so you get great products at a good price and help gorgeous dogs like Hugo find their furever home!
Join my team!
If you spend over $169 why not consider joining my team as an Independent Demonstrator? You will get $265 worth of your choice of products for only $169 and be entitled to a minimum 20% discount on your future orders. Many people join just to be Hobby Demonstrators for the personal discount!


Leave a comment