


This is a great fun fold that can be used for any occasion – not just Christmas or Thanksgiving! The card starts vertical, but as you open it, it swivels to the horizontal while the front piece stays upright in either position!
It does require precision with the cuts and the folds to work properly but the video (see below for the link) gives you great tips for how to do that more easily. The ribbon is optional but does help the card stay closed and adds a fun element to the experience of opening the card.
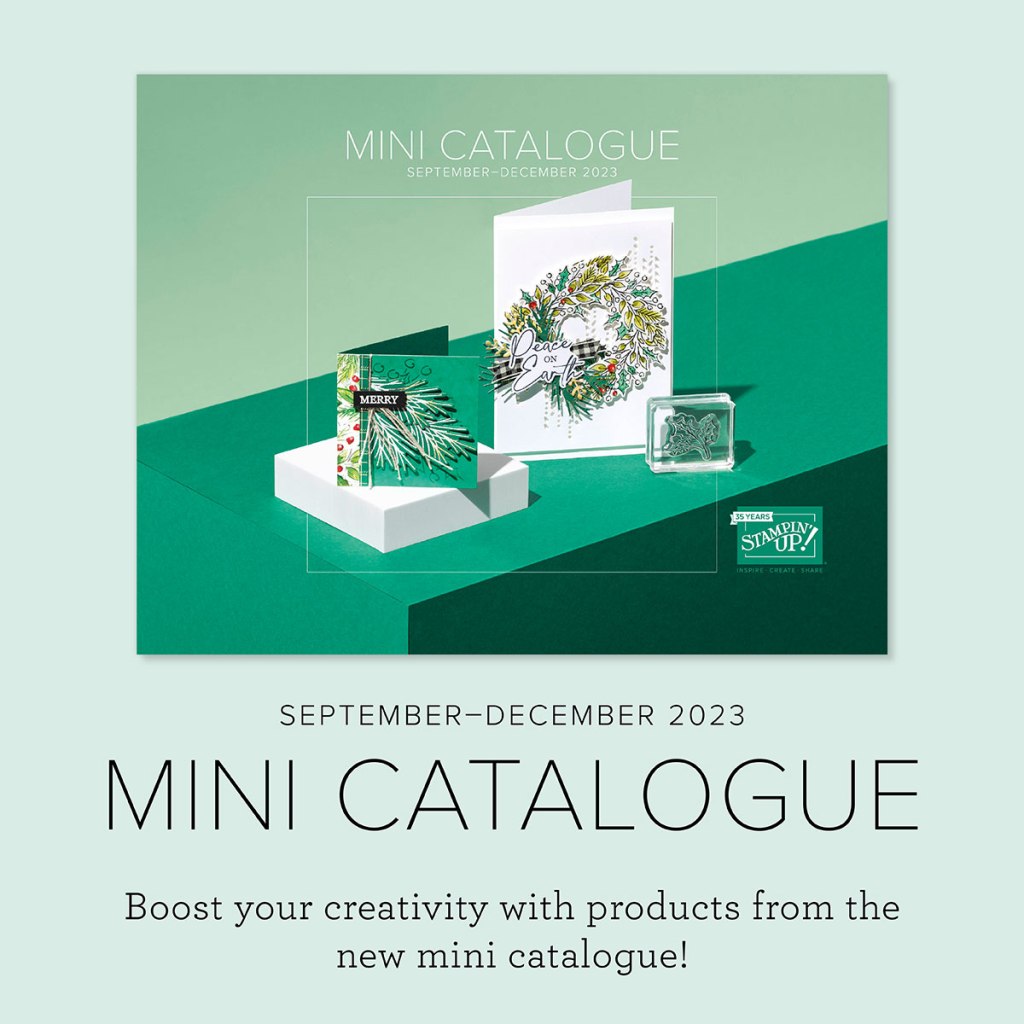
This tutorial also gives you a sneak peek at some items that are coming soon from the September-December 2003 Mini Catalogue! They will be available to the public from 6 September 2023. The Specialty Designer Series Paper (DSP) used in the card above is Shining Brightly and the stamps for the front sentiment are from the new Holy Night stamp set. The Ribbon is Night of Navy & Gold sparkle ribbon. There are so many amazing things in the new mini catalogue!
Can’t wait till September? Why not join my team as a Stampin’ Up! Independent Demonstrator! Did you know many people join as ‘hobby demonstrators’ just for the benefits? That’s what I did! You get a minimum of 20% off your purchases and early access to new products! Click HERE to find out about the benefits and how you can join!

Happy inking!
Tutorial Video
The video below takes you through how to assemble this card. It includes some tips for making the scoring and alignment easier.
Cut Plan
Names of the DSP used are in the tutorial video. They will be available to purchase from 6 September 2023 until 3 January 2024, or while stocks last.
Metric (Aussie/UK A6 Card) – all measurements are in mm.
Card Base (cut 2) – 105 x 277 scored at 148
DSP 1 – 100 x 100 cut in half diagonally from top left to bottom right
DSP 2 (cut 2) – 100 x 18
Writing Panel – 95 x 138
Optional Double layered writing panel – 100 x 143 DSP for mat, and 90 x 133 for writing panel
Optional:
- Ribbon – 450 mm
- Scrap for front sentiment.
- Ephemera for front (optional)
Imperial (USA A2 Card) – all measurements are in inches
Card Base (cut 2) – 10-3/8 x 4.25 scored at 5.5
DSP 1 – 4.25 x 4.25 then cut diagonally in half from top left to bottom right
DSP 2 (cut 2) – 0.5 x 4
Writing Panel – 3.75 x 5
Optional: Double layered writing panel – 4 x 5.25 DSP for mat, and 3.5 x 4.75 for writing panel
Optional:
- Ribbon – 16″
- Scrap for front sentiment.
- Ephemera for front (optional)
Instructions
Imperial measures are in parenthesis. Please remember there is no correlation between the metric and imperial. They are not a conversion. The finished Imperial card is a different size to the finished Metric card.
- Cut and score all cardstock as per cut plan.
- With a bone folder, crease the score lines on the two card bases.
- With the right card base open and facing up, with the 148 mm (5.5″) section on the left side, mark at 22mm (5/8″) to the right of the fold on the top front. Score on the diagonal from the mark to lower right front corner. Before creasing with bone folder, ensure the fold lines up along the bottom edge exactly when the vertical fold . Adjust fold if needed. Press with bone folder. Hint: Use a straight ruler to make the 22mm mark. Using the ruler on your paper trimmer or scoring board can lead to inaccuracies.
- With the left card base open and facing up, with the 148 mm (5.5″) section on the right side, mark at 22mm (5/8″) to the left of the fold on the bottom front. Score on the diagonal from the mark to upper left corner. Before creasing with bone folder, ensure the fold lines up along the bottom edge exactly when the vertical fold . Adjust fold if needed. Press with bone folder.
- Align the two card base pieces so that the 148 x 105 (4.25 x 5.5″) section of each match up.
- With the left piece horizontal, place glue all over the 148 x 105 (4.25 x 5.5″) section
- Lay ribbon across the middle of the glue section from top to bottom.
- Align the right card base over the left card base that so that both 148 x 105 (4.25 x 5.5″) sections match and affix right to left being very careful that they align exactly. The ribbon will now be sandwiched between the two card base pieces. Once the glue dries, you will have one combined card base.
- Affix the two DSP 1 pieces to the outer triangles of the card base.
- Fold the flaps (which will rotate the card to the vertical).
- Affix the two DSP 2 pieces to the top and bottom of the card front.
- Create a sentiment tag or ephemera for the front of the card. Affix to the middle but ONLY use adhesive on the top right half so it is only stuck to the top right panel (otherwise your card will not open!).
Hint: alignment is very important. I highly recommend using glue instead of score tape or glue tape. Wet glue allows you to move the pieces somewhat until you have the correct alignment. Glue tape and score tape do not allow for that.
Step It Up Options:
- Use a contrasting DSP for the inside triangle areas of the Card Base that are currently blank.
- Stamp images on the two triangle areas of the card base that do not have DSP covering them.
- Add ephemera or embellishments if desired.
- Add a sentiment to the inside writing panel.
Hint: Stamping an image in the same ink colour as the paper is often an effective way of adding interest without competing with or clashing with the DSP patterns.
Download pdf of instructions
Supply List
Note: Not all products used in this tutorial could be listed at this time. Some are from the new September-December 2023 Mini Catalogue and are not available to the public until 6 September 2023. I’ve also included the DSP and ribbon used on other cards shown in the tutorial video.
Shop at bridgeta.stampinup.net – the Mini Catalog items used in the video tutorial will be available from 6 September 2023.


Price: $21.75


Marcus, Polly and Hugo, the dogs of Drunk Dog Creative, want to remind you to subscribe to this blog, share with your friends, and follow Drunk Dog Creative on all the socials.
Woof woof. Sit. Stay. Follow us. Good human.
Need supplies?
You can shop for Stampin’ Up! products at https://bridgeta.stampinup.net. You can also click on any of the items in the supply lists in tutorial posts. A percentage of any profit from my SU sales is donated to Dachshund Rescue Australia, so you get great products at a good price and help gorgeous dogs like Hugo find their furever home!
Join my team!
If you spend over $169 why not consider joining my team as an Independent Demonstrator? You will get $265 worth of your choice of products for only $169 and be entitled to a minimum 20% discount on your future orders. Many people join just to be Hobby Demonstrators for the personal discount!


Leave a comment