

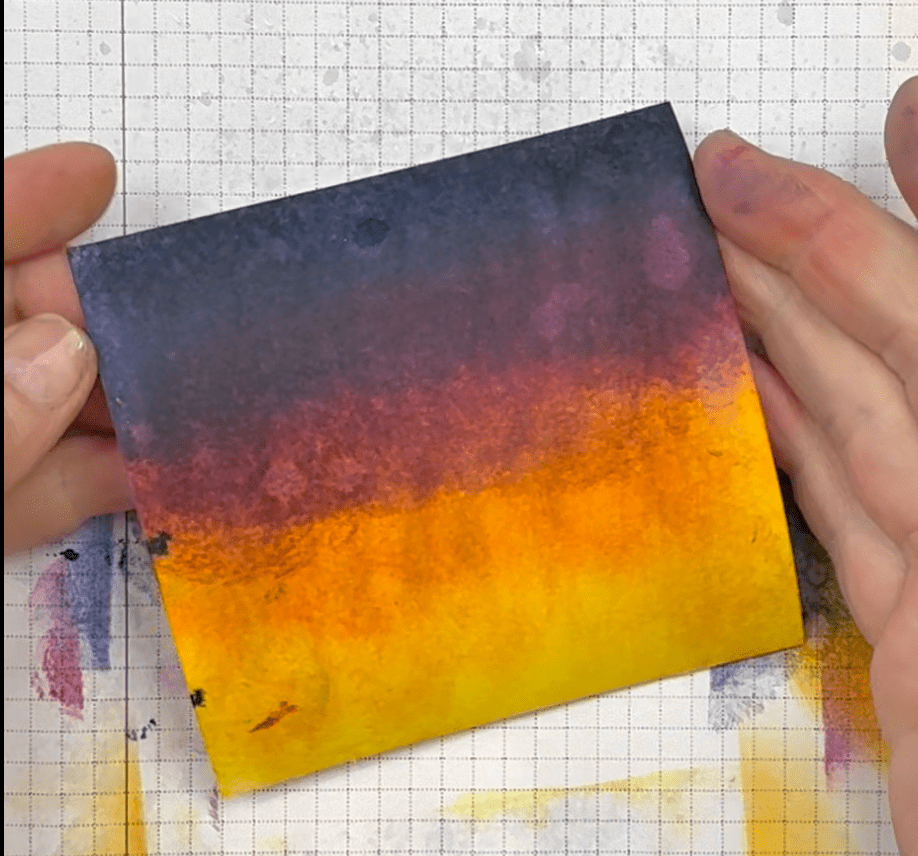
It is SO easy to make this gorgeous sunset background for your cards and scrapbook layouts. Water Based ink, blending brushes, a water spritzer, and a refillable water brush pen is all you need!
I made this birthday card for a dear friend, who also happens to be the best riding coach I’ve ever had. So, of course if had to be horse themed! This is one of those times when I reached beyond my Stampin’ Up! currently available products and used what I had in my stash. I am also a big believer in using what you have and I have a lot of supplies I purchased before finding Stampin’ Up! Since this tutorial is about technique rather than product, I figured you would forgive me. 🙂
Once I finished the card, I realised this was probably a technique others would want to try so I created a YouTube Short to demonstrate it (see it below!). However a couple friends commented that people might like to see how the whole card was put together so I’m writing this blog post to explain that.
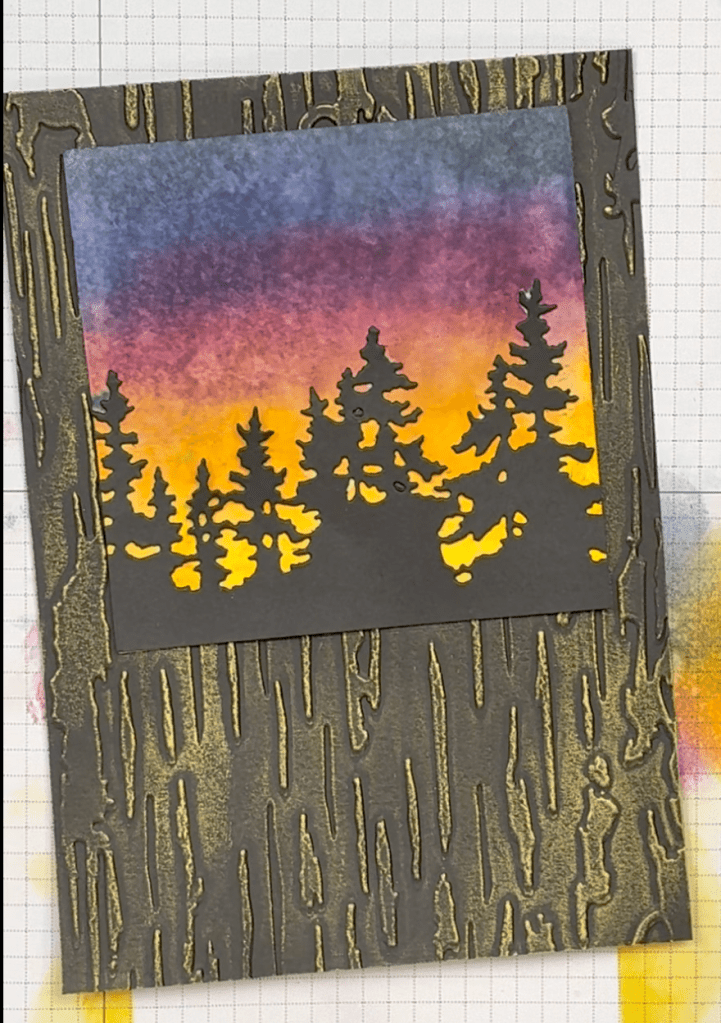
The background can be used with any die cuts or stamps in the foreground and with any colour/pattern of card base and mats you want. I find black silhouette type die cuts are the most striking against the sunset background, but honestly, almost anything can work with this background. Experiment with your own stash and your own colour combinations!
Video Tutorial
This YouTube Short demonstrates the technique. Other information about the specific card featured is below in this blog post.
Instructions for Sunset Background
Ink Colours Used
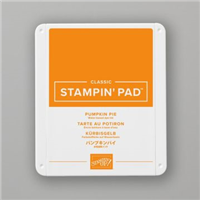
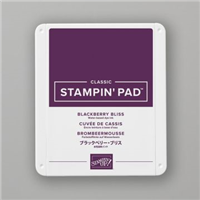
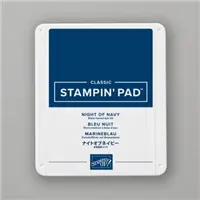
These are the Stampin’ Up! Ink Pads I used to create the sunset. There are links to them in the supply list at the end of this post.

Supplies Needed for Background
- Ink Pads
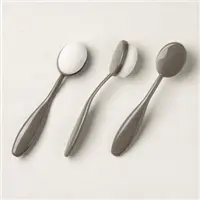
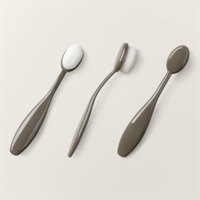
- Blending Brushes – I used a regular size blending brush for the Pumpkin Pie and the small blending brushes for the other colours.
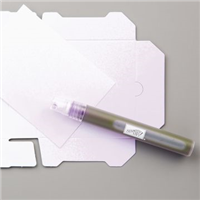
- Refillable Water Brush Pen (no longer sold by Stampin’ Up! but plenty of other brands available out there – and SU now carries a Blender Pens which may do the same thing…but I haven’t tried them yet.
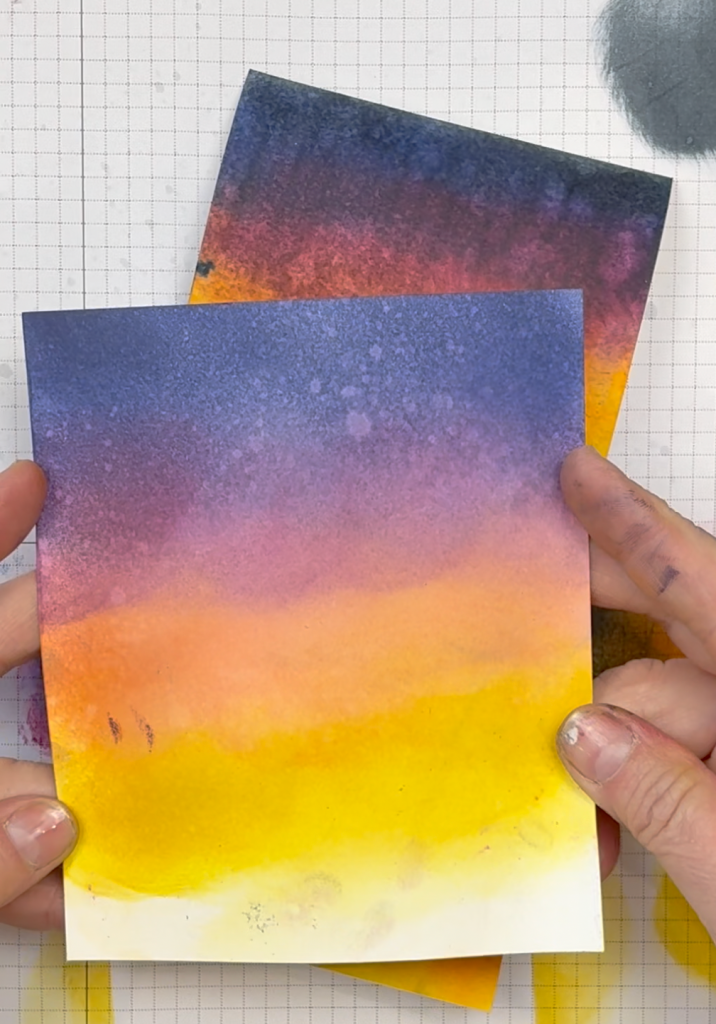
- Basic White Thick A4 Cardstock (any size that suits your project. I used a 95 x 95 mm piece…. about 3.75″ x 3.75″ in US Imperial measure)
Technique
Tip 1: After loading ink onto your blending brush, always offload some ink on scrap paper or a grid pad before rubbing the blending brush on your cardstock. This helps avoid blotching and gives you better blending.
Tip 2: You do not have to apply ink in straight lines across the cardstock. Having an arc or uneven line is best.
- Pick up Pumpkin Pie ink with the large blender brush, offload onto scrap paper, then gently rub blending brush over the middle part of the card, leaving some room for the Crushed Curry Below it and the other colours above. The Pumpkin Pie should be the largest band of colour, covering about 1/3 of the cardstock piece.
- PIck up the Crushed Curry ink wtih a small blending brush and apply it to the cardstock from the bottom of the Pumpkin Pie band to the bottom of the card stock.
- Pick up the Blackberry Bliss ink with a small blending brush and apply it to the cardstock in a thin band at the top of the Pumpkin Pie band.
- Pick up the Night of Navy ink with a small blending brush and apply it above the Blackberry Bliss, leaving a little room at the top for the next colour.
- Pick up the Secret Sea ink with a small blending brush and apply it to the top of the cardstock.
Tip 3: Each band of colour should slightly overlap or underlap the ones above and below.
- Spritz the cardstock with water.
- Using a Water Brush Pen, blend the colours somewhat. Pull the top colours down into the colour below it a bit. It won’t be hugely noticeable, but it does soften the ‘lines’ and put a slight wash of each colour into the next colour.
- Spritz the top area (the darker colours) with water again and let it dry (or use your heat tool to dry it). The last spritz should allow the water droplets to dry slightly differently and create a very subtle ‘starry’ effect in the sky.
- Decorate and add to card front once dry!
Hot Tip on Blender Brushes:
I really love the Stampin’ Up! Blender brushes. They are magic to use! But I have a hot tip that applies to any blender brush of this style… DO NOT wash them with water! This will ruin the bristles on it. Ask me how I know. Ugh.
I have one blender brush for each colour ‘family’ – reds, oranges, yellows, greens, blues, purples, pinks, browns, black/greys. Yep 9 brushes. I have a set of 9 in the normal sized ones and a set of 9 in the small blender brushes. Why? So I don’t have to wash them!
When I finish using a blender brush, I rub it on a chux wipe (or paper towel, or even scrap paper) to get the excess ink off. Then let it dry. When I use them with my Stampin’ Up! inks (water based ink) they do not transfer the ink on the brush to another ink once dry. Even when going from darker colours to lighter colours.
This way I don’t have to wash them and risk ruining the bristles. I’ve had my blender brushes for over a year now with zero problems using this method.
About the Rest of the Card
Because some friends asked, here’s the information about the rest of the card featured in the video…. This is based on a 5″ x 7″ card. I used imperial measures for that because it’s kind of a stadard large format card and I can work in both imperial and metrics. The cardfront however, is in metrics, because that’s the size I cut the white cardstock to for the sunset background. I’ll give measurements in both systems here.
| Metric – in mm (AUS, UK, EU, Canada, etc) | Imperial – in inches (USA) | |
| Card Base Basic Black | 254 x 178mm scored at 127mm | 10″ x 7″ scored at 5″ |
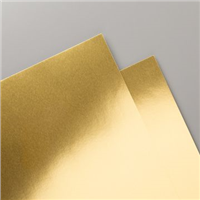
| Base Mat 1 Gold Foil Cardstock | 122 x 173 mm | 5.75″ x 6.75″ |
| Base Mat 2 Basic Black | 117 x 168 mm | 5.5″ x 6.5″ |
| Card Front Basic White Thick | 95 x 95mm | 3.75″ x 3.75″ |
| Front Mat 1 Basic Black | 100 x 100mm | 4″ x 4″ |
| Front Mat 2 Gold Foil Cardstock | 104 x 104mm (note very thin gold edge – not the usual measurement) | 4-1/8″ x 4-1/8″ |
| Inside Writing Panel | 117 x 168 mm | 5.5″ x 6.5″ |
| Scraps for Die Cuts Basic Black & Gold Foil Cardstock | scraps to suit whatever die you use. | |
| Scrap for sentiment Gold Foil Cardstock | scrap to suit whatever sentiment you use – I used a die to cut it from gold foil but you could use normal cardstock and stamp a sentiment. Up to you! |
Assembly
- Affix Front Mat 1 to Card Base
- Affix Front Mat 2 to Card Base
- Create your Sunset background on the card front.
- Add die cuts, stamps, etc to Card Front
For my card front, I die cut a line of trees in Basic Black cardstock. Then I die cut a horse in Basic Black and the same horse in Gold Foil cardstock. I affixed the black tree silhouette to the Card Front and cut off the excess on each side. Then, I glued the black horse to the gold horse, offsetting the black horse a little to the right and above the gold to give a very thin gold outline to the lower left of the horse. This made it stand out from the black trees behind it and gave it a little something special. I affixed the horse over the trees using Black Dimensionals (you can also use the white dimensionals).
- Affix the Card Front to Front Mat 1.
- Affix the assembly from step 5 to Front Mat 2.
- Put Dimensionals on the back of the Card Front Assembly and affix to Card Base Assembly.
- Add Sentiment and/or other embellishments.
The cardstock used is all from Stampin’ Up! but the die cuts were from my stash. I have no idea where I got the horse from but the treeline is from Tim Holtz from several years ago. The Scenic Adventures Die Set from Stampin’ Up! (which can be purchased separately or in a bundle with the coordinating stamp set) would be a PERFECT substitute for the one I used! It also gives you some other silhouettes to play with like the mountains or single trees. I think I need to order this one myself now! See the supply list below for links to view that set.

At the end of the video, you can see a quick glimpse of an embossed card front mat that would also look good with this type of card front. I embossed with the Birchwood 3D Embossing Folder from Stampin’ Up! This folder is large enough for 5×7″ card fronts and mats. I then ran over it lightly with some gold luster wax from Sizzix. Just another idea for you!
To be honest, I’m not sure I really like the look of the gold on black wood so I didn’t use it. But I put it in my stash of card mats and fronts. I often find when I don’t like something, if I set it aside for a while, the next time I look through that stash, I like it…for a different project. So don’t throw away the things you don’t like!

Supply List
The products listed below include links for further details. Prices and availability were accurate at the time of publication but may change. For shoppers in Australia, you can browse the full range of SU products, including specials and online exclusives, at bridgeta.stampinup.net. Customers outside Australia are encouraged to visit the Stampin’ Up! website for their respective country to locate a local independent demonstrator.


Did you know that when you shop with me, you are helping Dachshund Rescue Australia to rescue and rehome dachshunds in Australia? I have adopted from them over the years, including Hugo, one of my current dogs. It’s a charity close to my heart and home and I am proud to support them. So when you support my small business, you are also supporting them! You can read more here.

Marcus, Polly and Hugo, the dogs of Drunk Dog Creative, want to remind you to subscribe to this blog, share with your friends, and follow Drunk Dog Creative on all the socials.
Woof woof. Sit. Stay. Follow us. Good human.
Need supplies?
You can shop for Stampin’ Up! products at https://bridgeta.stampinup.net. You can also click on any of the items in the supply lists in tutorial posts. A percentage of any profit from my SU sales is donated to Dachshund Rescue Australia, so you get great products at a good price and help gorgeous dogs like Hugo find their furever home!
Join my team!
If you spend over $169 why not consider joining my team as an Independent Demonstrator? You will get $265 worth of your choice of products for only $169 and be entitled to a minimum 20% discount on your future orders. Many people join just to be Hobby Demonstrators for the personal discount!


Leave a comment