


I’m started to work on my Christmas Cards early this year after last year’s experience of still making them right up until the day I had to get on a plane to join my family interstate for the holidays! I came across a wonderful tutorial by Createinspain on how to use LED lights in papercraft. It’s definitely worth watching and can be found HERE.
After watching that video, I set off to make my own light up Christmas card using products from the Lights Aglow Suite from Stampin’ Up. If you’re in Australia, you can purchase the Stampin’ Up products used in this demo at the Stamp Dogs Stampin’ Up site HERE. To make it easy for you, go the website then click on the MY PROJECTS page then the image of the Christmas Tree card. That will have all the links to the Stampin’ Up products that I used for this project so you can click on them to easily add them to your shopping cart! [So, I guess this is a bit of shameless self promotion, but if it helps… I also donate a healthy chunk of any profits to Dachshund Rescue Australia. So I’m not afraid to be shameless for their sake. ☺️]. While each part of the instructions has a materials list, the full list of materials can be found at the end of the post.
Now, on to the fun stuff! This is where Engineering meets Art! The directions given here will create an A6 size card (Australian sizing… that’s 105mm wide by 148mm tall).
Part 1: Art – The Card Front
Materials:
- Shaded Spruce A4 Cardstock
- * Distressed Gold 12 x 12 Specialty Paper
- * Very Vanilla Glimmer 12 x 12 Specialty Paper
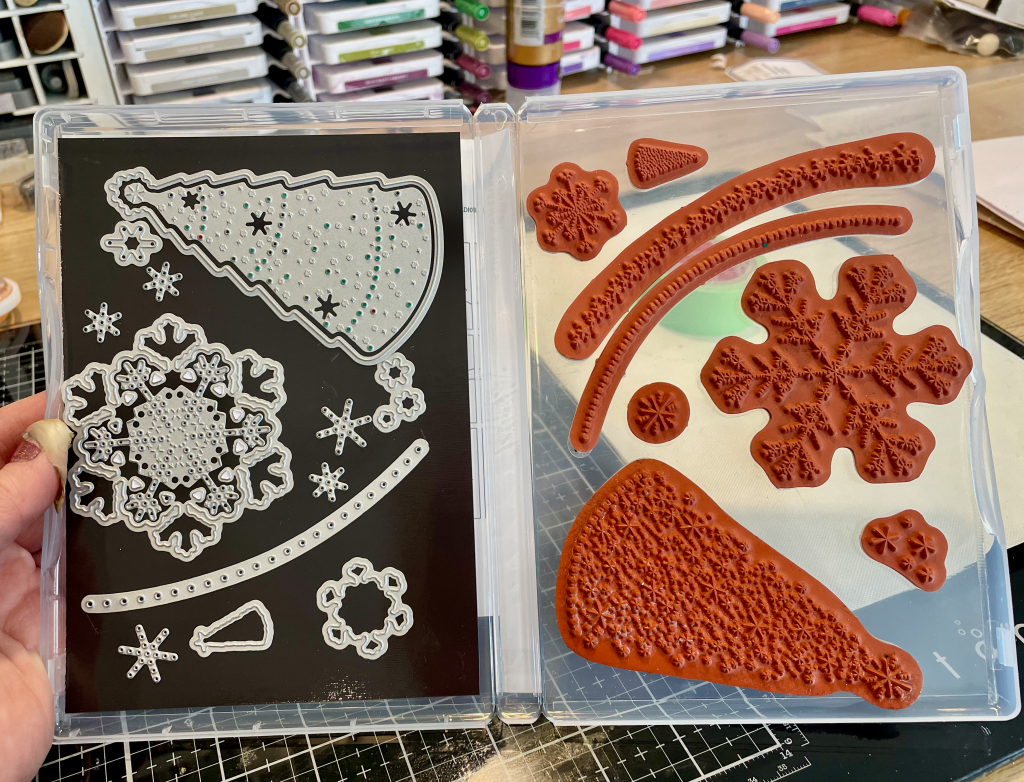
- * Christmas Lights Bundle (Christmas Lights Stamp Set + Twinkling Lights Dies)
- VersaMark
- Gold Embossing Powder
- Take Your Pick multi-tool (Paper piercer and mini spatula)
- Glue Tape and/or Glue
- Mini Glue Dots
- Heat Tool
- Mini Stampin’ Cut & Emboss machine
Materials marked with an * throughout this post are included in the Lights Aglow Suite from Stampin’ Up. They can also purchased separately while stocks last or until the July-December 2022 Mini Catalog period ends.
Step 1:
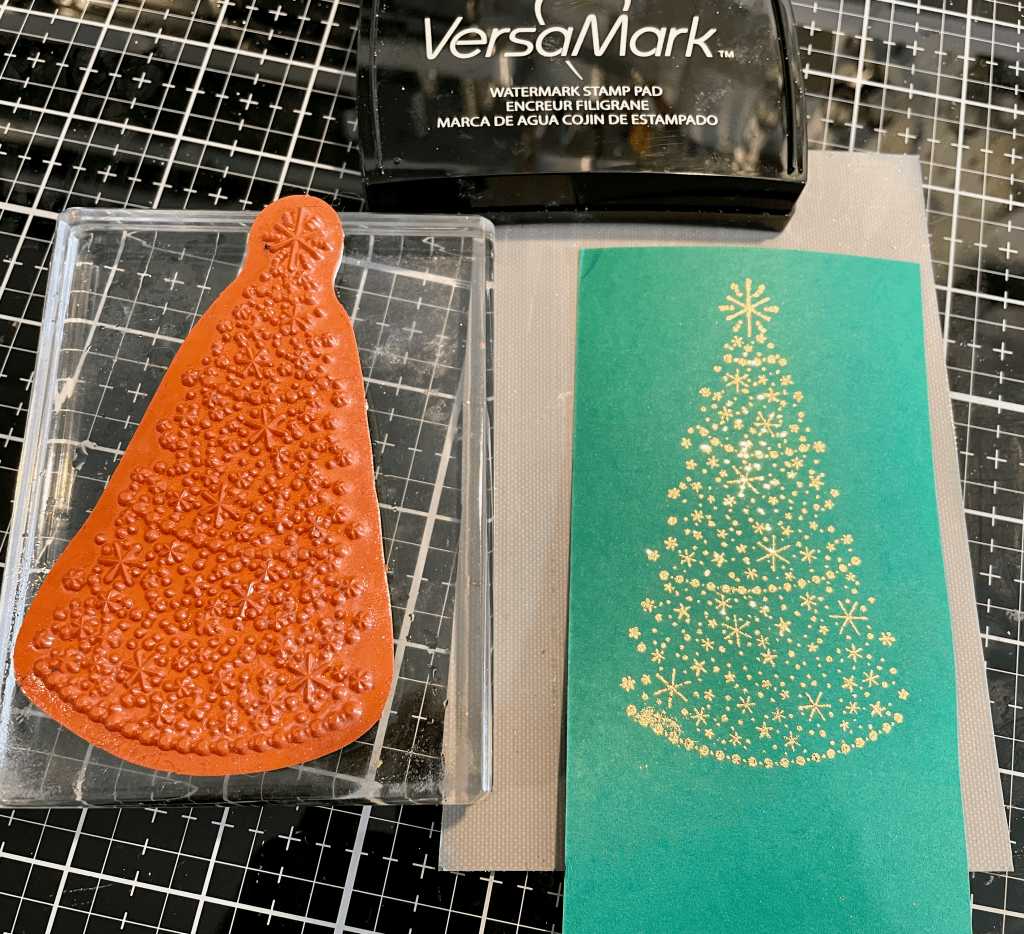
Cut the Shaded Spruce cardstock into a piece measuring roughly 8cm wide. Stamp the Christmas Tree stamp from the Christmas Lights Bundle onto the Shaded Spruce cardstock using VersaMark and heat emboss with gold embossing powder.
Step 2:
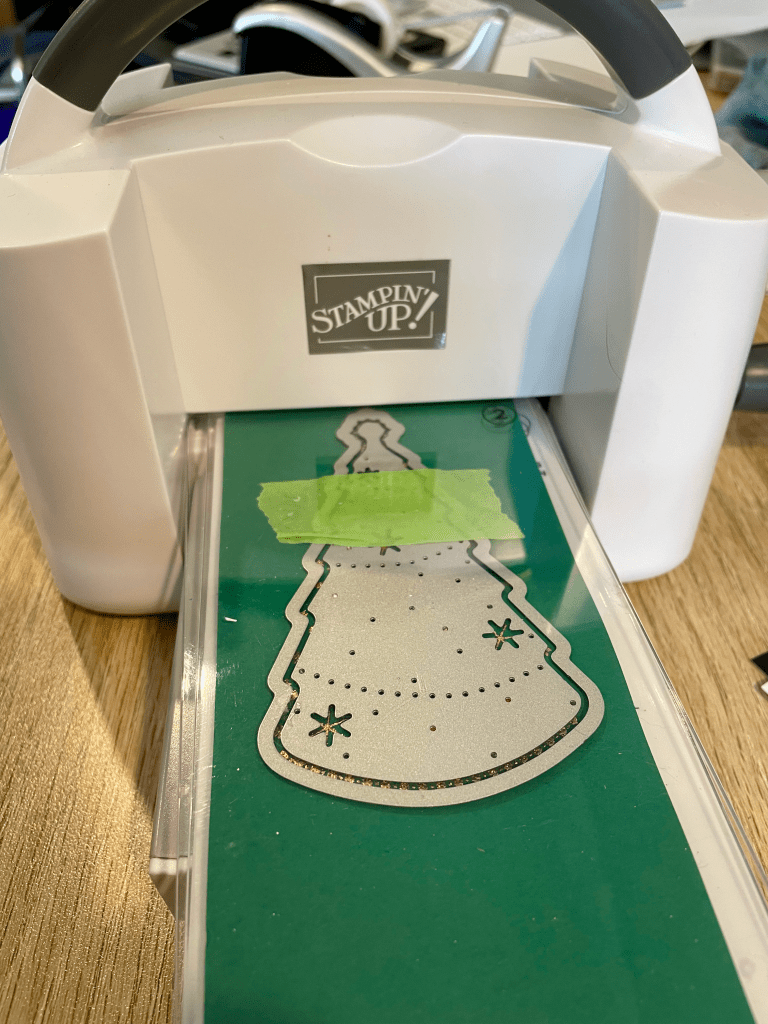
Die cut the embossed image using the two dies from the Christmas Lights Bundle. I used my Mini Stampin’ Cut & Emboss Machine to do this. But any die cutting machine should work. One of the dies embosses and cuts the little holes and detail for the tree. You can easily line it up by centreing the glittery stars in the star shaped spaces on the die. The second die cuts out the outline of the tree. Be sure to tape them down for accuracy while cutting!
Step 3:
Cut a piece of the Distressed Gold paper to 95 x 148 mm and cut a piece of Very Vanilla Glimmer cardstock to 93 x 145mm.
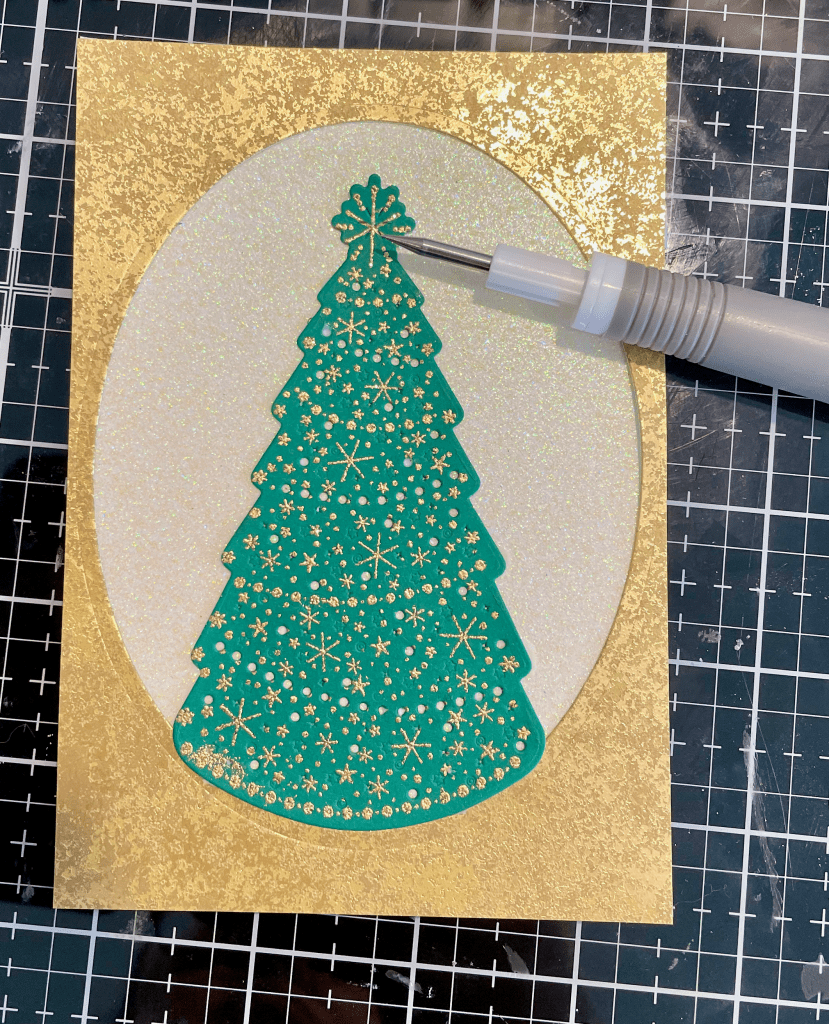
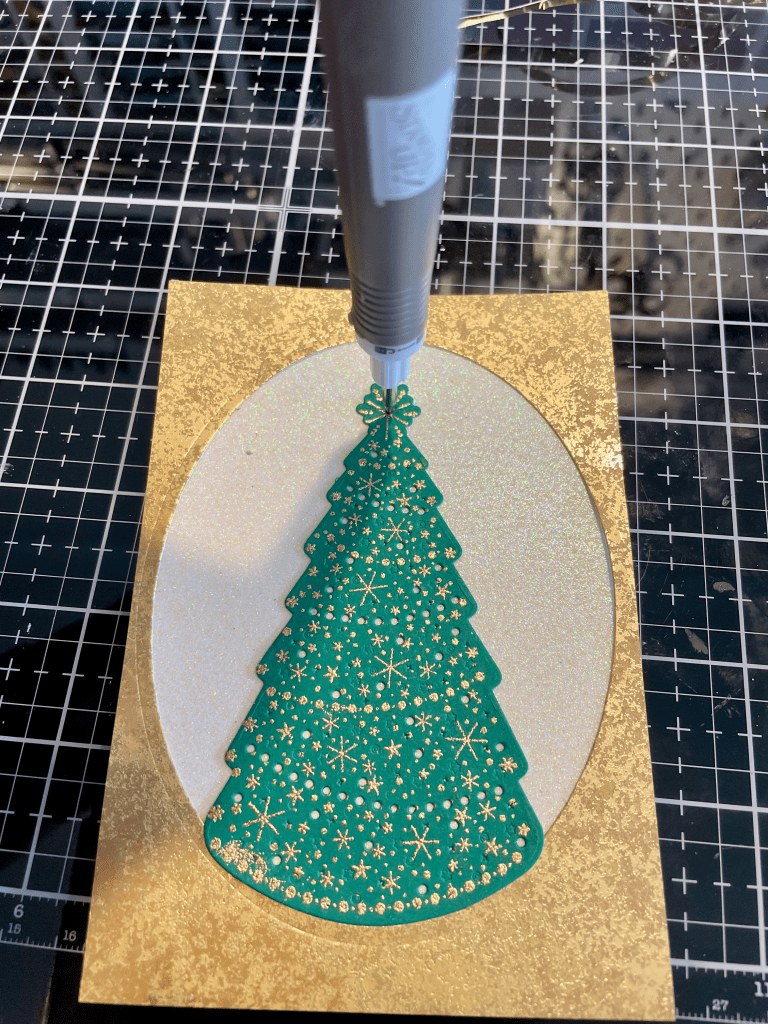
Cut a shape into the centre of the gold foil cardstock or paper that will showcase the tree. In this case, I used an oval die that was 113mm tall.
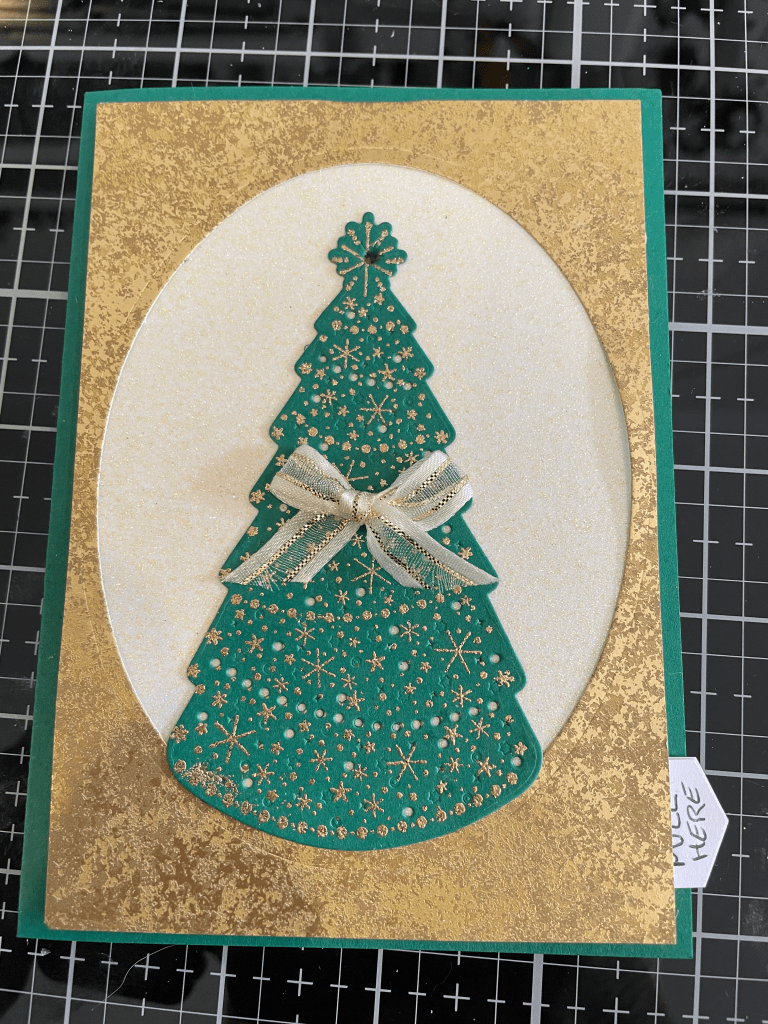
Secure the gold foil cardstock to the Very Vanilla Glimmer cardstock using your choice of glue tape or glue. Affix the tree to the card-front so that it is framed nicely in the cut-out shape. Here, I put it along the bottom of the oval rather than above it as it seemed to balance the total look of the card better…but you place your tree however best fits the shape you cut out of the Distressed Gold paper.
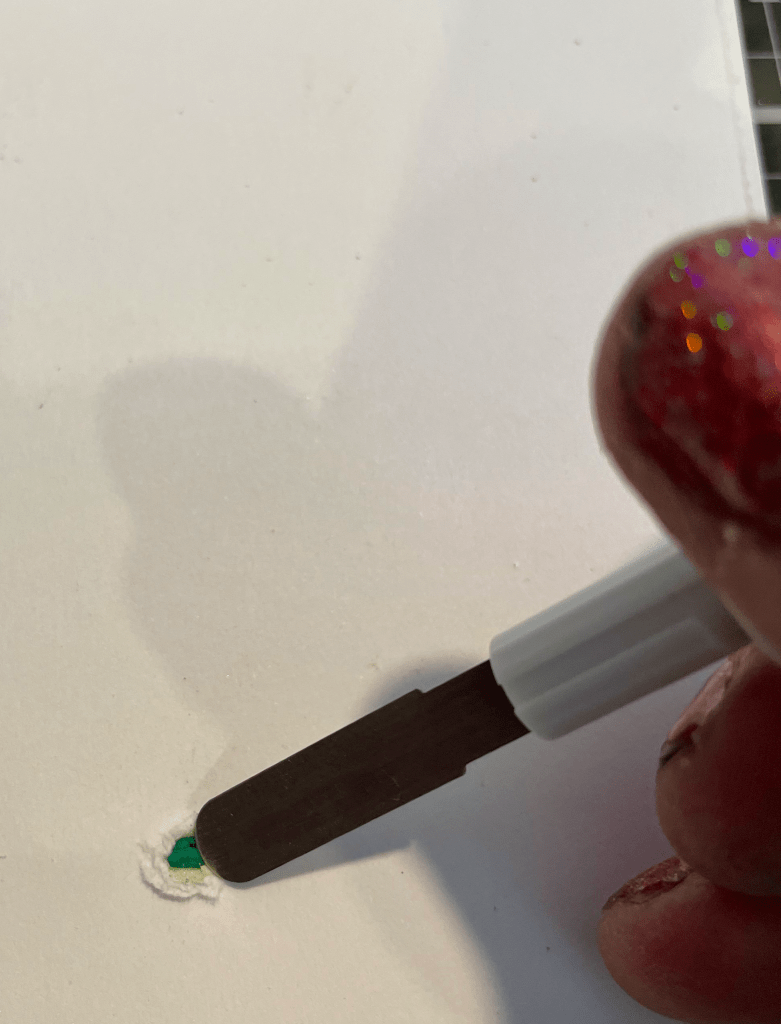
Using a piercing tool and piercing mat, pierce a hole through all three layers at the centre of the ‘star’ at the top of the tree. Make sure it’s a decent hole for the light to shine through. I used the piercing end on the Take Your Pick tool and pushed it all the way to the white plastic. Then I turned the card front over and used the mini spatula on the Take Your Pick tool to flatten down the bits of card that were pushed through to enable the LED light to shine through. Set the card front aside.
Part 2 – Engineering: The Circuitry
If the explanation and photos below are still confusing to you, then I highly recommend watching Creatinspain’s video on YouTube that I mentioned at the start of this post (you can see it HERE). It’s easy to follow and is the same process as here. The difference is, I’ve included all the measurements here for this size card and this specific project. 🙂
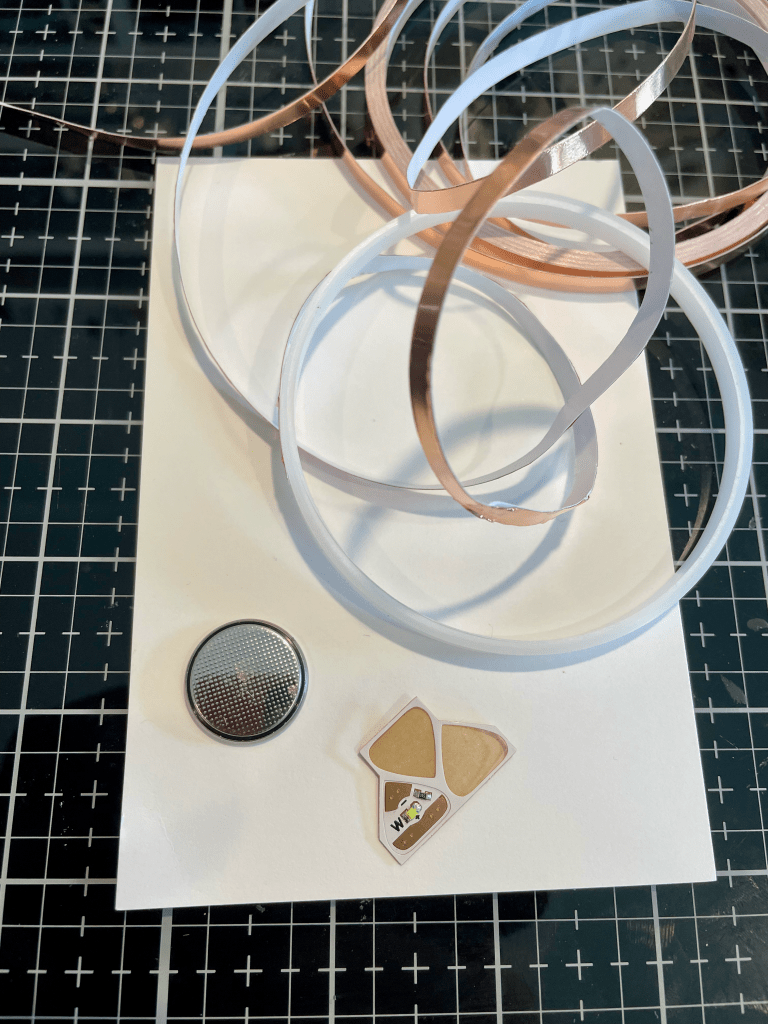
Materials:
- Chibitronics LED light sticker (or LED light diode of your choice) (from Amazon HERE)
- Copper Tape (from Amazon HERE)
- 3v Coin Battery
- Sticky Tape
- Basic White Thick Cardstock
- Pencil
- Paper Snips
- Banners Pick a Punch
- A lot of patience
I got the Chibitronics LED light stickers and the copper tape from Amazon. Chibitronics also have a starter set at Amazon which gives you 3 lights, copper tape and a coin battery. This is probably the more economical way if you want to just try it out before investing in a pack of 30 LED lights. 🙂 You can find the starter set HERE. The coin battery is from my local hardware store but they are readily available pretty much everywhere. If you are not in Australia, then I recommend you do a search in your local Amazon site for these items. As an aside, the links to these products are NOT affiliate links. I do not get any commission on these. Just trying to help here. Maybe it will make up for the shameless promotion of Stampin’ Up products. 🙂
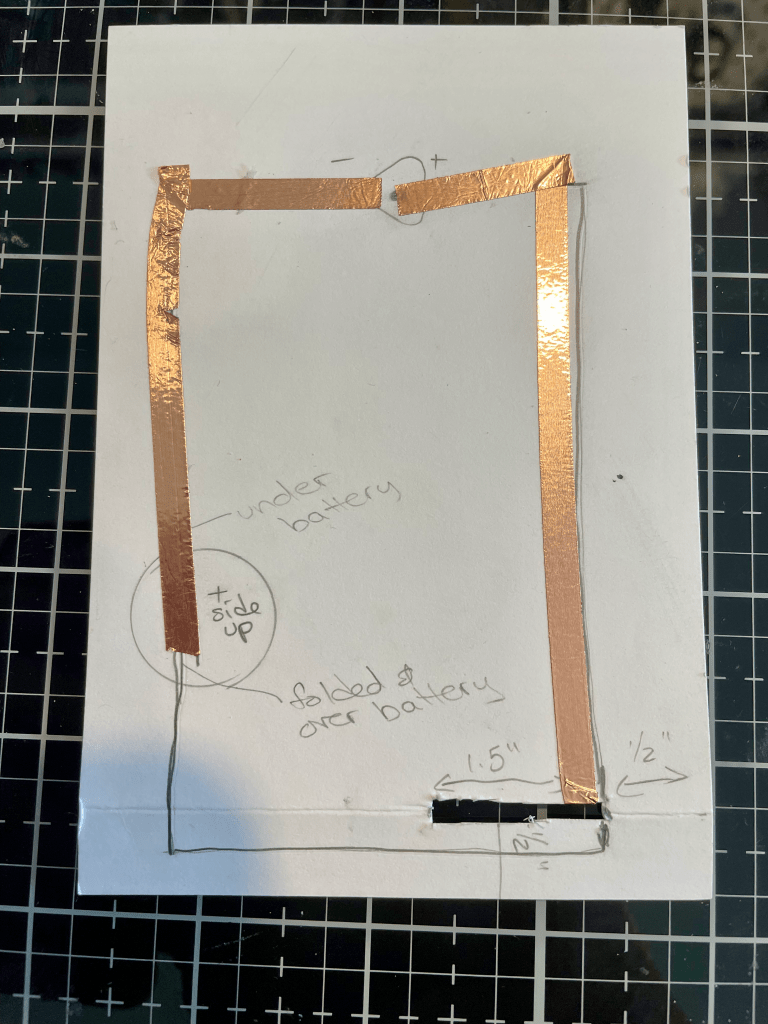
Step 1: Mark out the Circuitry
Cut the Basic White Thick Cardstock to 93 x 145mm.
Score a line 1.5cm from the bottom (about 1/2″ in US terms). Mark a point 1.5cm from the right side and 5cm from the right side (1/2″ and 2″). Fold along the score line and make a tiny snip with your Paper Snips at each mark. Open the paper and cut along either side of the score line from snip to snip – this makes a slot for you pull slide to go into (more about that later!).
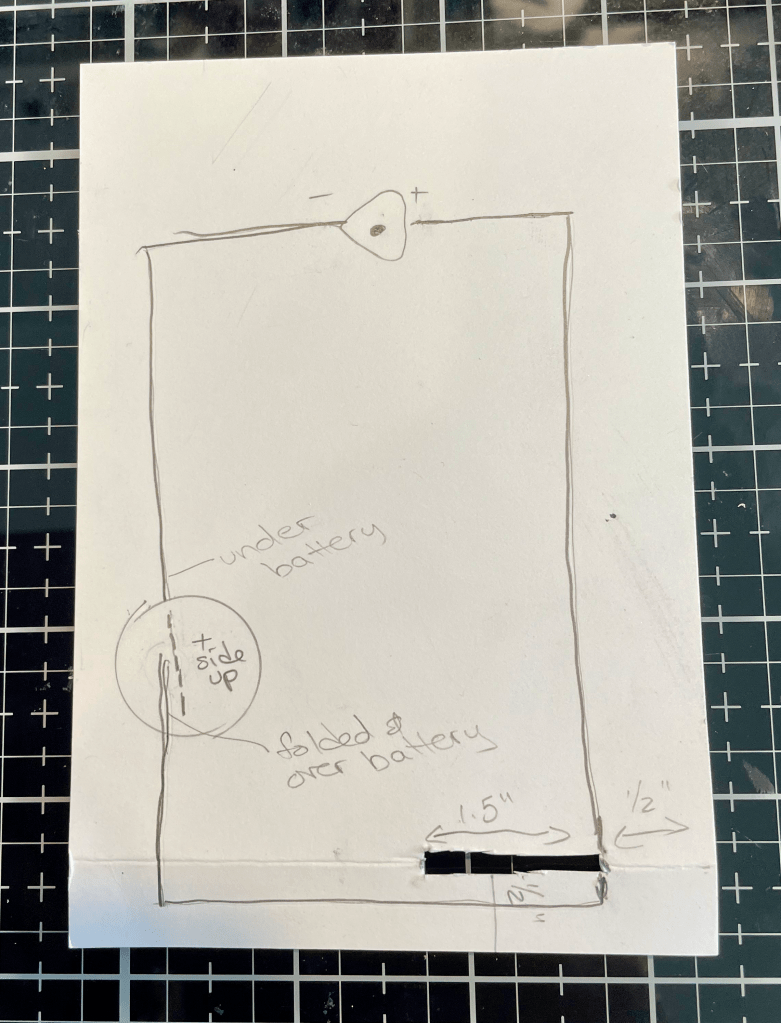
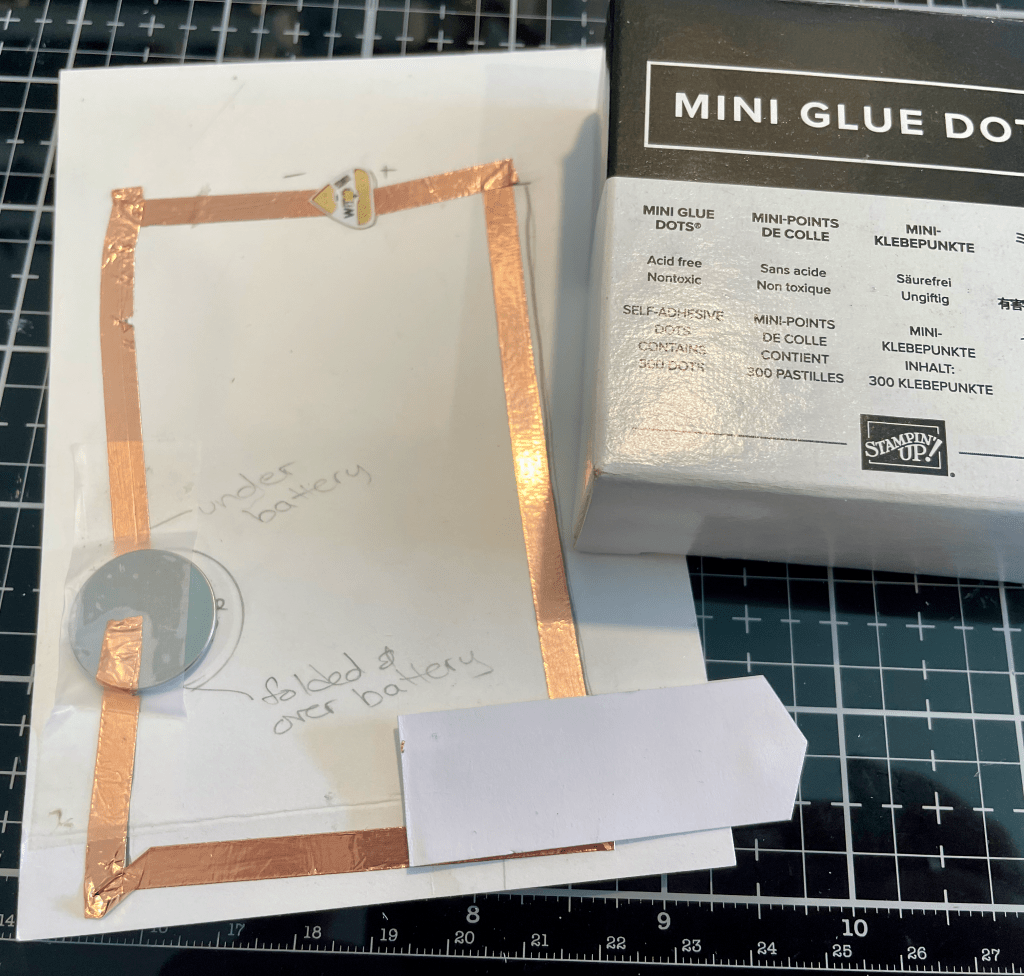
Put your card front on top of the white cardstock and using your paper piercer, make a mark through the hold in the star of the tree. Remove the card front and set aside again. Make a pencil dot where the piercer left an indent. Then trace the outline of one of the chibitronic LED stickers. This is where you will place the LED sticker later. Trace the coin battery on the left side about 3/4 of the way down the cardstock – placement here does not have to be exact – just make sure to leave enough room around the outside of the cardstock for the foam strips.
Draw a + sign to the right of the LED sticker outline and a – sign to the left. It is VITAL that you get the + and – correct for the LED and the coin battery placement.
Draw a line from the right side of the slot you have made up to the level of the LED sticker. Then another line across to the + side of the sticker.
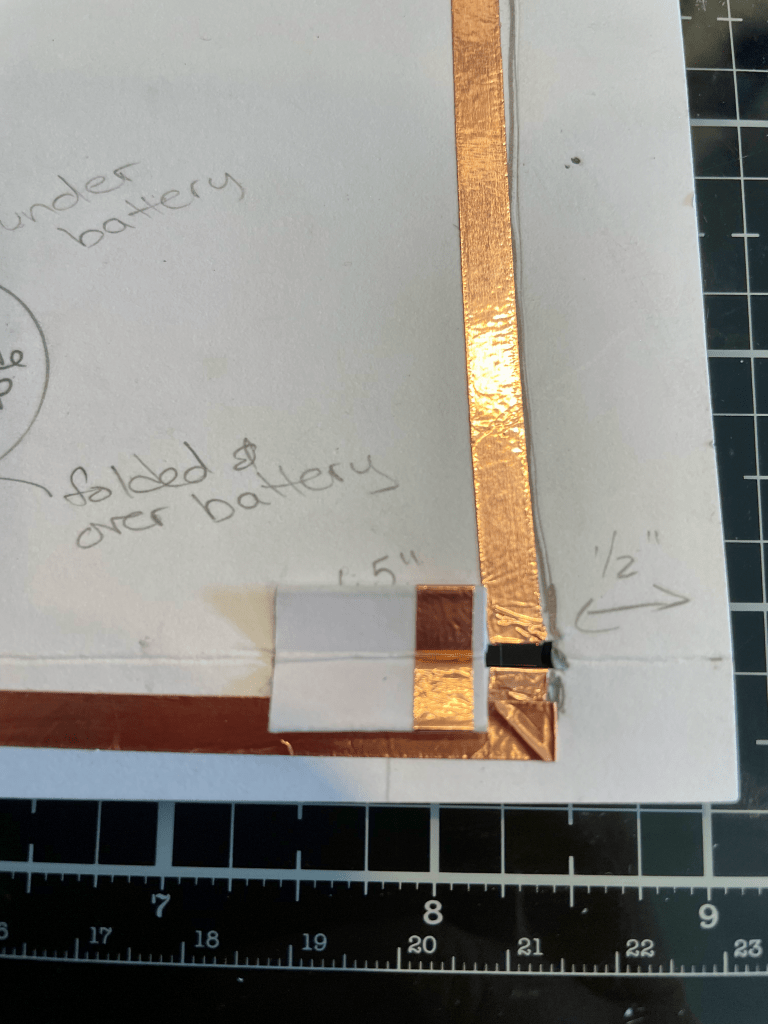
Draw a line from the – side of the sticker out and down to the top of the coin battery outline with a dotted line to about the middle of the coin battery outline to signify that this strip of copper tape will go UNDER the battery (again VITALLY important).
Draw a solid line from the middle of the coin battery outline to near bottom (again, leaving room for foam tape) and over to the right edge of the slot, then up to the slot itself.
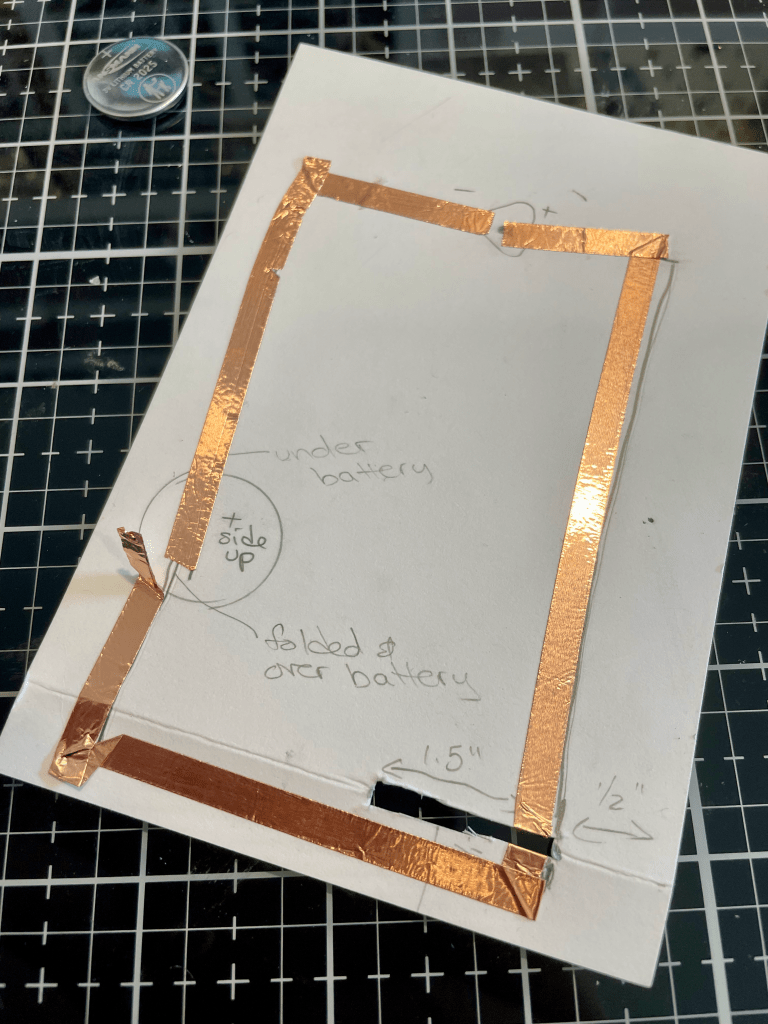
Step 2: The Copper Tape
This is where you need patience. Take your time with this step. The copper tape can be tricky to work with and it is vitally important that you don’t tear it. It is also vitally important that the tapes do not touch or overlap at the triangle outline for the LED sticker or at the slot on the bottom (or anywhere really) as if the + and – sides of the copper tape meet, you will get a short circuit and the light will not work.
Slip the end of the copper take through the slot and affix it to the back of the card and then through the slot and all the way along the positive lines (right of the card) to the + side of the LED shape. You will need to do a corner fold to change direction. To do this, fold the copper tape back on itself at an angle, then fold again in the new direction.
Then adhere the copper tape along the lines from the – side of the LED sticker to the centre of the battery outline, again using a corner fold to change directions.
Adhere the copper tape from the back of the card, through the slot and along the bottom, using a corner fold to change directions and run up to the battery stencil. Stop BEFORE reaching the battery stencil. Cut the tape, leaving about 3-4cm (or the amount needed to reach the centre of the battery stencil and back again). Fold the tape on itself so the two sticky sides attach to each other, which gives you a non-adhesive flap of copper tape. Don’t worry, it will make sense later.
Step 3: The Switch
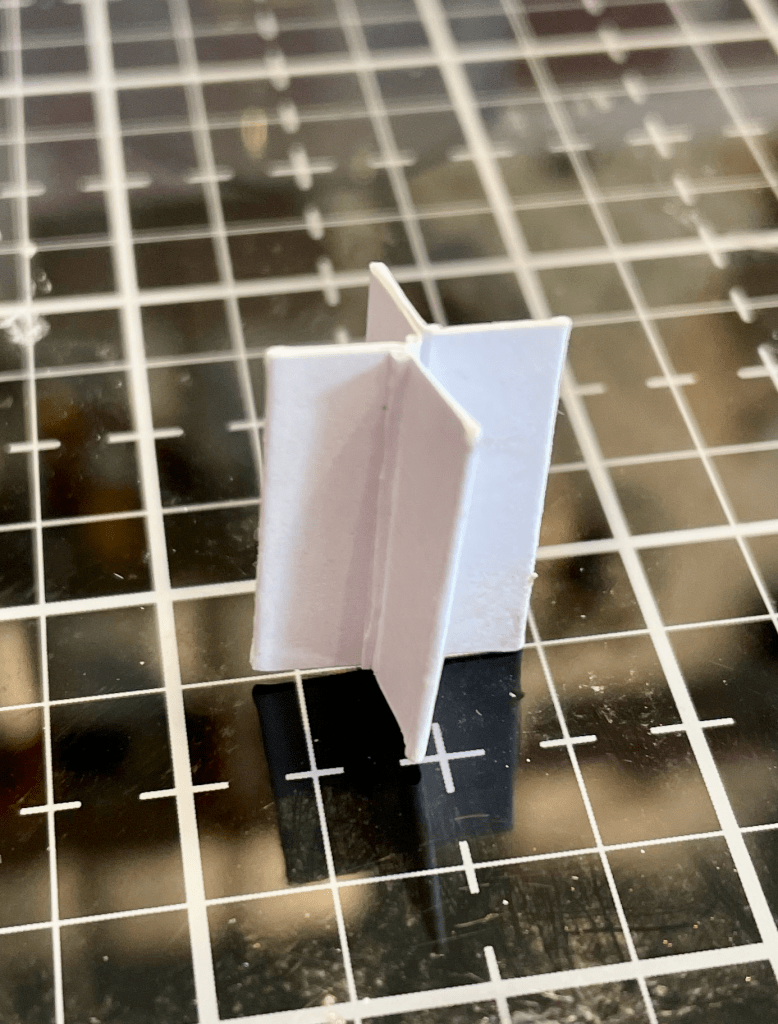
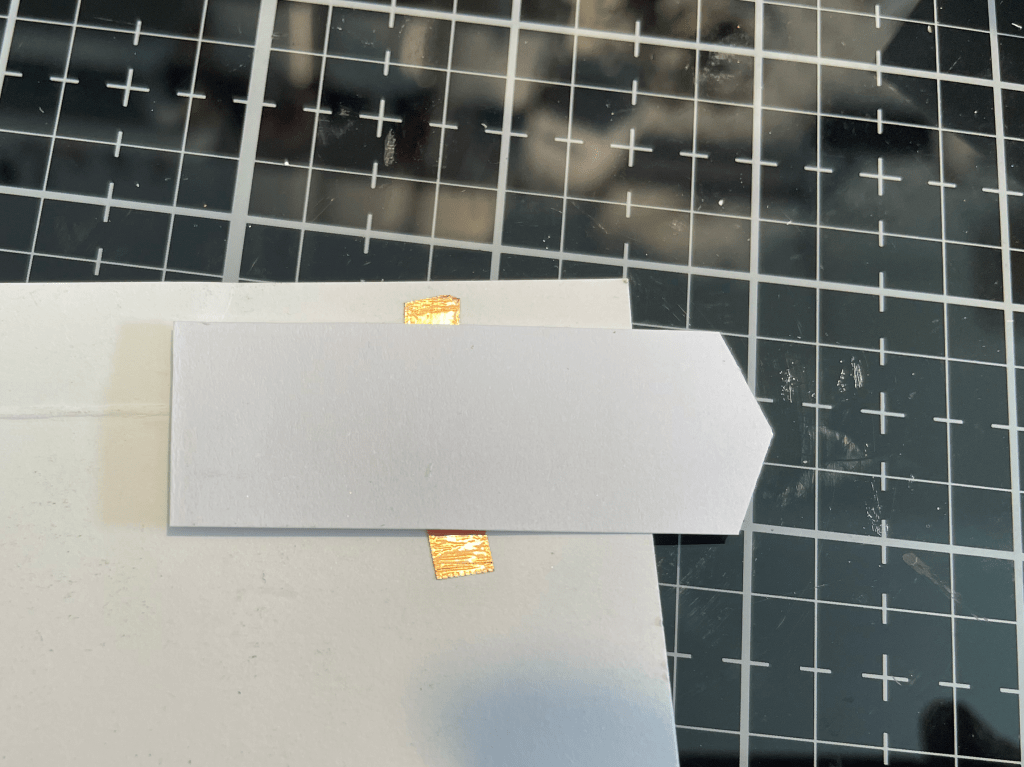
Cut a piece of White cardstock that is 5cm long (2″) and 2cm wide (3/4″). Score it at 6mm (1/4″) increments (7 score lines).
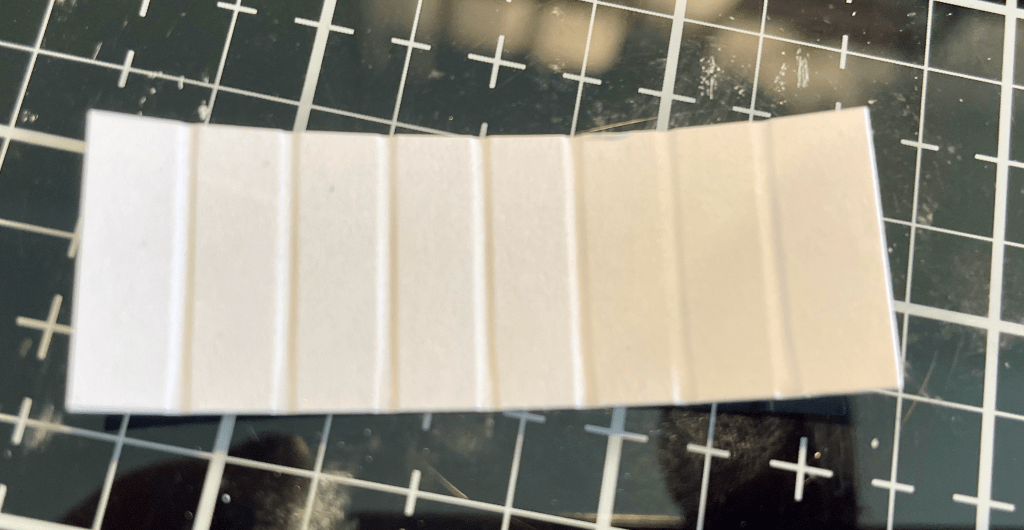
Accordion fold along the score lines and place glue or glue tape on every second section. Press together to form a cross shape.
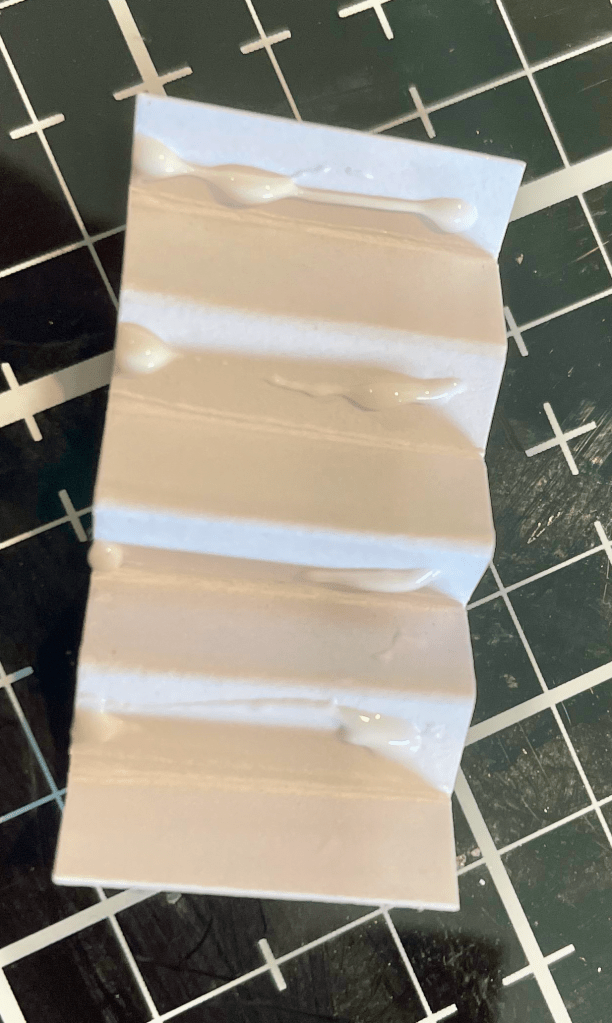
Adhere copper tape to one edge of the switch, going around each section without breaking or tearing the tape.
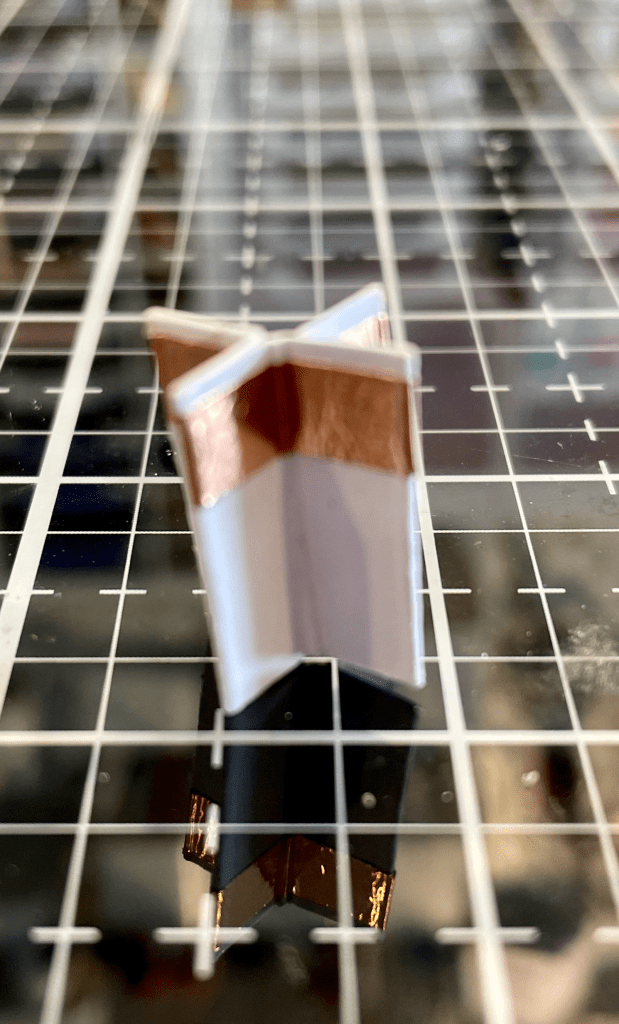
Slip the switch through the slot so that the tape is at the right side and the folds hold the switch in place while allowing it to slide along the slot.
Step 3: Light, Battery, Action!
Now you can place the coin battery in its place on the outline on the cardstock. One side of the battery will have a + sign on it. That is the side that has to face upward. Place the battery with the – side on the copper tape that is stuck down to the cardstock. Place the loose flap of the copper tape that you created on top of the battery (the + side).
Place the Chibitronics LED sticker on it’s outline making sure the wide side of the triangle is firmly on top of the + side copper tape and the point of the triangle is firmly on the – side copper tape. press down firmly to ensure good connection with the copper tape.
To test that the light is working, firmly press the copper tape tab onto the battery and slide the ‘switch’ so that the copper tape at the right side of the switch comes into contact with the copper tape in the slot. Your light should now light up.
If the light does not light up, then check that there are no tears or breaks in the copper tape and that the battery and the chibitronics LED are firmly in contact with the copper tape and at the correct polarities (+ and -).
Once everything is working, use some sticky tape to tape the battery in place, making sure the copper tape flap is UNDER the sticky tape (ensuring a good connection with the battery).

Step 4: the Pull Tab
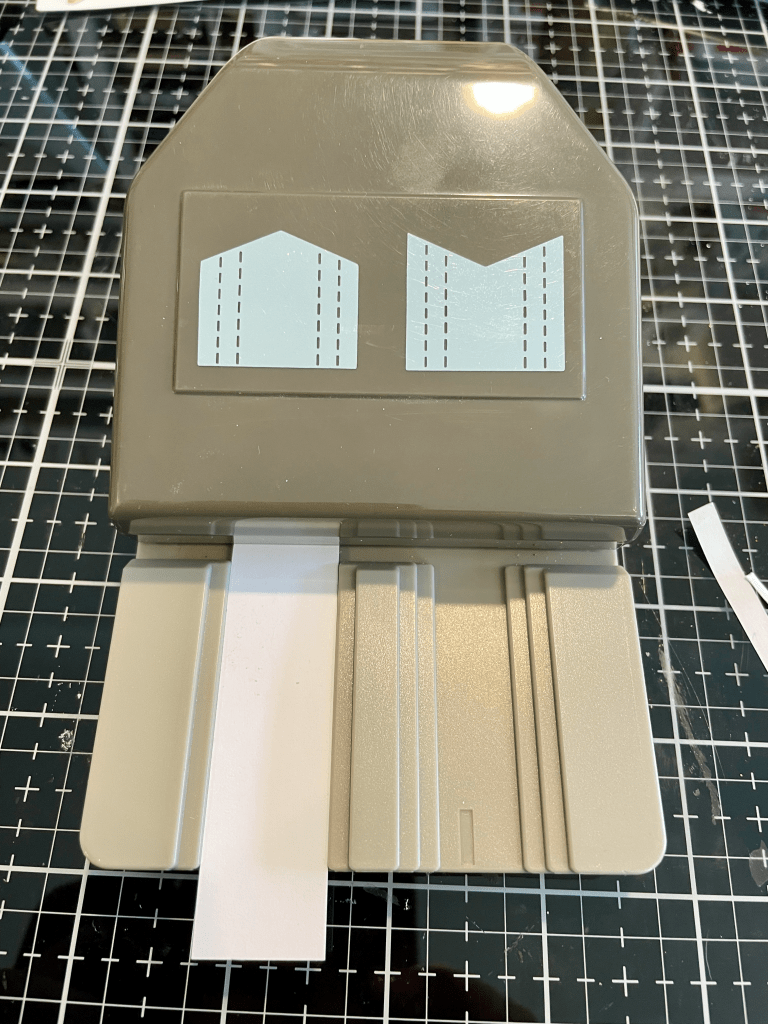
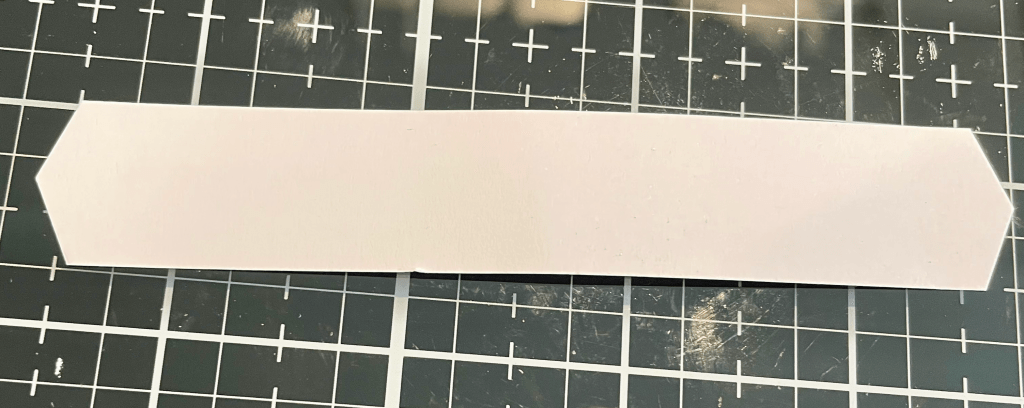
Cut a piece of white cardstock that is 11.5cm x 2cm. Shape each end with the Banners Pick a Punch pointed end. Fold in half and cut along the fold line so the two halves are an exact match for each other. Hint: when using Stampin’ Up punches, you can flip it over and see exactly where it is going to cut to ensure great alignment!
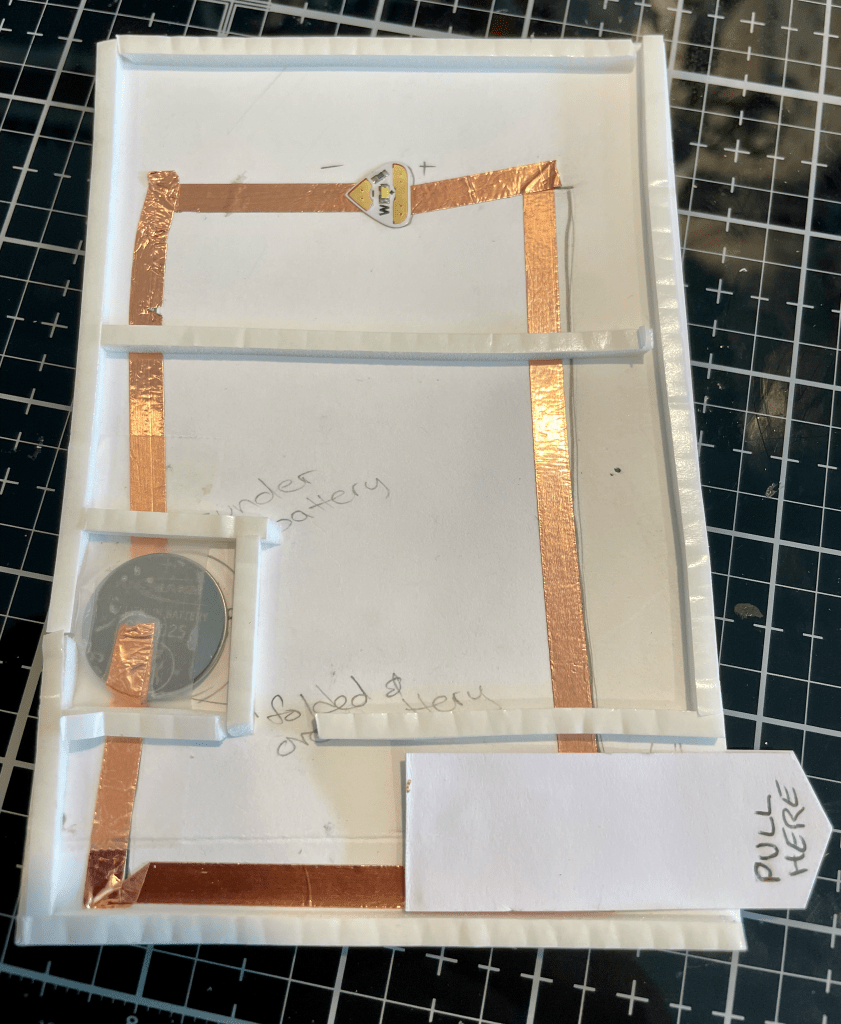
Move the switch to the far left of the slot. Align one of the pull tabs to the edge of the switch and affix in place with a Mini Glue Dot. Turn the mechanism over and affix the second pull tab to the other side with a Mini Glue Dot, ensuring it lines up with the front pull tab. Use a third Mini Glue Dot to attach the pointed ends of the two pull tabs together. Write “Pull Here” on the front pull tab. (p.s. apparently Lawn Fawn make a stamp and die set that includes pull here, push here, and other helpful directions for these sorts of things but I had to handwrite it as I didn’t have that set).
Part 3: Putting on the Ritz… aka… finishing the card.
Materials:
- Foam Adhesive Strips
- Brightest Glow Bundle (from the Lights Aglow Suite)
- Gold & Vanilla 1cm (3/8″) Satin-Edged Ribbon
- Deckled Rectangles die set
- Mini Glue Dots
- Very Vanilla, Basic White cardstock or white heavey weight paper.
- Glue or glue tape
- Mini Stampin’ Cut & Emboss machine
The Foam Adhesive Strips I used are a Stampin’ Up product and are much much better for this project than normal foam tape. The strips are very thin so they take up much real estate on the cardstock, leaving more room for the circuitry. They are also a decent height to allow room for all the workings to sit well under the card front but not be too bulky.
Step 1: Foam Strips
Apply the foam strips around the edge of the circuitry card (as close to the edge as possible) but leave a gap for the pull tab!
Put more foam strips around the battery, next to the pull tab (to keep it from accidentally pulling at an angle), and through the middle of the card to support the card front.
Step 2: Card Front
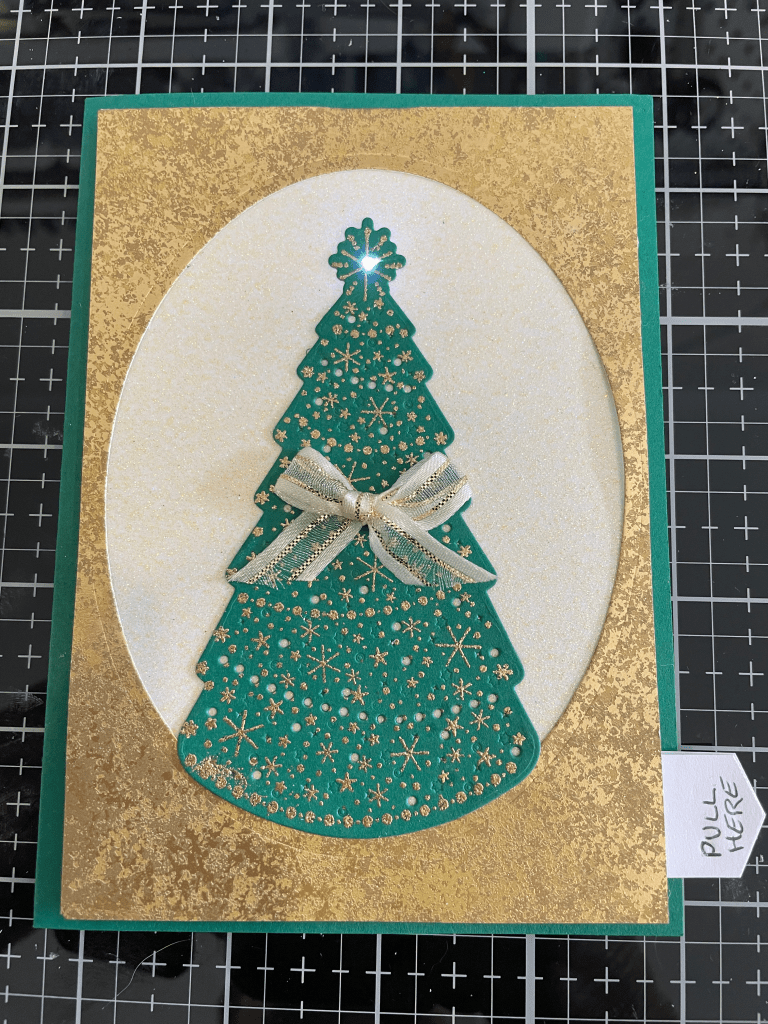
Pull the protective strips off of the foam strips. Carefully align the hole in the ‘tree’ to the LED light and the rest of the card front to the circuitry card and press down so that it sticks to the foam strips. Pull the pull tab out to ensure it slides freely and watch the tree’s star light up!
Take a piece of the Gold & Vanilla ribbon and make a small bow. Affix to the middle of the tree with a mini glue dot. These mini glue dots are fabulous for affixing ribbons and small embellishments to cards. Discovering them was a sanity saver! No more messy dried glue where I didn’t want it and no more embellishments falling off because the glue tape wasn’t strong enough to hold them!
Step 3: Attaching the card front to the card base
Cut a piece of Shaded Spruce cardstock to an A5 size (210 x 148mm). Score in the centre and fold to make the card base.
Affix the card front (which is now a sandwhich of the circuitry card and the card front) to the card base. I like to use a glue tape runner for this but you can use whatever method you prefer.
Voila! A card! … but wait…..
I know you are now rejoicing because you think you are finished …but… you’re not. You can’t neglect the inside of the card!
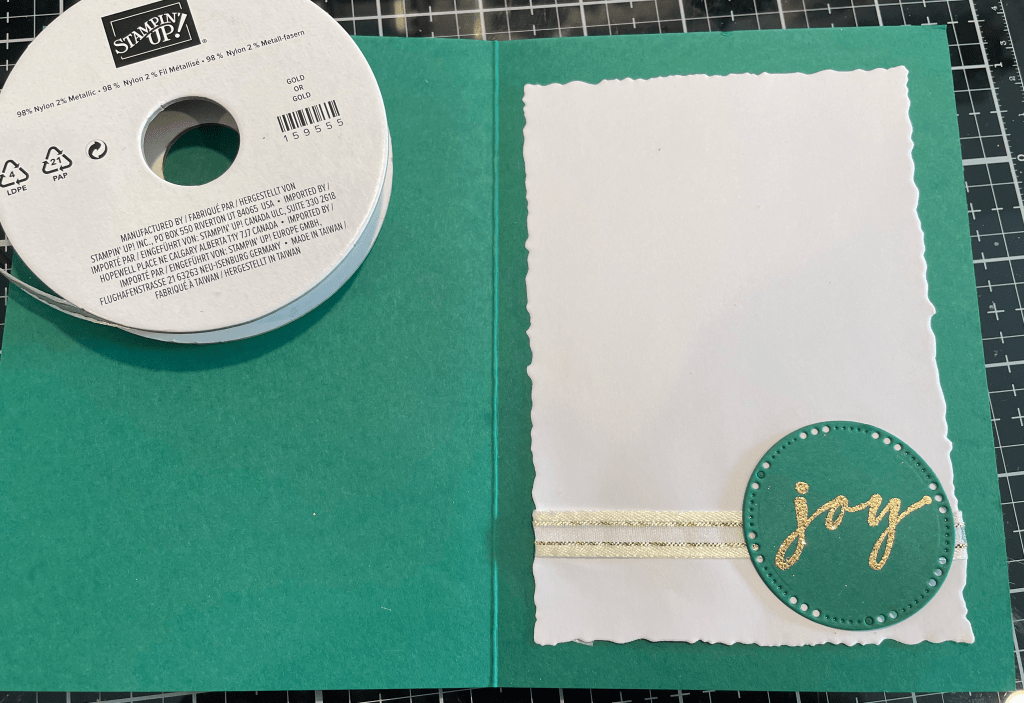
Step 4: The inside sentiment
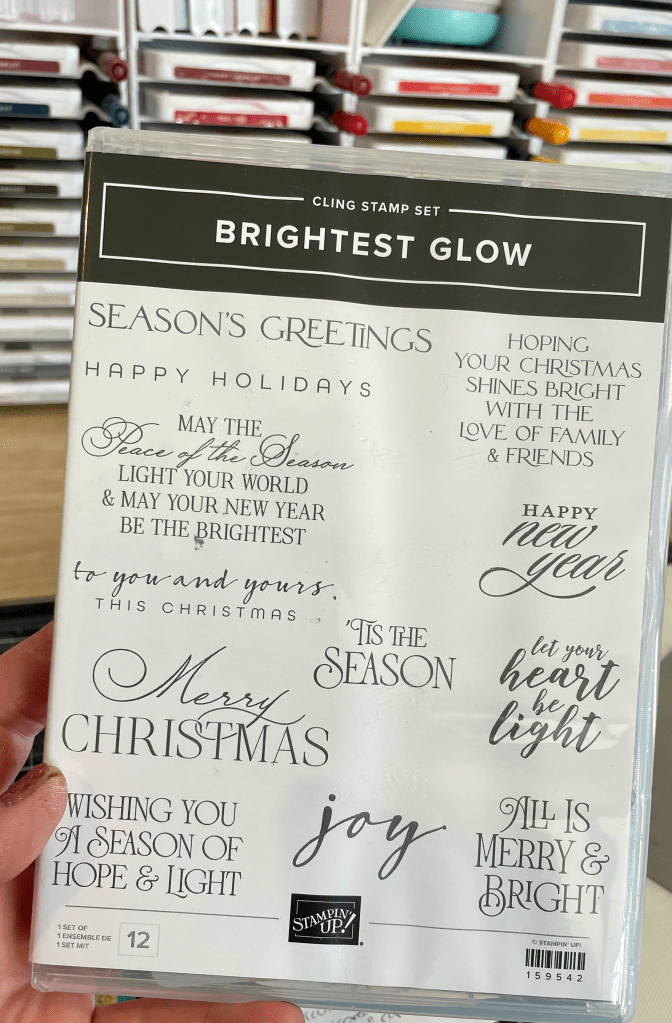
Using the ‘joy’ stamp from the Brightest Glow Bundle (included in the Lights Aglow Suite), and the versamark ink, stamp the work Joy on a piece of Shaded Spruce cardstock and heat emboss with gold embossing powder.
Centre the round die from the Brightest Glow Bundle on the word “joy” and cut it using the Mini Stampin’ Cut & Emboss machine.
Using the Deckled Rectangles dies, cut a piece of Basic White or Very Vanilla Cardstock (or white heavyweight paper) to fit the inside of the card.
Cut a piece of Gold & Vanilla ribbon long enough to go across the rectangle piece and tuck behind it on both sides. Secure it in place using Mini Glue Dots and secure the “Joy” sentiment circle to it using glue or glue tape.
Adhere the inside piece to the card base using glue or glue tape.
Close the card. Pull the tab out… and enjoy your work! Now it’s finished! Hooray!
Full Materials List
Consumables:
- * Distressed Gold 12 x 12 Specialty Paper
- * Very Vanilla Glimmer 12 x 12 Specialty Paper
- Shaded Spruce A4 Cardstock
- Basic White Thick Cardstock
- * Gold & Vanilla 1cm (3/8″) Satin-Edged Ribbon
- VersaMark
- Gold Embossing Powder
- Foam Adhesive Strips
- Mini Glue Dots
- Multipurpose Liquid Glue or Stampin’ Seal glue tape runner
- Sticky Tape
- Copper Tape
- Chibitronics LED light sticker (or LED light diode of your choice)
- 3v Coin Battery
- Sticky Tape
Stamps, Punches, and Dies:
- * Christmas Lights Bundle (Christmas Lights Stamp Set + Twinkling Lights Dies)
- * Brightest Glow Bundle (Brightest Glow Stamp Set + Labels Aglow Die Set)
- Banners Pick a Punch
- Deckled Rectangles die set
Tools:
- Take Your Pick
- Pencil
- Paper Snips
- Mini Stampin’ Cut & Emboss machine
- Paper Trimmer
- Simply Scored Scoring Tool
Important Note: Items with an * are part of the Lights Aglow Suite from the Stampin’ Up Mini Catalog (July – December 2022). They can be purchased as the whole suite or as separate items while stocks last. When the catalog period ends, the items will be retired and will be unavailable.
About StampDogs and Stampin’ Up
Stamp Dogs is a ‘side hussle’ for me here at Drunk Dog Creative. I added card making to my crafty repertoire a couple of years ago and discovered Stampin’ Up. They have amazing products at good prices and the best part is….they all coordinate with each other …which makes being creative even easier! So I signed up as an Independent Distributor (mainly to get the personal discount on the products I was purchasing!) and Stamp Dogs came into being.
Independent Demonstrators get generous discounts on their purchases, can earn free goodies, and have early access to purchase items from the mini-catalogs and new annual catalogs. If you are interested in joining my team as a demonstrator, even if it’s just as a hobby demonstrator, then please contact me at info@drunkdogcreative.com. You can also find out more information or even join online HERE.
Finally… it’s been my long-standing practice to donate a big chunk of any profits I make from my crafting hobbies to Dachshund Rescue Australia. So, if you decide to purchase Stampin’ Up products from me, then you’re also helping support a wonderful charity.
If you are in Australia, and want a catalog sent to you, then please email me at info@drunkdogcreative.com and I’ll make sure to post one out to you! You can also shop at stampdogs.stampinup.net.
Marcus, Hugo and I thank you!

Major thanks to Dachshund Rescue Australia for Hugo – In this case, he rescued Marcus and I!


Leave a comment