

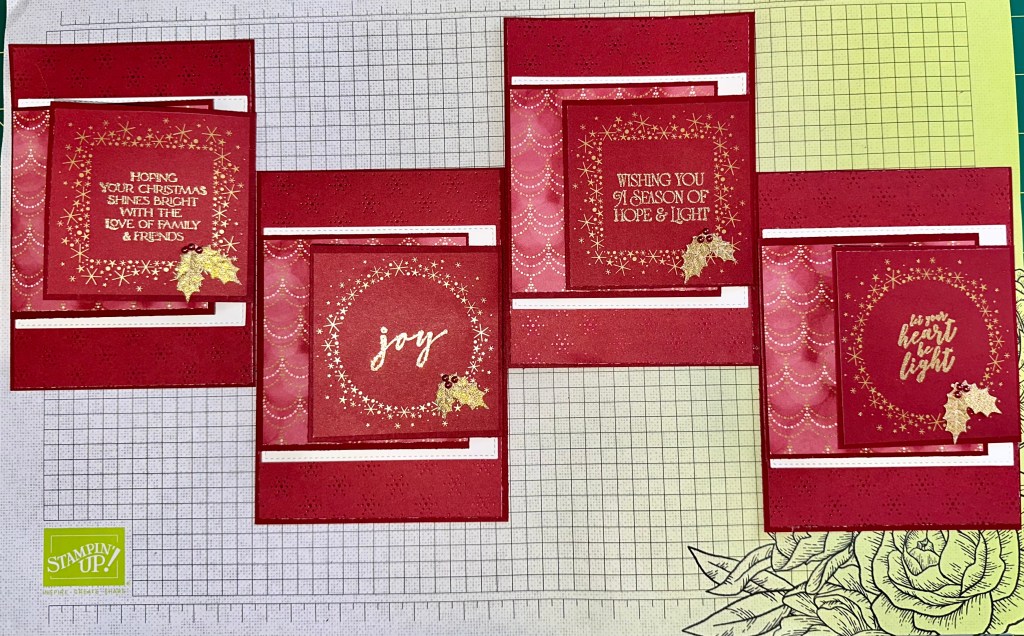
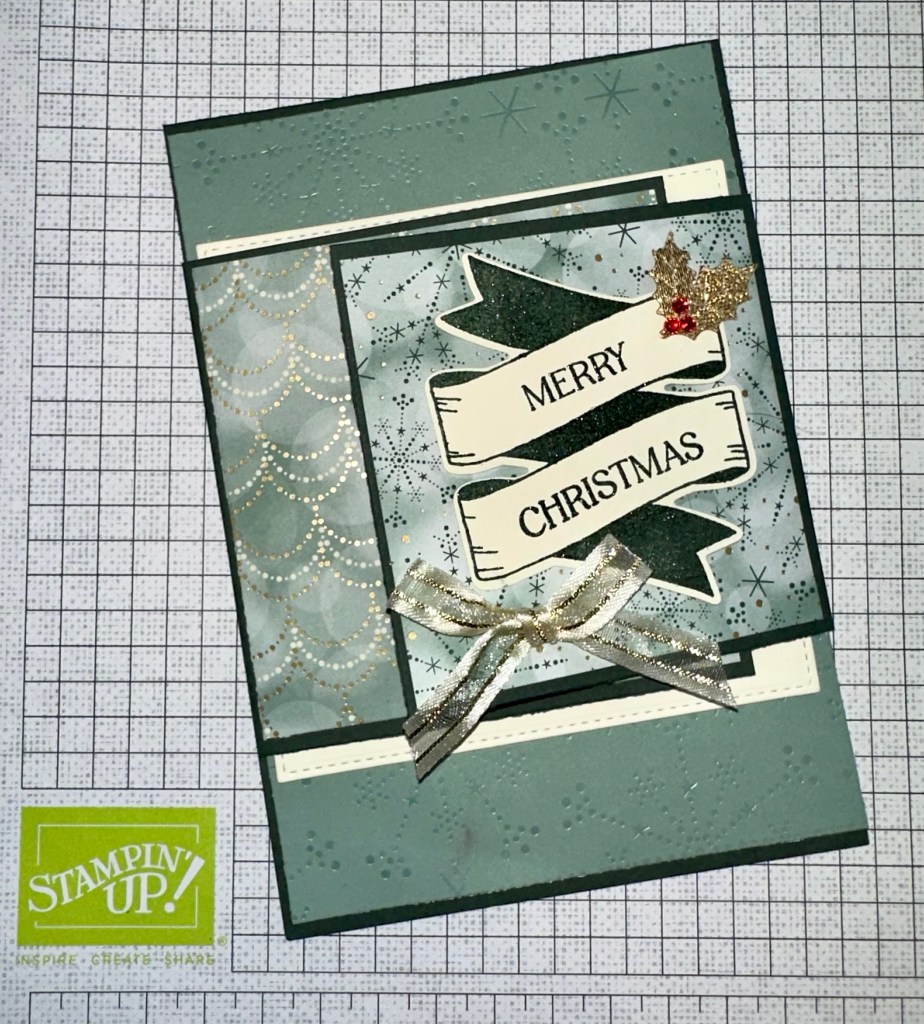
Are you like me and left making your Christmas cards to the last minute? Yep, I did. But I have worked out a design for a card that is quick and easy to make multiples of with any products you have at home – it’s a great stash-busting design! For each card, I used a base cardstock colour, 3 different patterned papers and white or vanilla cardstock.
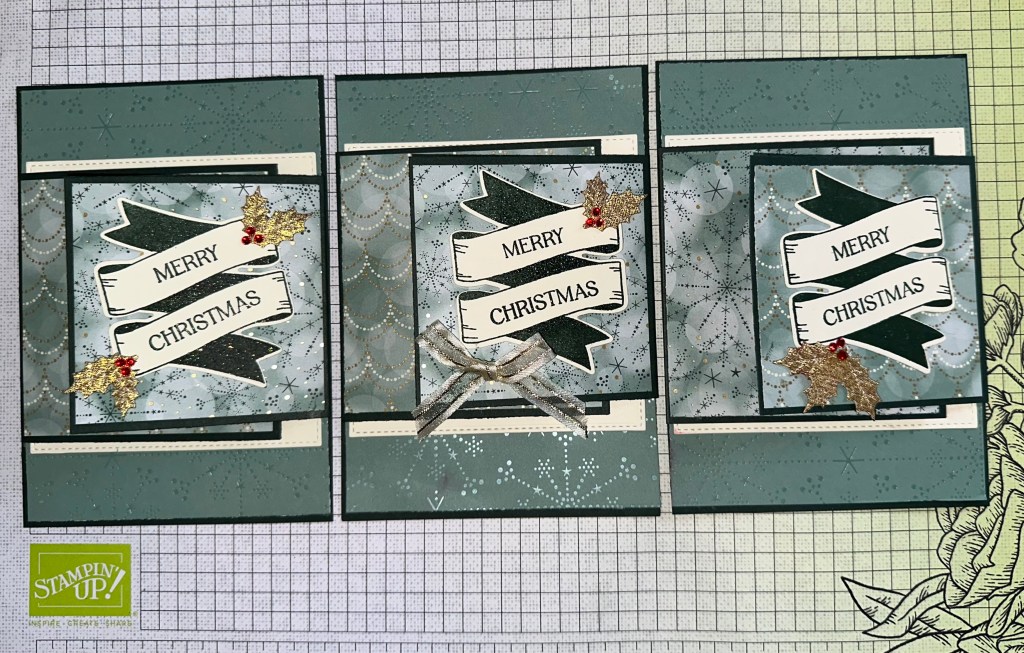
This is where Stampin’ Up is really handy – their cardstock, inks, ephemera, etc all colour co-ordinate. I bought the Lights Aglow Bundle this year and I am so glad I did. It came with stamps, dies, ribbon, ephemera and designer specialty paper that was perfect for this design.
Disclaimer: I saw a card in this shape on Pinterest but the link wasn’t active so while I had a photo of the finished card, I had to figure out the sizing and how to put it together myself, based on Australian measurements.
For this card I used the following Stampin’ Up products (other products have the manufacturer name in brackets after it):
- Lights Aglow Bundle which includes:
- Christmas Lights Stamp and Die bundle
- Brightest Glow Stamp and Die bundle
- Gold & Vanilla Satin-Edged Ribbon
- Festive Pearls
- Glimmer 12 x 12” specialty paper
- Festive Foils 12 x 12” specialty designer series paper
- Lights Aglow 6 x 6” specialty designer series paper
- A4 Cardstock in Evening Evergreen, Cherry Cobbler, Very Vanilla and Basic White
- Inks in Evening Evergreen and Cherry Cobbler
- Versamark
- Embossing Powder in Gold Tinsel (by Ranger)
- Gold Holly Leaves
- Red Adhesive Gems
- Adhesive Tape (Scotch 3M ATG)
- Glue Dots (these are a must-have for your stash!)
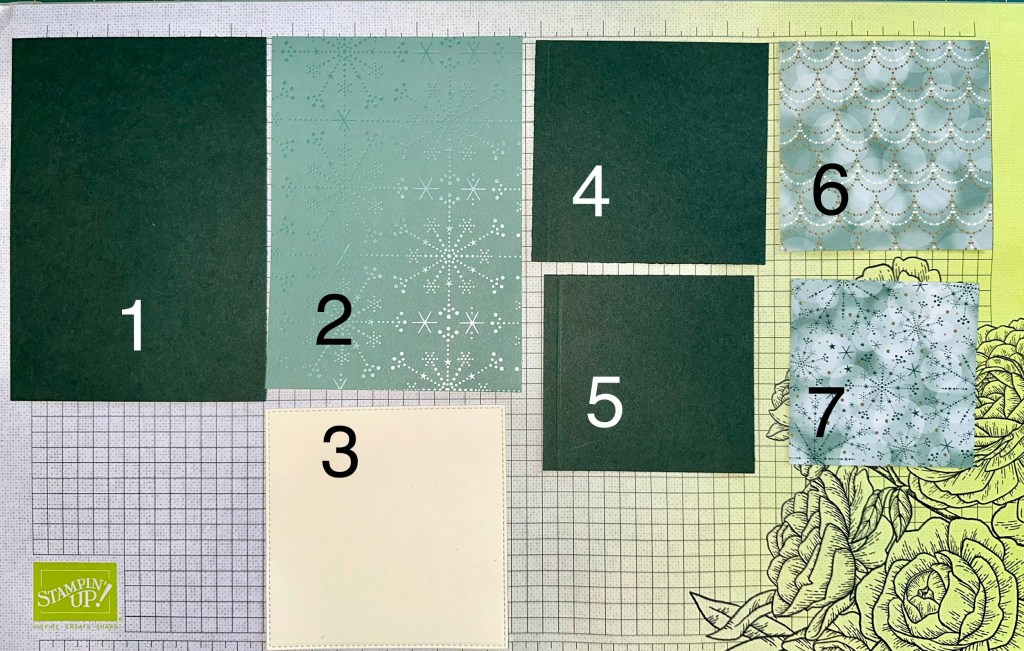
Cut Plan
To make the card cut the following (all dimensions are width x height are in millimeters)
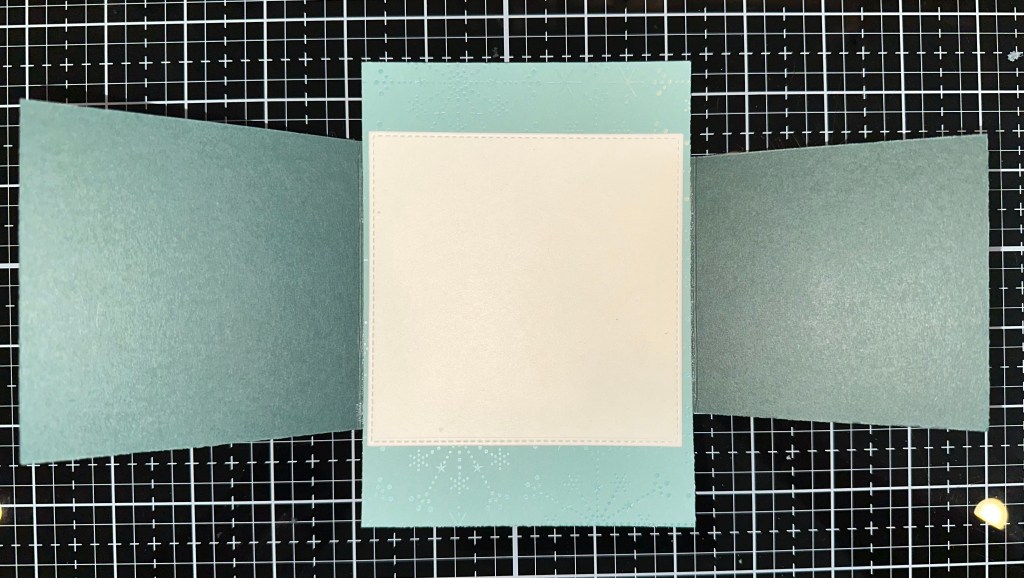
- Base Card – 105 x 149 mm
- Patterned Paper 1 – 101 x 145mm
- Writing area (very vanilla or basic white) – these were cut with a square stitched die – the piece measures 99 x 99mm.
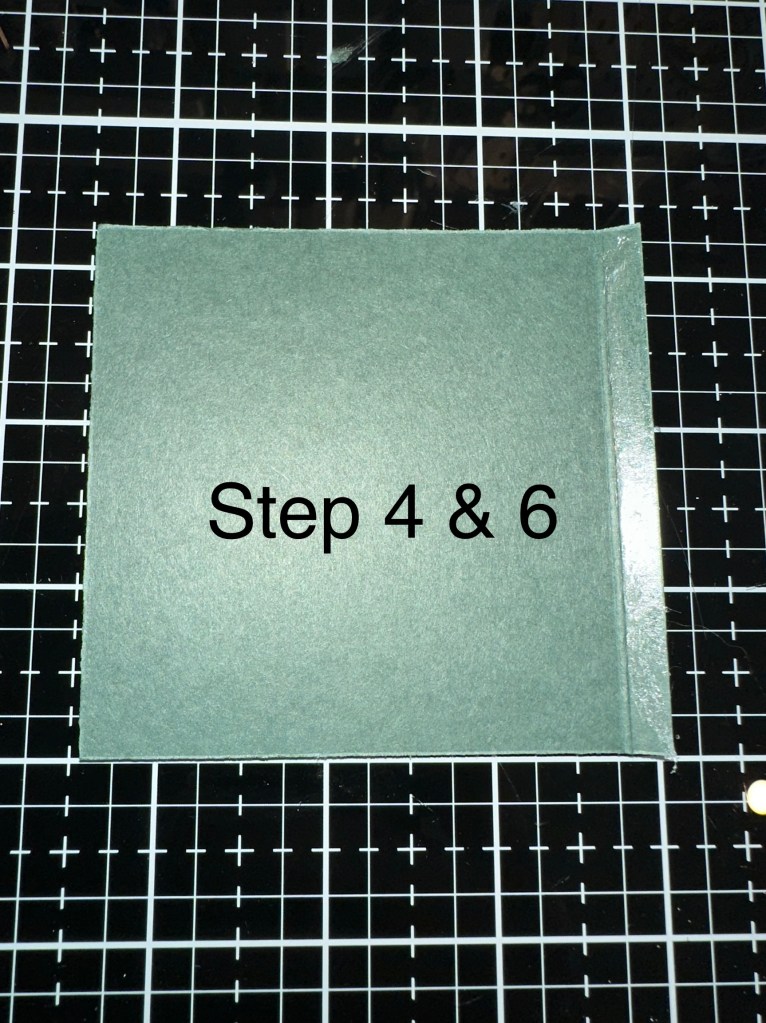
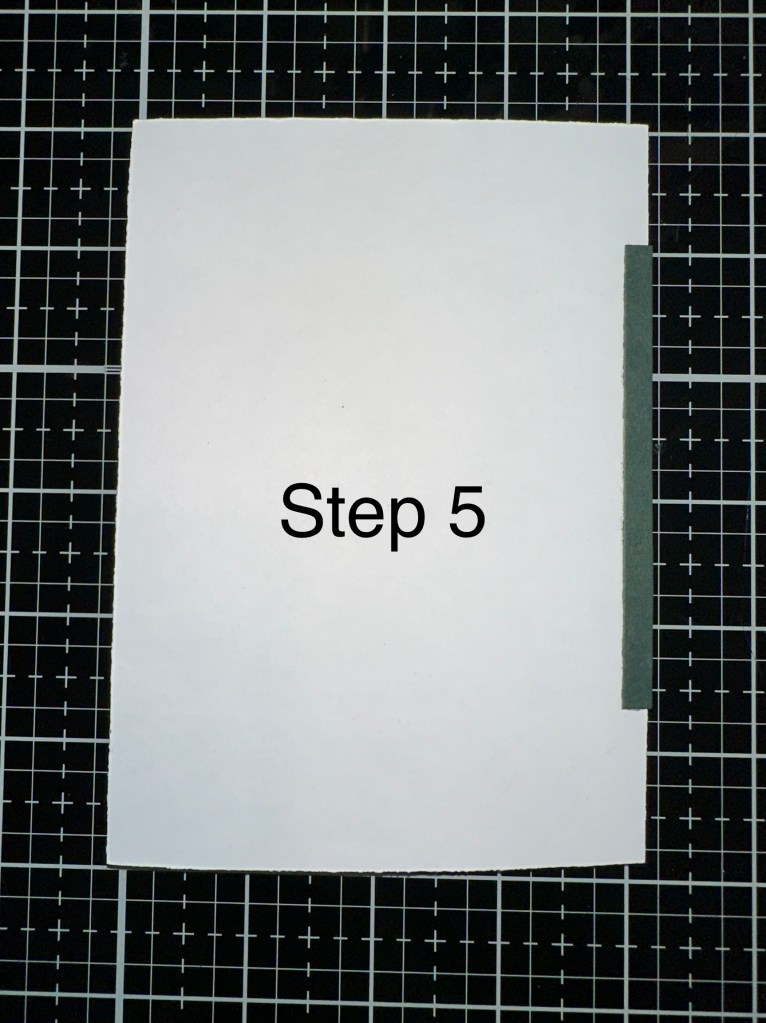
- Same colour as base card – 95 x 90 mm – score at 6mm (1/4”) at left side
- Same colour as base card – 85 x 80 mm – score at 6mm (1/4”) at right side
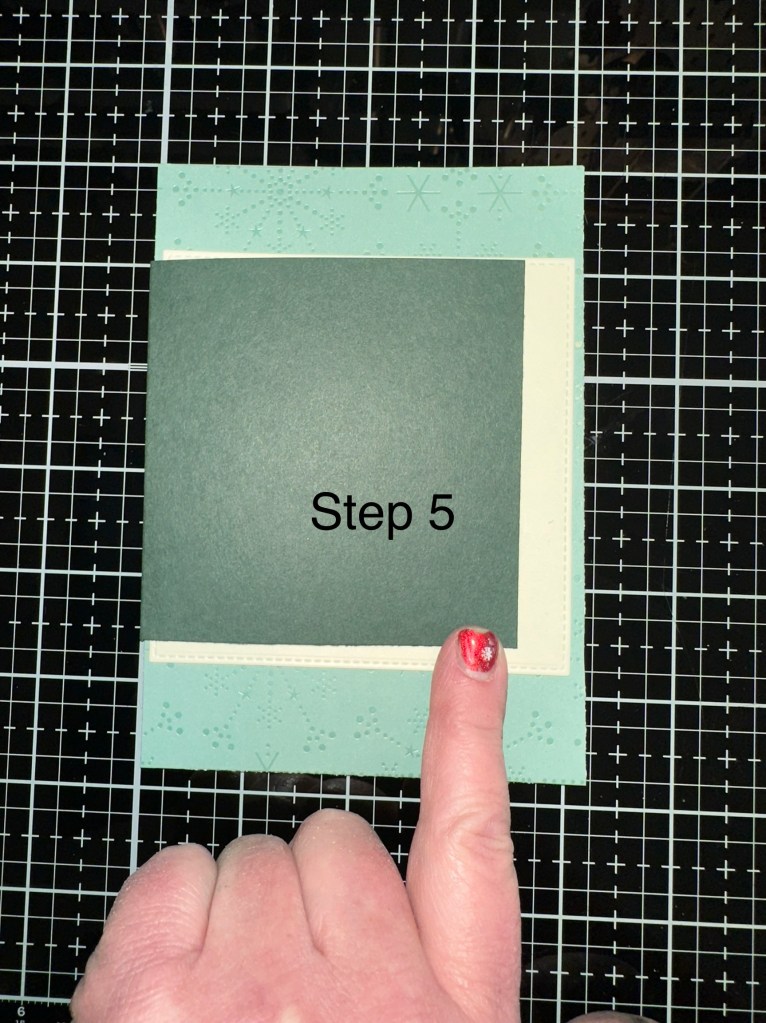
- Patterned Paper 2 – 85 x 85 mm
- Patterned Paper 3 – 75 x 75mm
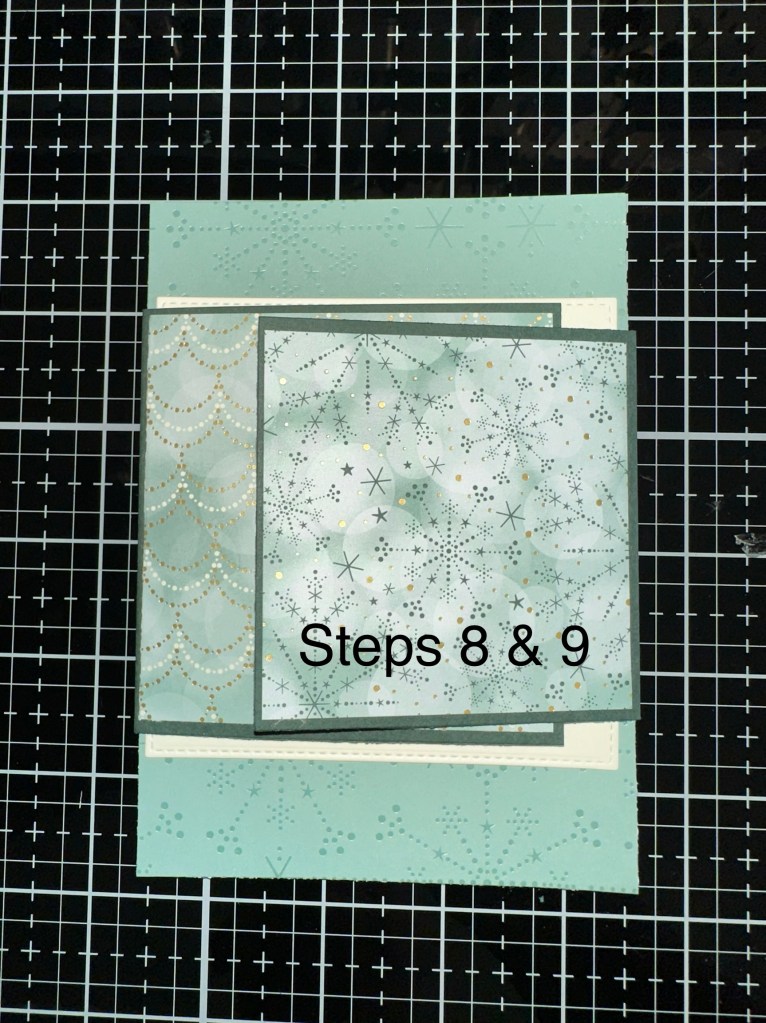
To Assemble Card:
- Cut out the pieces as per the cut plan above.
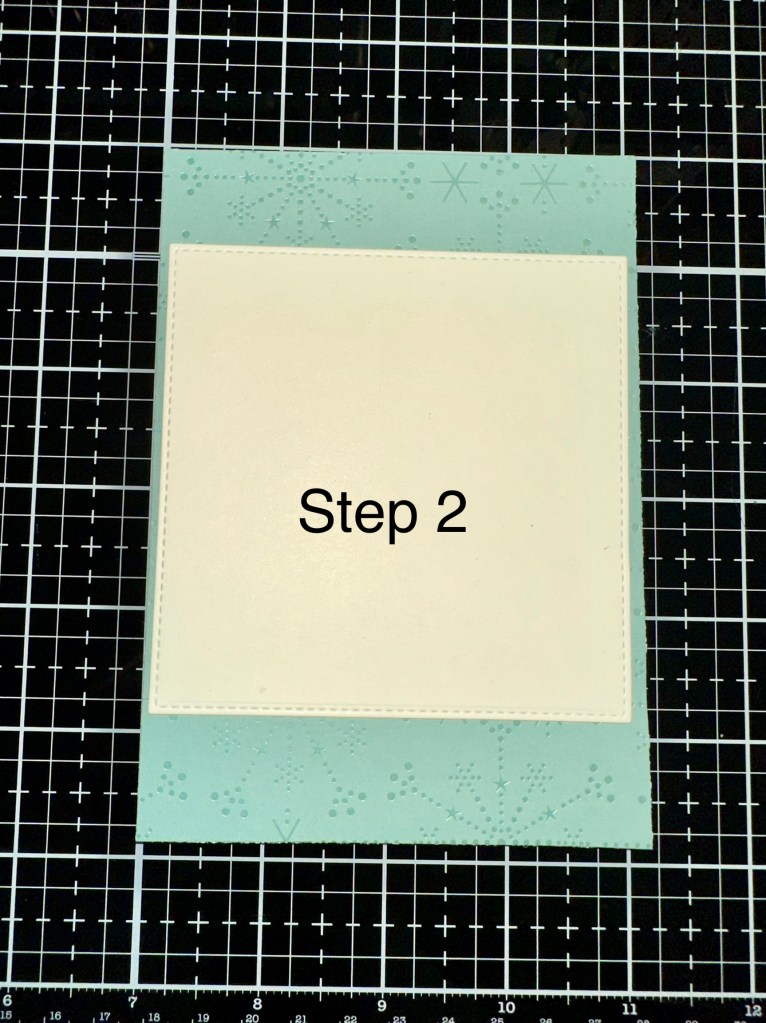
- Layer Piece 3 centred on Piece 2 and affix with your choice of adhesive.
- Fold along the fold lines of pieces 4 and 5. Burnish with bone folder.
- Put adhesive on the inside of the 6mm fold of piece 4.
- Align piece 4 to the middle of the piece 2 and adhere the fold to the back of piece 2.
- Put adhesive on the inside of the 6mm fold of piece 5.
- Align piece 5 to the middle of piece 2, over piece 4, and adhere the fold to the back of piece 2.
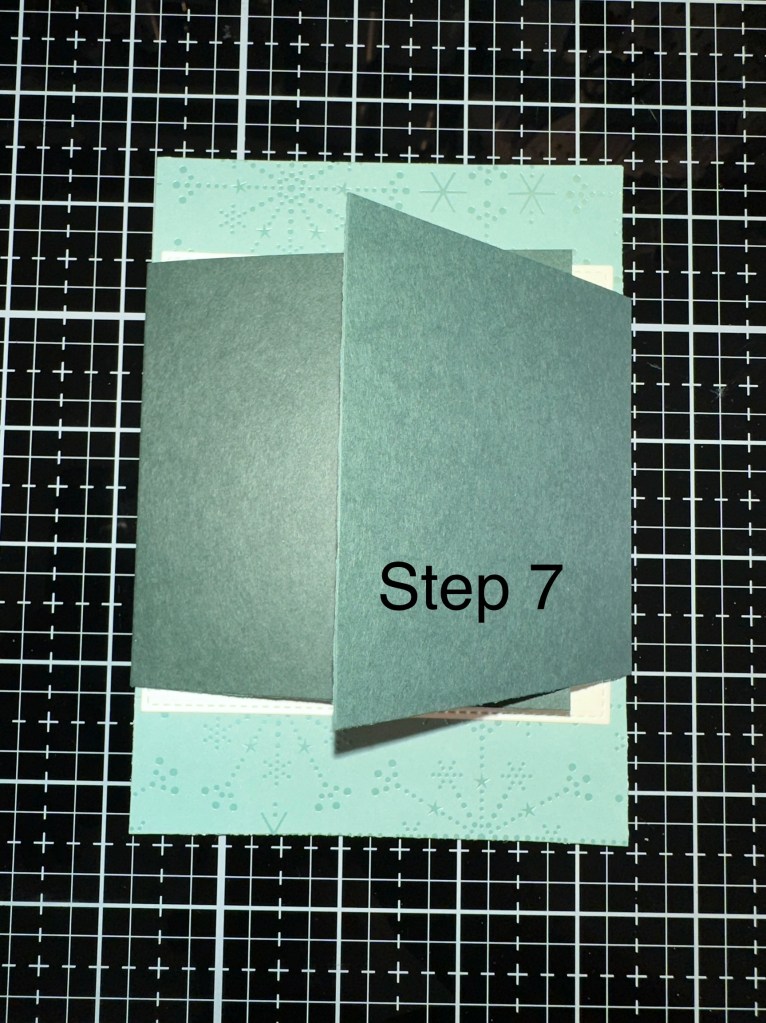
- Put adhesive on piece 6 and affix it centred on piece 4.
- Put adhesive on piece 7 and affix it centred on piece 5.
- Put adhesive on the back of piece 2 and affix it centred on piece 1.
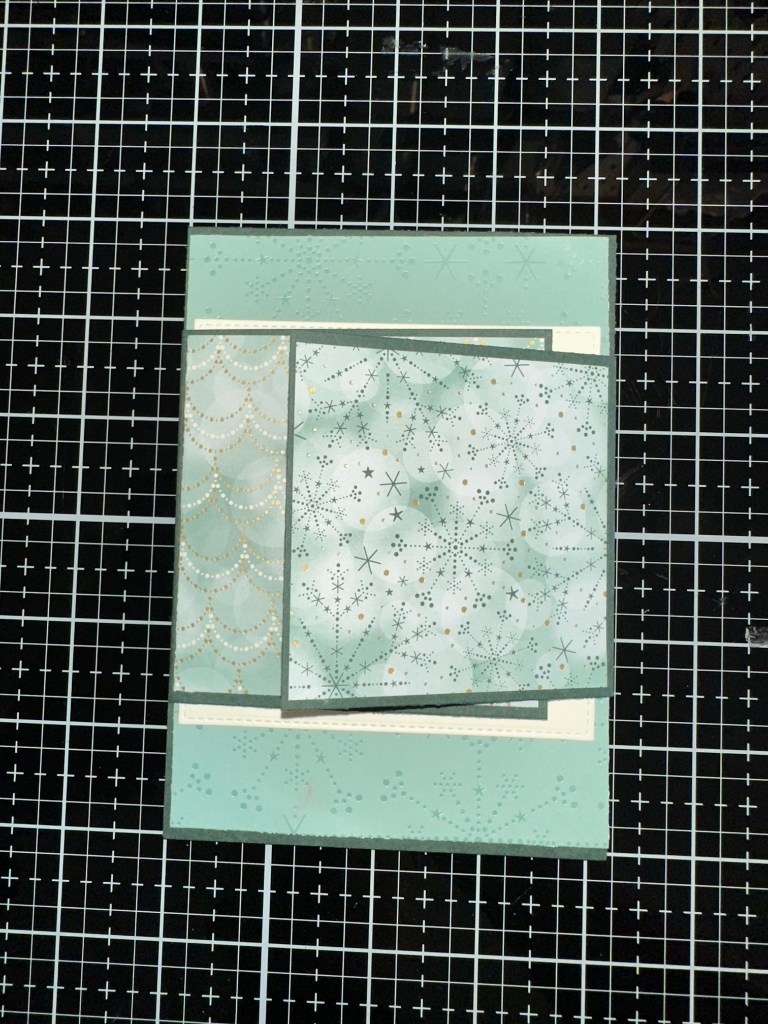
Your card is now ready to decorate with stamps, embossing powder and ephemera!
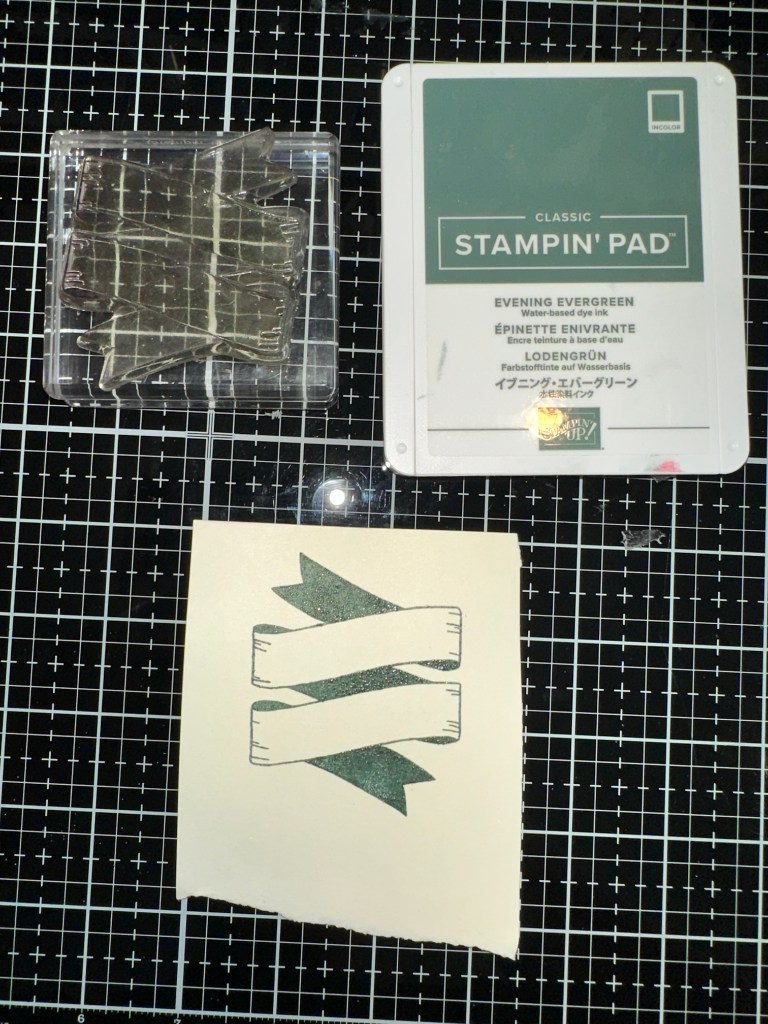
I used a variety of decorations for the front of the card including sentiments made using the stamp and die bundles from the Lights Aglow Suite from Stampin’ Up. I also used Stampin’ Up ephemera which included Vanilla and Gold Ribbon, the Gold Holly Leaves, Red Festive Pearls, and Red Jewels. I affixed the Holly Leaves and Ribbon with Glue Dots (the best for this stuff!). Sentiments were stamped with Evening Evergreen ink and embossed with Holographic Embossing Powder (by Ranger) or with Versamark and Gold Tinsel Embossing Powder (by Ranger).
Feel free to experiment with whatever you have on hand and make the design your own!
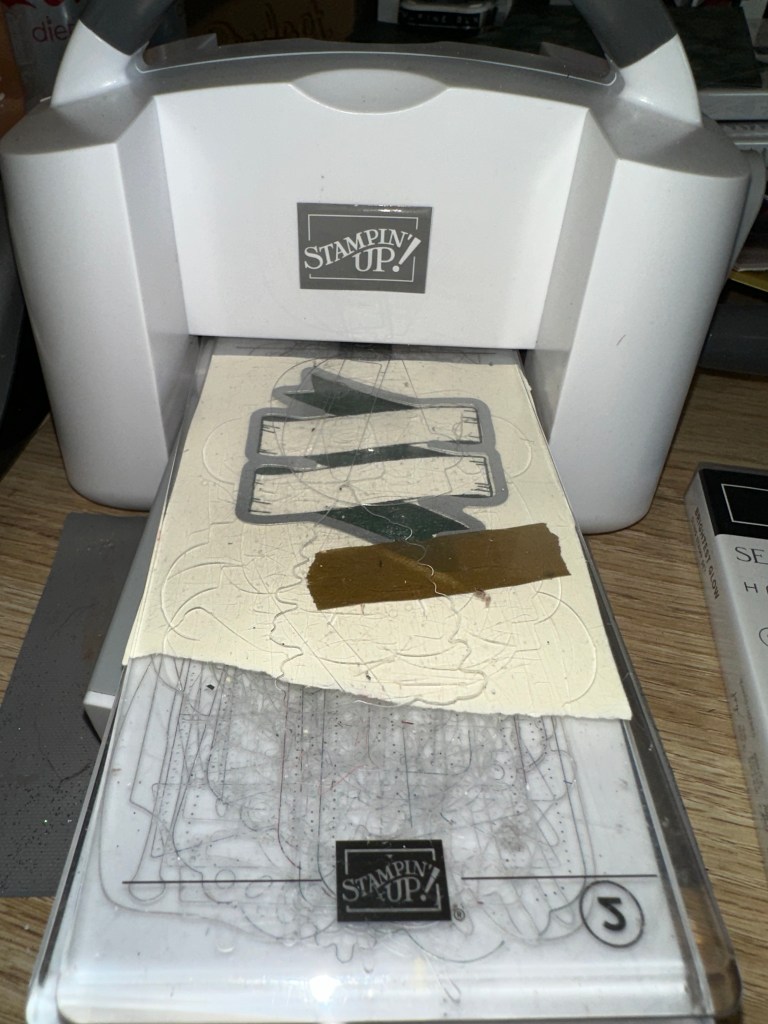
Pro Tip: I use an electric die cutting machine for most cuts but I have to admit, I adore my Stampin’ Up Mini Cut ‘n Emboss machine. It sits on my desk and is perfect to run smaller dies and embossing folders through quickly without breaking my workflow!
Enjoy experimenting with your own cards! Please share your makes on socials and tag me #stampdogs and #drunkdogcreative
Merry Christmas and Happy New Year!
About StampDogs and Stampin’ Up
Stamp Dogs is a ‘side hussle’ for me here at Drunk Dog Creative. I added card making to my crafty repertoire a couple of years ago and discovered Stampin’ Up. They have amazing products at good prices and the best part is….they all coordinate with each other …which makes being creative even easier! So I signed up as an Independent Distributor (mainly to get the personal discount on the products I was purchasing!) and Stamp Dogs came into being.
Independent Demonstrators get generous discounts on their purchases, can earn free goodies, and have early access to purchase items from the mini-catalogs and new annual catalogs. If you are interested in joining my team as a demonstrator, even if it’s just as a hobby demonstrator, then please contact me at info@drunkdogcreative.com. You can also find out more information or even join online HERE.
Finally… it’s been my long-standing practice to donate a big chunk of any profits I make from my crafting hobbies to Dachshund Rescue Australia. So, if you decide to purchase Stampin’ Up products from me, then you’re also helping support a wonderful charity.
If you are in Australia, and want a catalog sent to you, then please email me at info@drunkdogcreative.com and I’ll make sure to post one out to you! You can also shop at stampdogs.stampinup.net.
Marcus, Hugo and I thank you!
Major thanks to Dachshund Rescue Australia for Hugo – In this case, he rescued Marcus and I!


Leave a comment