

The inspiration for this card came from Jan B’s blog. She makes a similar one for a 6×6″ card and gives measurements for USA sized cards. I’ve modified it somewhat to fit an Australian Metric A6 card. So for this tutorial, I’m only going to give the cut plan and instructions for the metric card. If you’re interested in the USA sizing, please go visit Jan B’s post and get what you need from there. In my ‘day job’ I’m a Professor so I do believe in giving credit where credit is due. JanB is a fabulous papercrafter and you might find some other treasures on her blog!
This card takes a single image from some Designer Series Paper (DSP) or patterned paper, and cuts it into strips, then mats those strips before arranging them on the card front. You still get an idea of the original image but it has a bit of dimension and interest to it when it’s arranged this way.
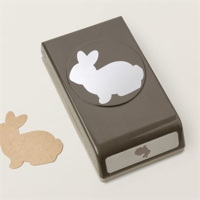
All the details and instructions are in the video as well as written below. Cutting the strips is a little tricky though, so I highly recommend you watch the video. In the video, I couldn’t resist doing something a little different and changed up the colours and added the adorable Easter Bunny. The end of the video shows you how to do the ribbon and sentiment like the other cards featured here and there is a link below to the video on how to make the Easter Bunny if you’re interested.
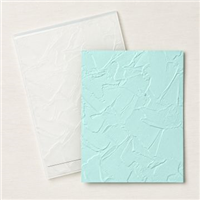
This is a great card to use up your DSP stash and can be adapted to suit any occassion, not just Easter or birthdays. The Card Front is also embossed to give the card dimension. A complete supply list is given below. Use your creative imagination and share with me on socials how you’ve given this design your own spin!
Video Tutorial
Cut Plan
Basic White Cardstock (Crumb Cake Cardstock in the video except for writing panel):
- Card Base: 210mm x 148mm scored at 105mm on long side
- Card Front: 138mm x 95mm
- Inside Writing Panel: 138mm x 95mm
- scrap for sentiment
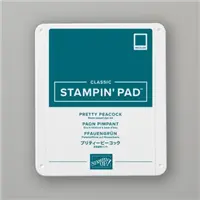
Coloured Cardstock (Pretty Peacock in the video)
- Mat: 143mm x 100mm
- Inside Mat: 143mm x 100mm
- Strip Matting: 137mm x 93mm
- scrap for sentiment
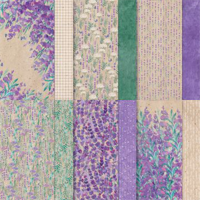
Designer Series Paper
- Piece to cut strips from: 109mm x 89mm
Other supplies
- Embossing Folder (I used “Painted Texture” from Stampin’ Up!)
- Ribbon (30cm)
- Optional Die Cuts (ie the Easter Bunny)
- Optional Embellishments (sequins, jewels, beads, etc)
Instructions
Cutting the Strips
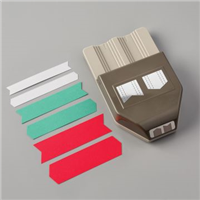
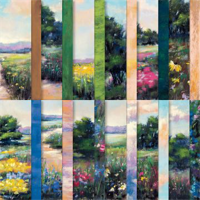
For this particular card, it is really best to watch the video. Cutting the strips can be confusing and the video really provides comprehensive information to make it easier. The photo below is also provided for reference.
- Cut the Strip Matting into the correct size strips (see image below).
- 4 x 17mm wide – remove 38mm from the bottom of two of these strips and 14mm from the bottom of two of the strips.
- 2 x 20 mm wide – remove 26mm from the bottom of these two strips.
- 1 x 29 mm wide
- Cut the DSP image into strips… one at a time:
- Strip 7 (right side of DSP): Cut at 13mm wide, remove 19mm from the top and bottom,.
- Strip 6: 16mm wide, remove 13mm from the top and bottom.
- Strip 5: 13mm wide, remove 7mm from the top and bottom.
- Strip 4: 25 mm wide, do not remove anything from the top or bottom.
- Strip 3: 13mm wide, remove 7mm from the top and bottom.
- Strip 2: 26mm wide, remove 13mm from the top and bottom.
- Strip 1: 13mm wide, remove 19mm from the top and bottom (the width of this strip should be the right width without cutting but if any of your previous cuts were off by even a fraction of a mm, you might have to trip this last one to 13mm wide).
- Glue each Image Strip to its corresponding Mat Strip
Pro Tip : Be very careful to always keep the image strips in order and the the right way up. They are very easy to mix up and if you do, the final image won’t make sense.

Assembling the Card
- Cut all pieces as per the cut plan.
- Cut and assemble the strips as per above.
- Score and fold the Card Base.
- Affix the Mat to the front of the CardBase
- Place the Card Front in an Embossing Folder and run through your die cut machine.
- Mark the centre of the top edge of the Card Front with a pencil (at the 69mm mark) to make aligning the first strip easy.
- Using Dimensions (or foam tape), affix the Centre Strip (#4) to the centre of the card front, making sure it is straight. Once the first one is correct, the others will be easier.
- Alternating each side, affix the remaining strips in place using Dimensionals or foam tape.
- Affix the Card Front to the front of the Card Base.
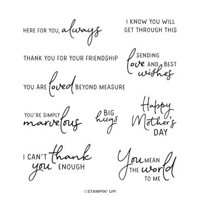
- Decorate with sentiments, die cuts, ribbon, and/or other embellishments.
- Affix Inside Mat to inside of the Card Base.
- Affix Inside Writing Panel to Inside Mat.
- Options can include rounding the edges of the Mat and Panel, using a punch to create fancy corners, stamp a sentiment or image on the Writing Panel, etc. Let your imagination run wild! Release your creative spirit!
Happy Crafting!
Bonus Video Short – Making the Easter Bunny
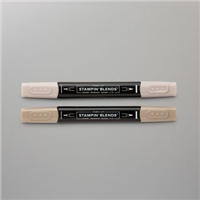
If you want to learn how I made the Easter Bunny for the card in the video, you can watch this short video. The video also demonstrates the technique for using Stampin’ Blends (alcohol markers). The Easter Bunny stamp set and Punch are only available through April 2024. Once the new annual catalogue is released, they could be gone!
Supply List
The list below includes the supplies used to make the four cards above. All products in the list are available at the time of posting. Click on the products below to link to the shop or visit bridgeta.stampinup.net to browse my Stampin’ Up! store. I donate part of all profits to Dachshund Rescue Australia.


Price: $21.75


Marcus, Polly and Hugo, the dogs of Drunk Dog Creative, want to remind you to subscribe to this blog, share with your friends, and follow Drunk Dog Creative on all the socials.
Woof woof. Sit. Stay. Follow us. Good human.
Need supplies?
You can shop for Stampin’ Up! products at https://bridgeta.stampinup.net. You can also click on any of the items in the supply lists in tutorial posts. A percentage of any profit from my SU sales is donated to Dachshund Rescue Australia, so you get great products at a good price and help gorgeous dogs like Hugo find their furever home!
Join my team!
If you spend over $169 why not consider joining my team as an Independent Demonstrator? You will get $265 worth of your choice of products for only $169 and be entitled to a minimum 20% discount on your future orders. Many people join just to be Hobby Demonstrators for the personal discount!


Leave a comment