
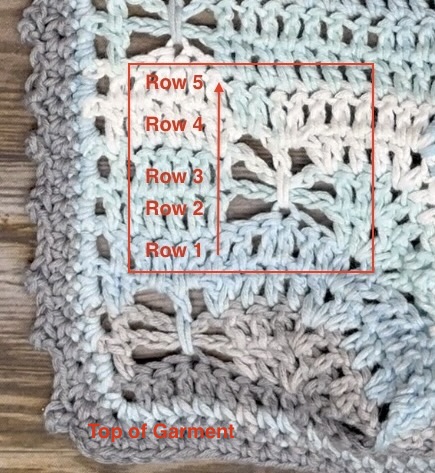
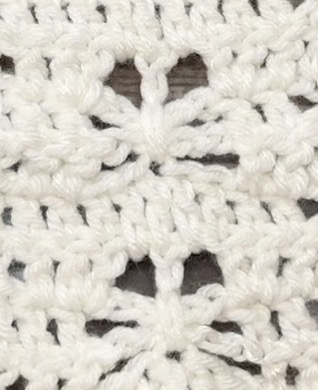
The Butterfly Stitch is a beautiful decorative stitch that is easier to do than it may look at first. It is a stitch that is worked top down – meaning you create your project from the top to the bottom. The top of the butterfly is created first and the bottom of the butterfly is created last (see photo below). The butterfly motif is 5 stitches wide and 5 rows tall. It is usually worked in double crocht (UK treble crochet) but can be worked in other stitches, however, smaller stitches (such as half double crochet (UK half treble crochet) give less definition to the butterfly. It is not recommended for use with single crochet stitches.
The video below demonstrates how to make the butterfly stitch. Normal stitches that even beginners should know, are demonstrated at normal speed but the special stitches are demonstrated more slowly. The video is likely the best way to understand how to do this stitch but written instructions are also given. Keep an eye out for patterns on this blog and in Ravelry that use this beautiful stitch motif!
Video Tutorial
Instructions
The Butterfly Stitch motif is made by a combination of stitches done over a space that is 5 stitches wide and 5 rows tall. It is usually done within a row of double crochet stitches (UK treble crochet) but can be adapted to other stitch heights if necessary. The instructions below are based on US terms (with UK terms in parenthesis) and are for the motif alone, ignoring whatever surrounding stitches might be in your pattern. It is best to allow at least 3-5 stitches on either side of each butterfly motif. The surrounding stitches are represented by elipses (…). The only ‘tricky’ stitch is the middle stitch of Row 4 which needs to encompass the two rows of chains. I highly recommend watching the video for that part.
- Row 1: … 5 dc (tc) …
- Row 2: … ch 5, sk 5 …
- Row 3: … ch 5, sk 5 …
- Row 4: …2 dc (2 tc) into stitch before chsts, ch 1, dc (tc) into 3rd skipped stitch of Row 1 below, encompassing the chains into the stitch, ch 1, sk remaining chsp, 2 dc (2 tc) in next dc …
- Row 5: … 1 dc (1 tc) in each st and chsp …
So if you had a row of 11 stitches, the pattern would look like this:
- Row 1: ch 3 (counts as first st), dc (tc) in each of the next 10 sts, turn.
- Row 2: ch 3, dc (tc) in each of the next 2 sts, ch 5, sk 5 sts of Row 1, dc (tc) in each of the next 3 sts, turn.
- Row 3: ch 3, dc (tc) in each of the next 2 sts, ch 5, sk the ch5sp below, dc (tc) in each of the next 3 sts, turn.
- Row 4: ch 3, dc (tc) in the next st, 2 dc (2 tc) in the next st (the last one before the chsp), ch 1, dc (tc) into the 3rd skipped st in Row 1 and complete the stitch encompassing the two chain rows into the stitch, ch 1, sk remainig chsp, 2 dc (2tc) in the next st, dc (tc) in each of the next two sts, turn.
- Row 5: ch 3, dc (tc) in each stitch or chsp to end of row, turn.
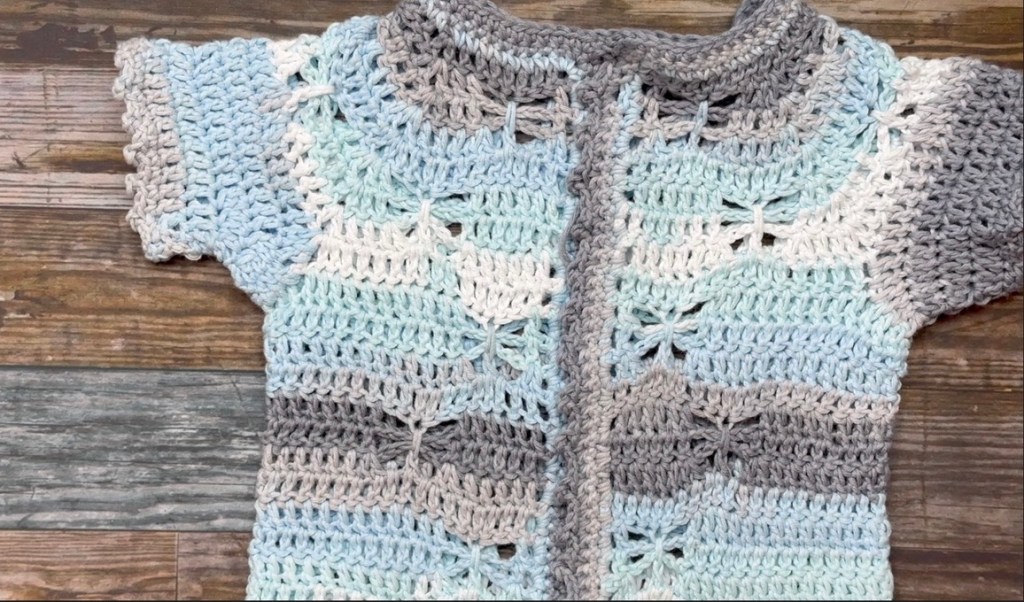
That’s how you make the butterfly stitch motif! Have a look on this blog and in Ravelry for Drunk Dog Creative Patterns that use this stitch such as the Butterly Blessings Baby Cardigan and the Entomology Wrap. Keep an eye out for future patterns too!
Happy hooking everyone!

Marcus, Polly and Hugo, the dogs of Drunk Dog Creative, want to remind you to subscribe to this blog, share with your friends, and follow Drunk Dog Creative on all the socials.
Woof woof. Sit. Stay. Follow us. Good human.
AND ON RAVELRY!


Leave a comment