


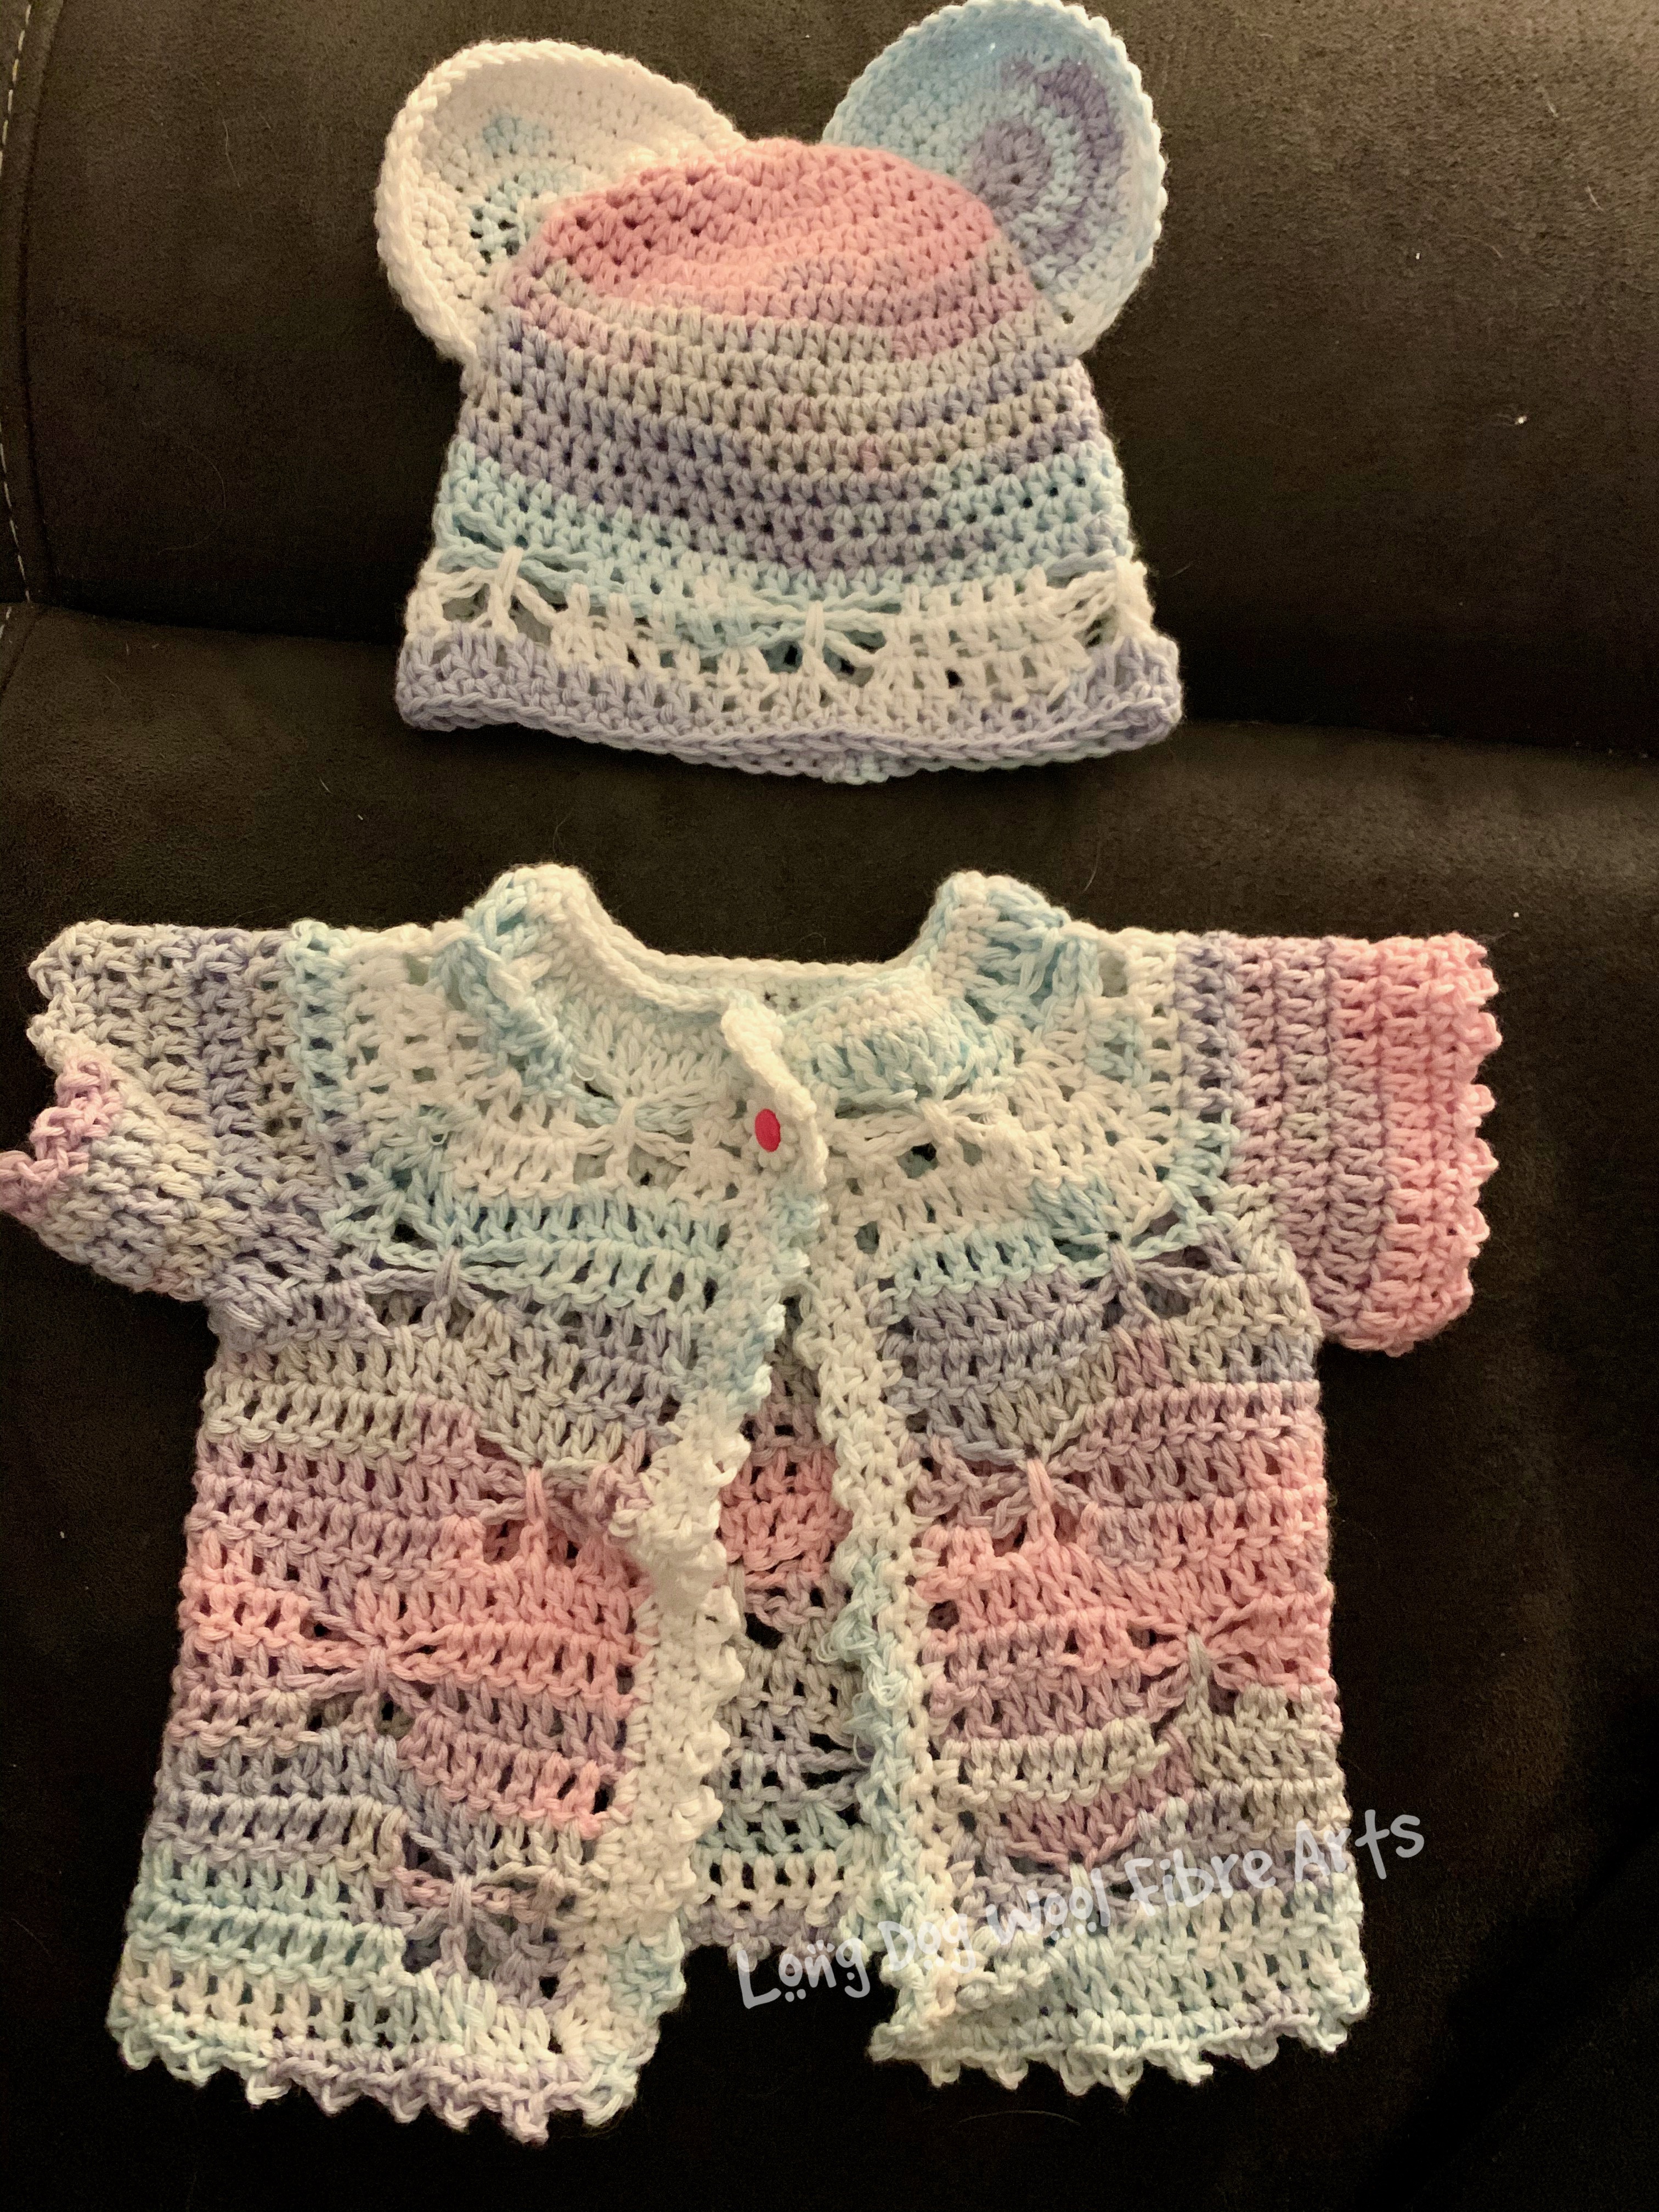
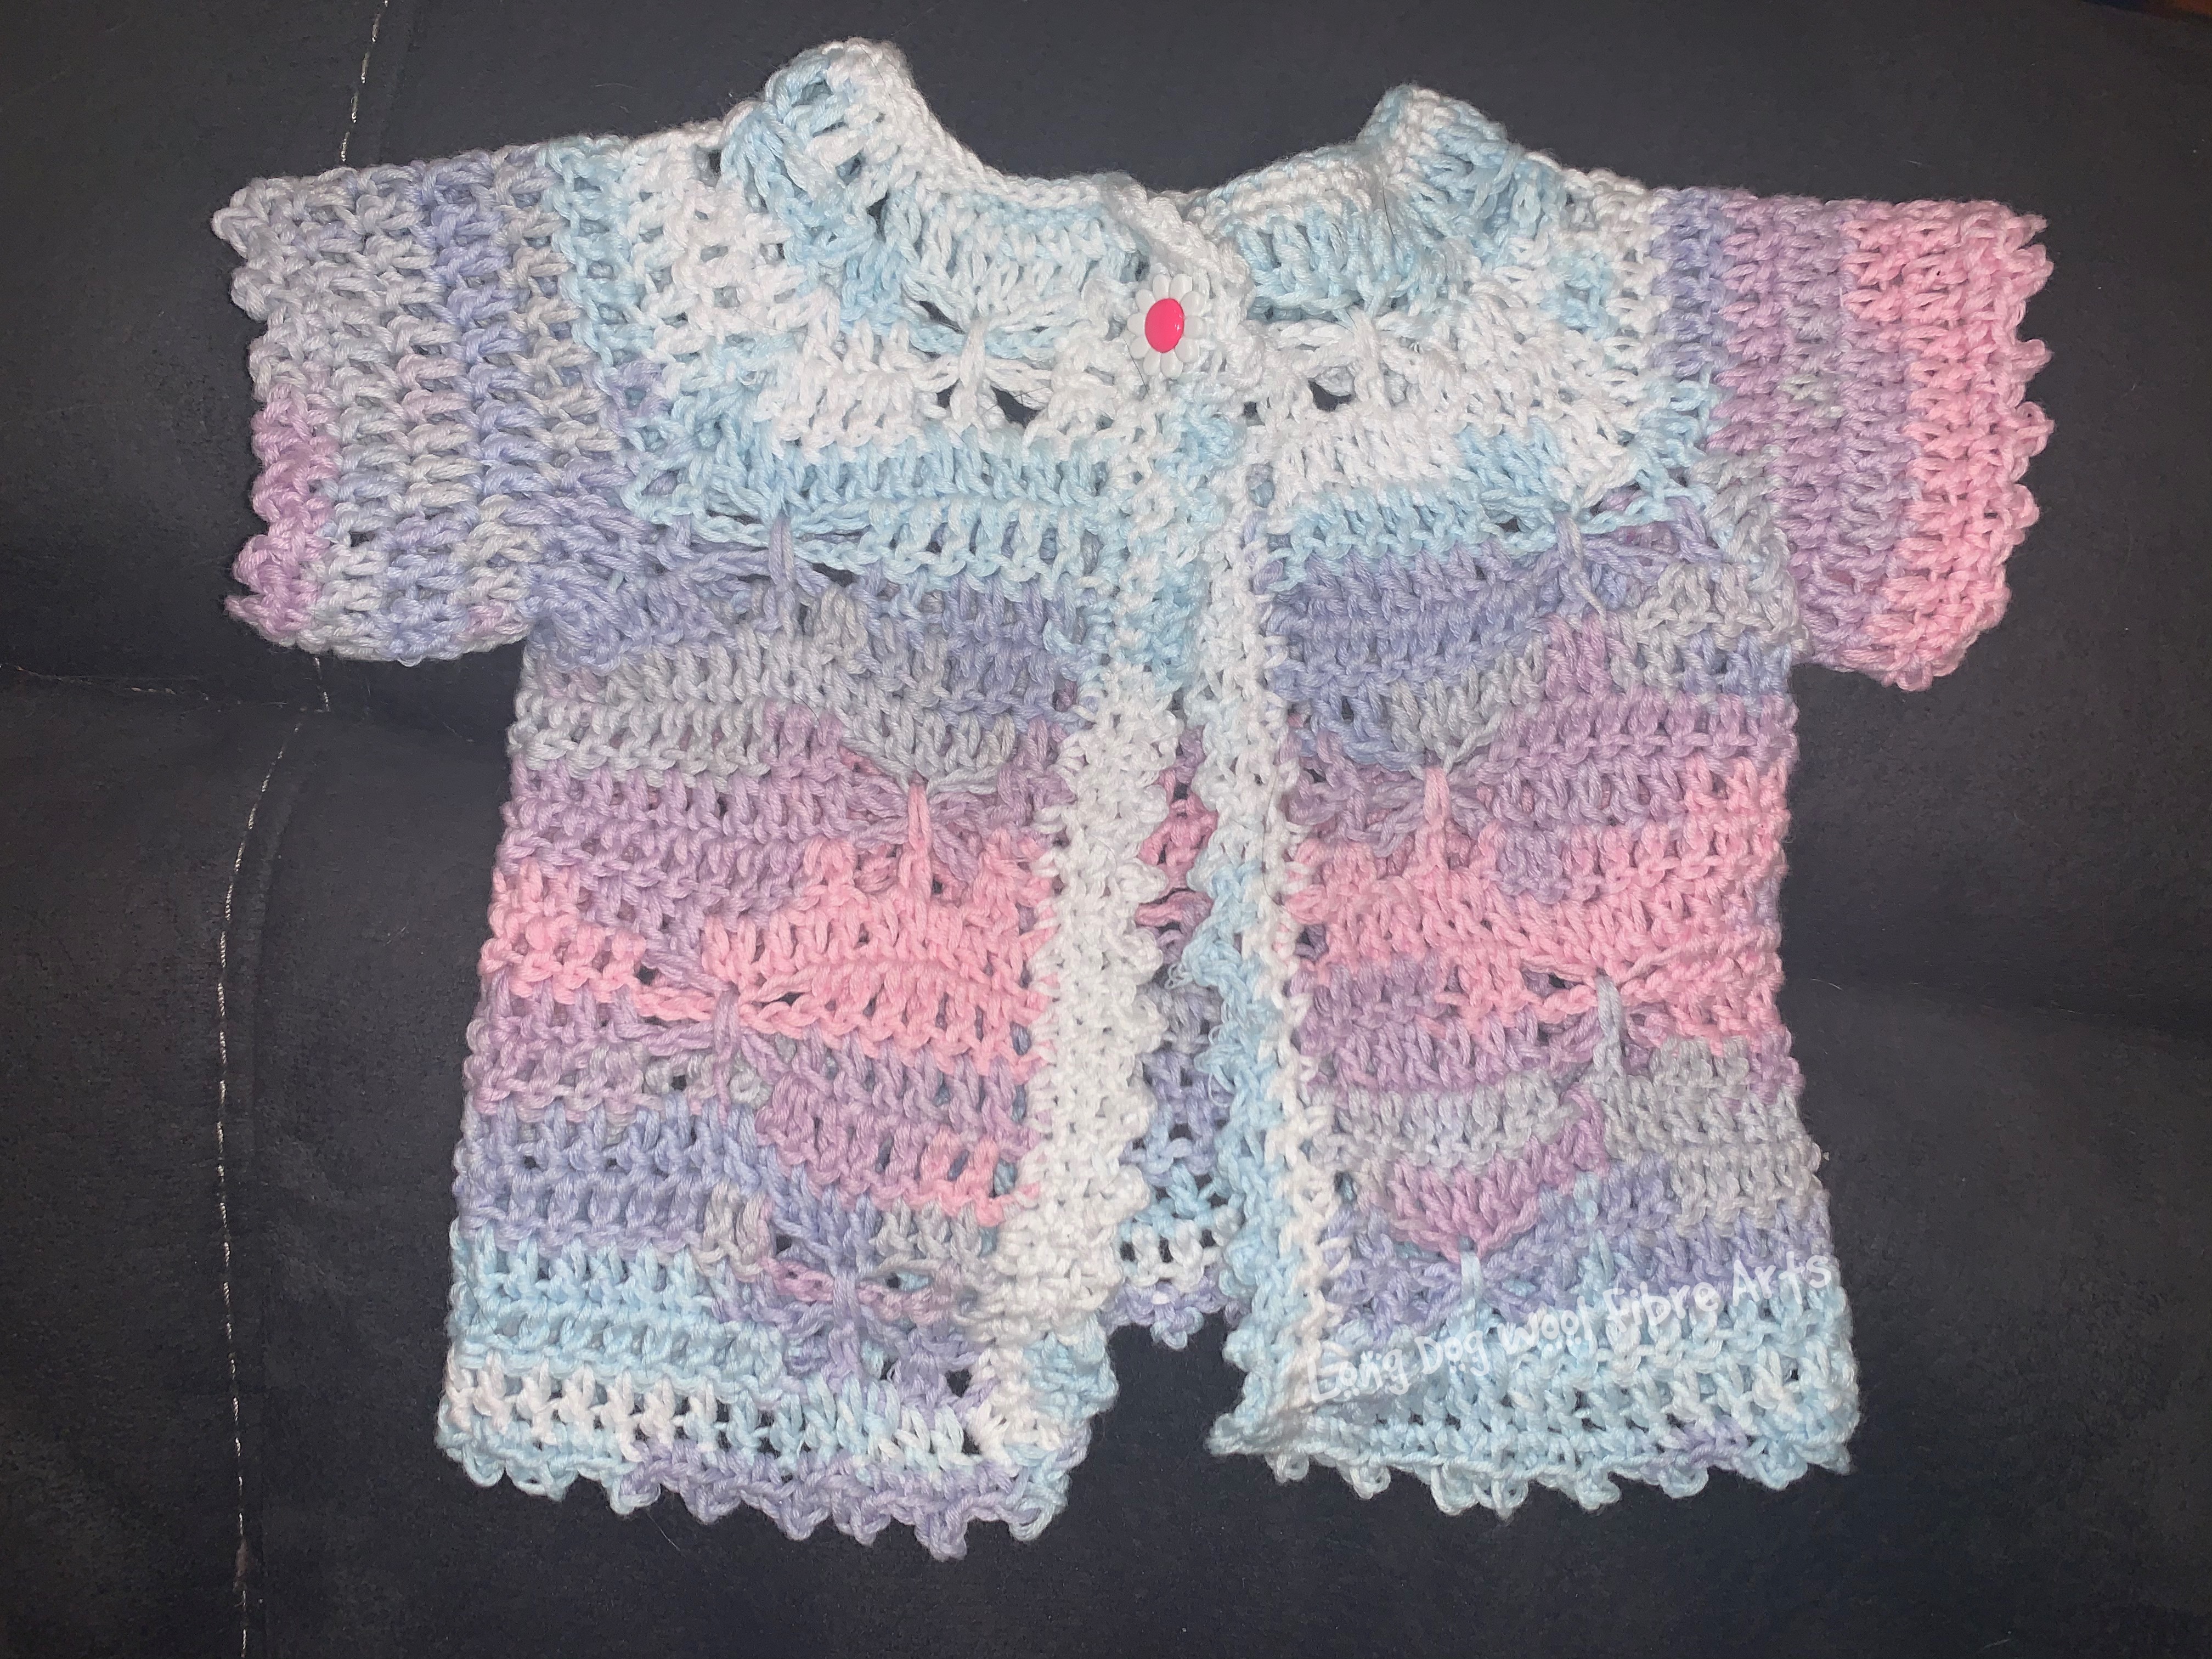


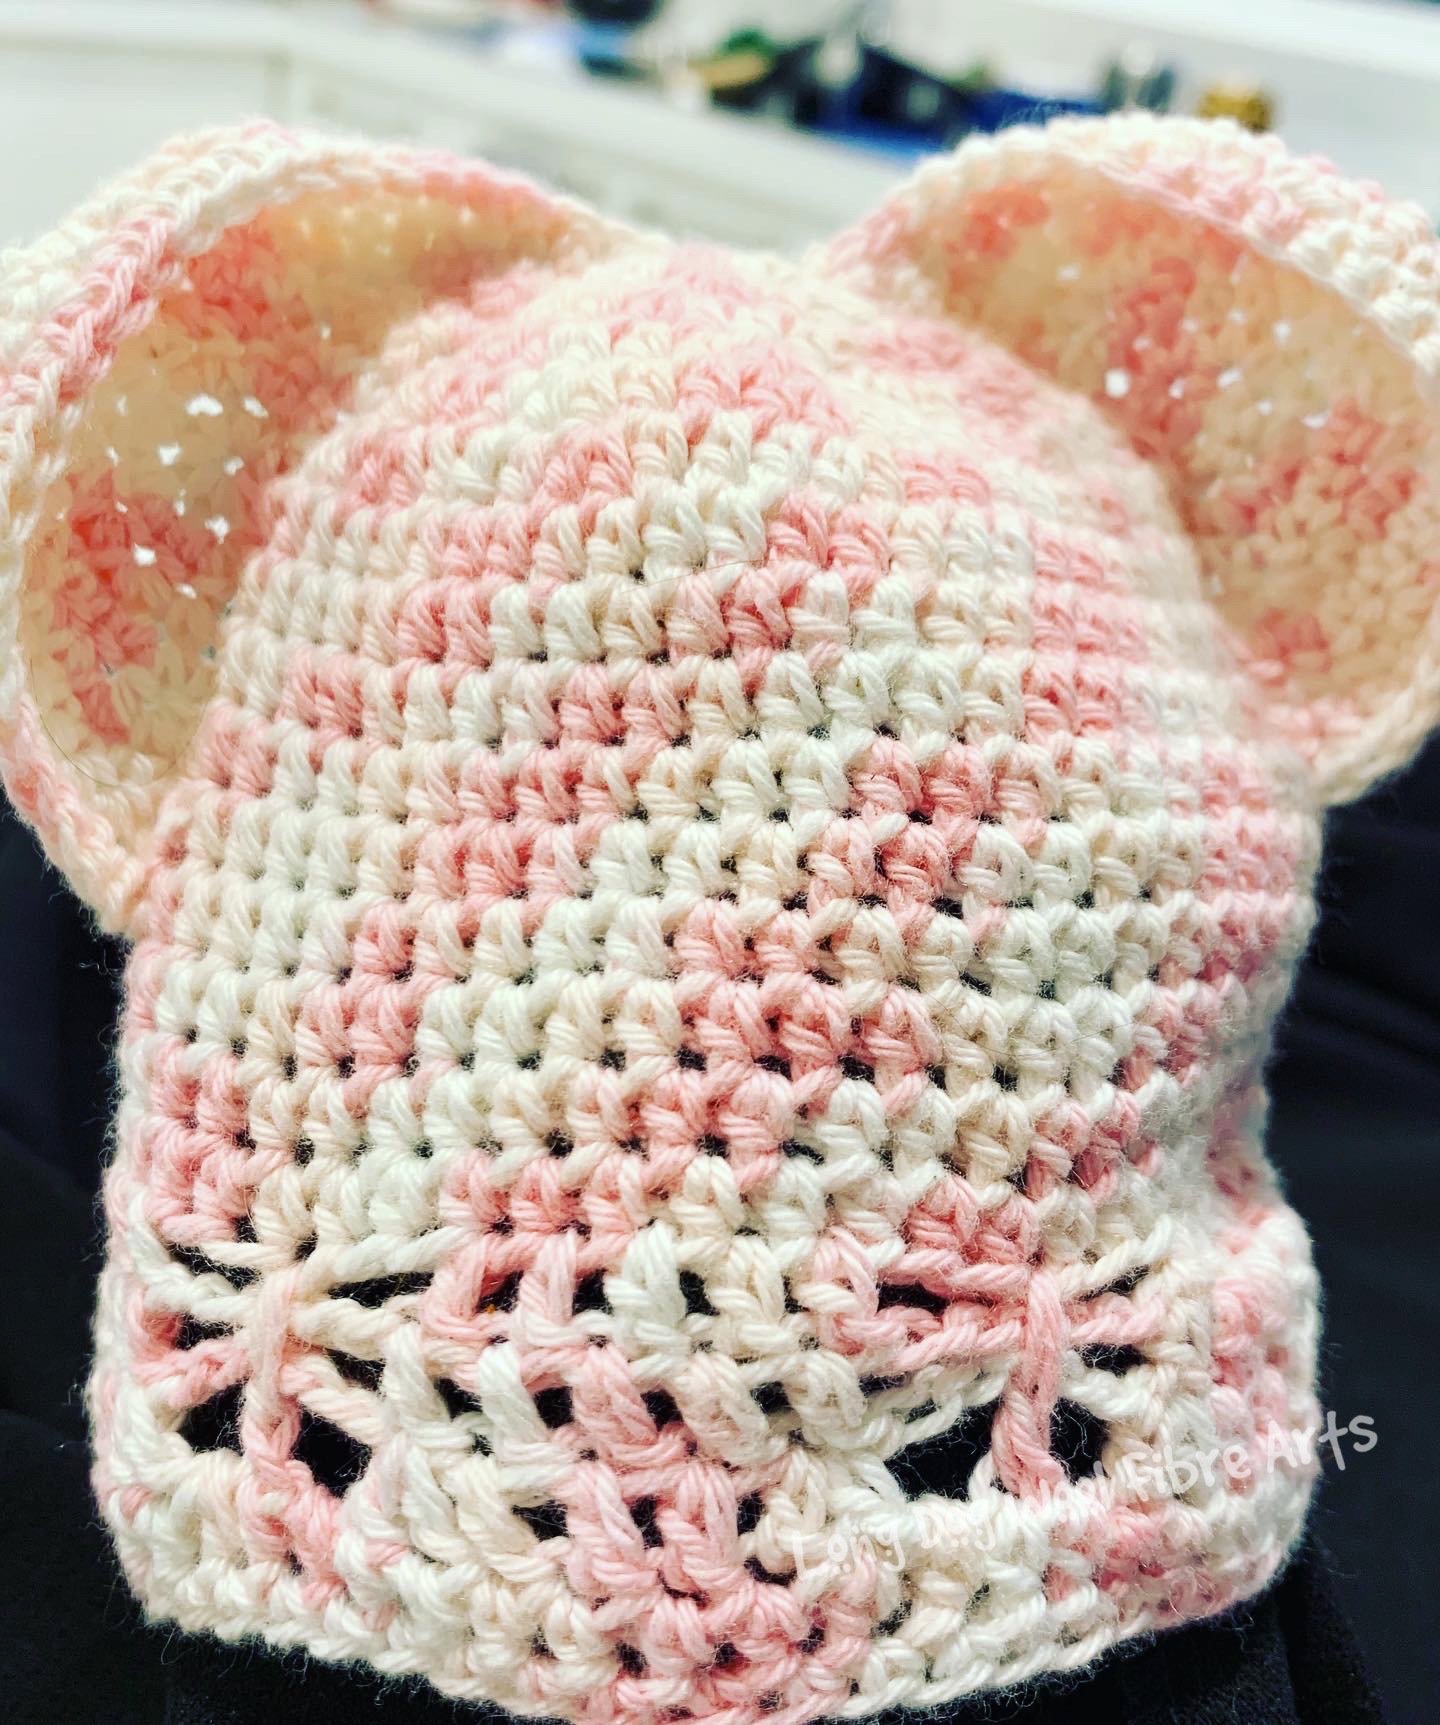
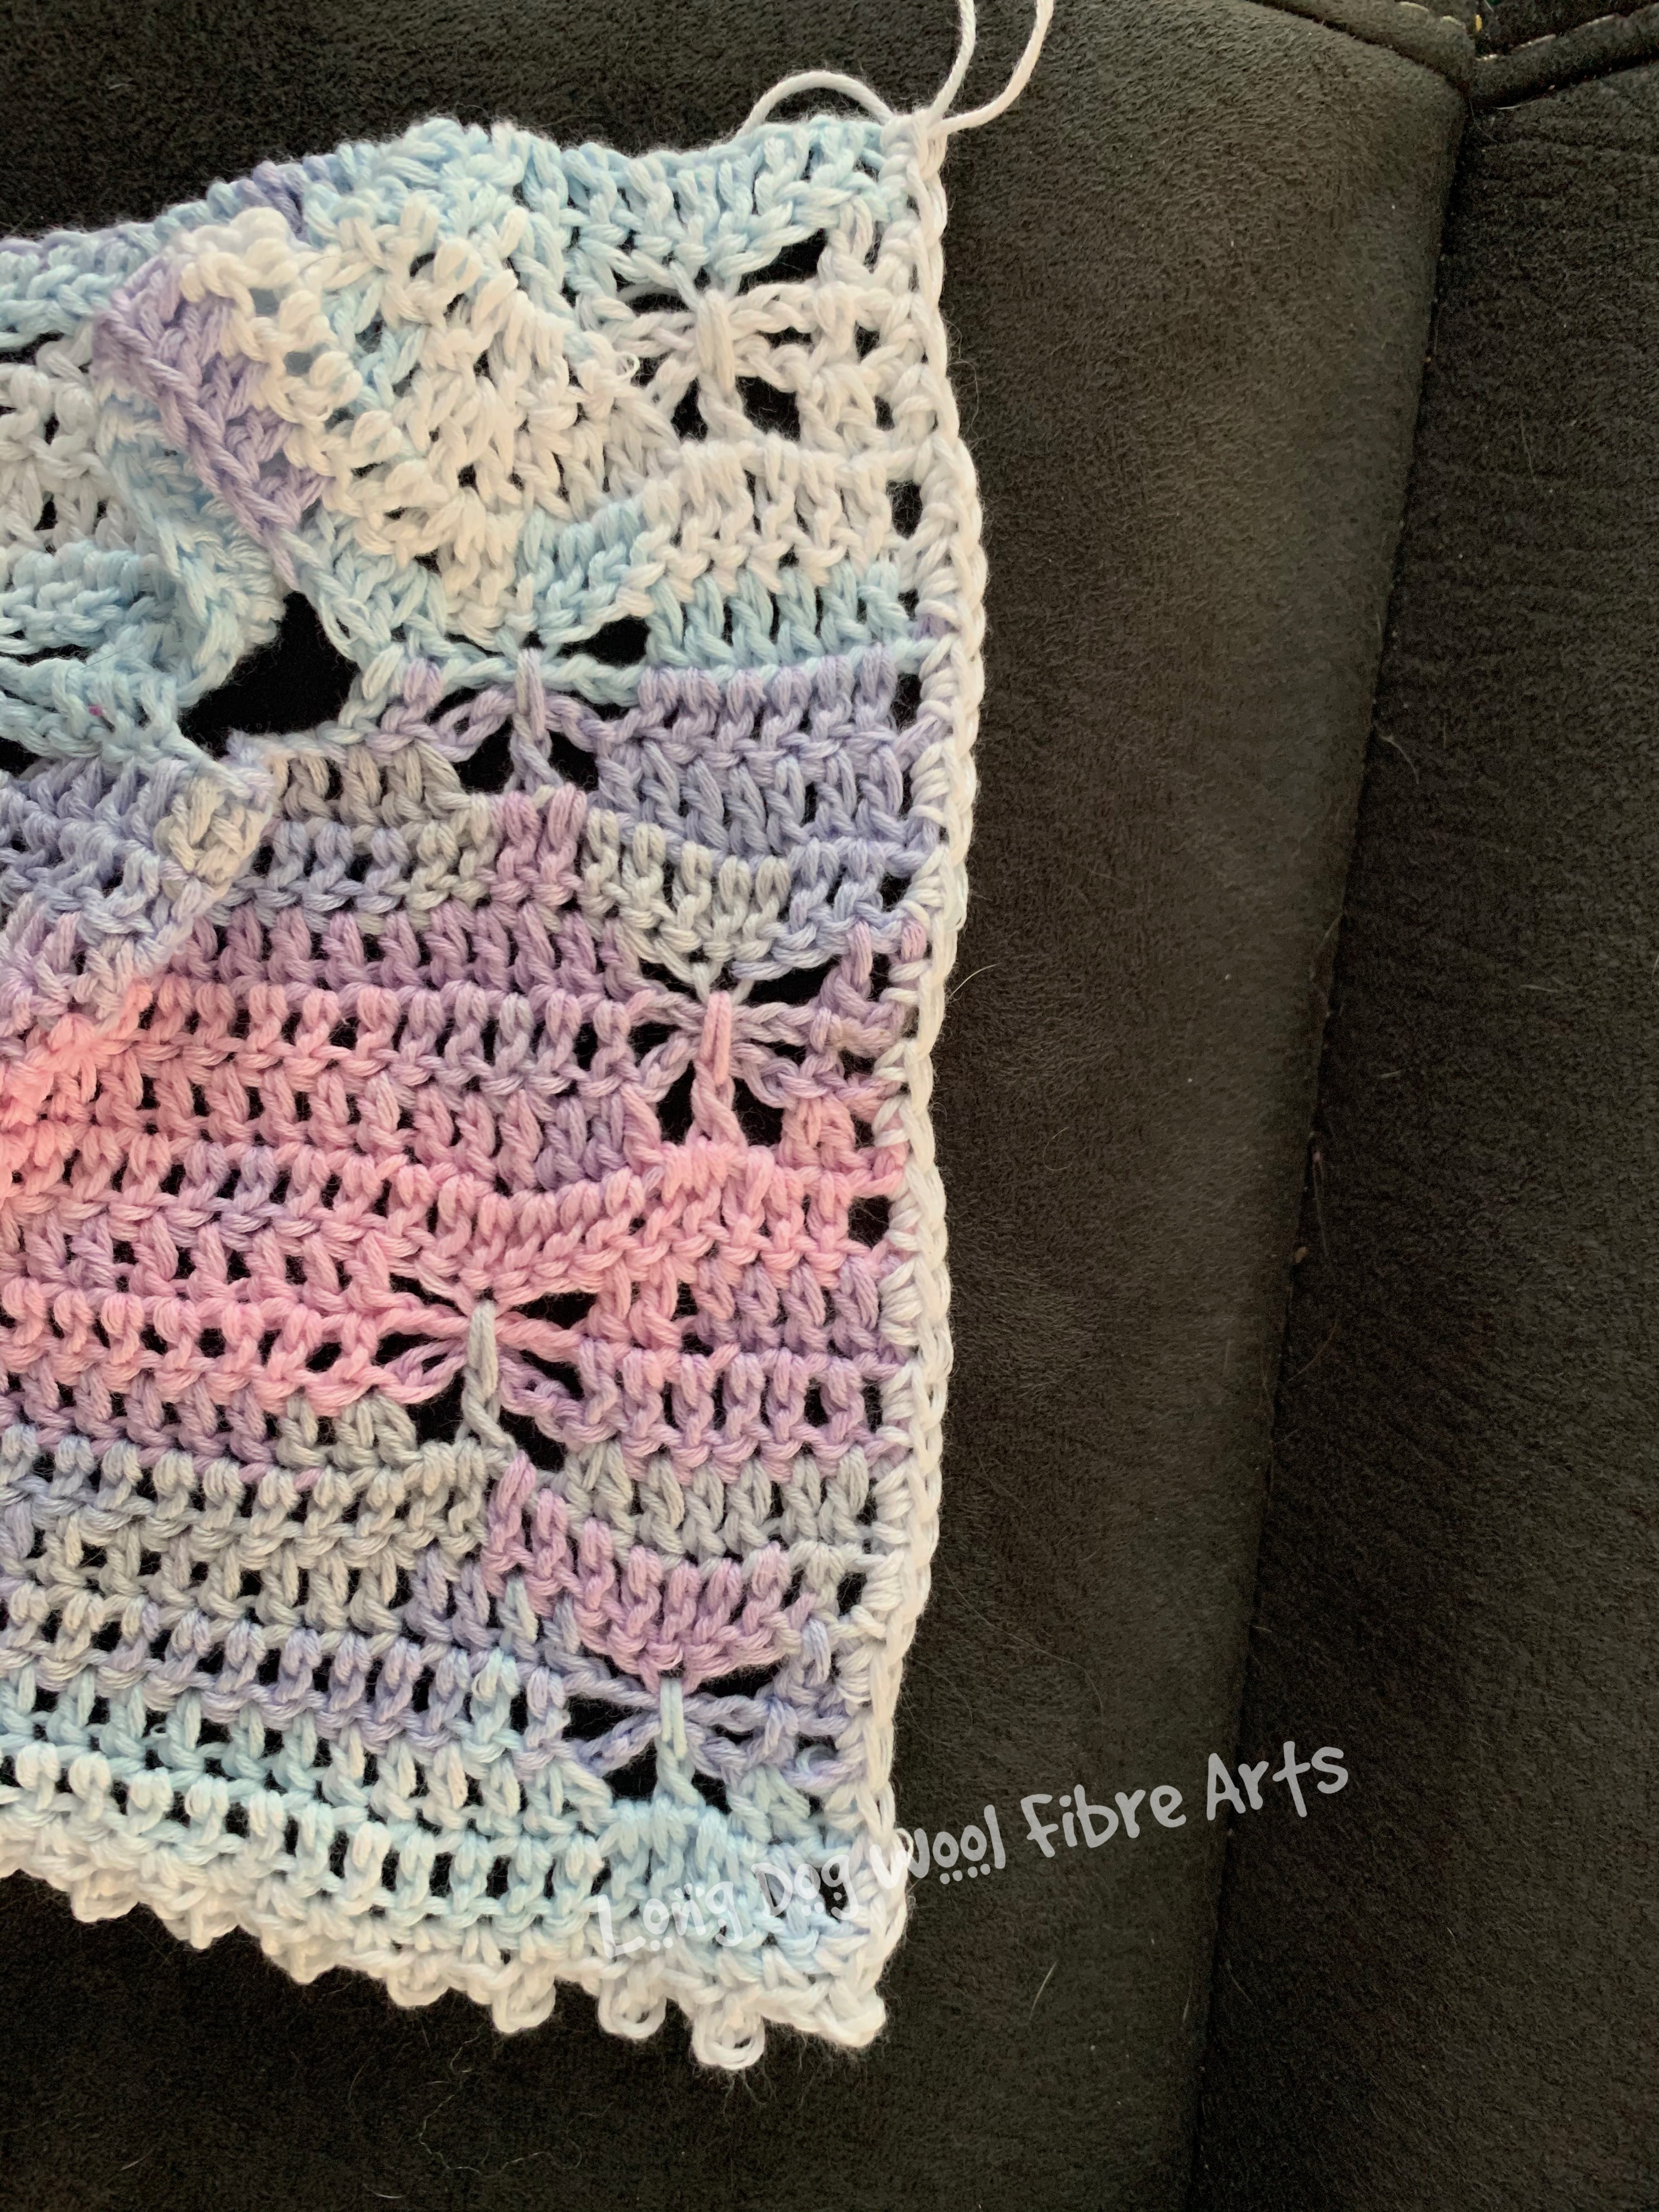
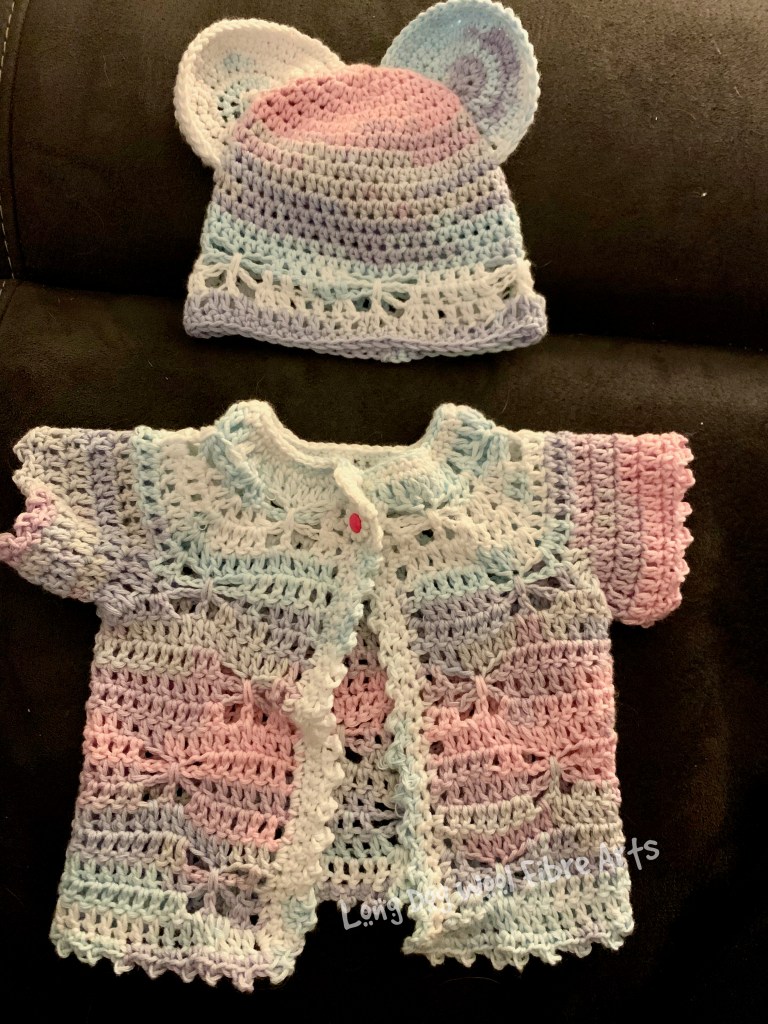
The Butterfly Blessings Cardigan and Hat are the perfect gift for the baby girl. The subtle butterfly stitch patterns the front and back of the cardigan and the band of the hat. For summer weather, the versions pictured are made with cotton yarn but an acrylic or wool would give you a spring/autumn version. Instructions give you a choice of three sleeve lengths – sleeveless, short sleeve (pictured) or long sleeve.
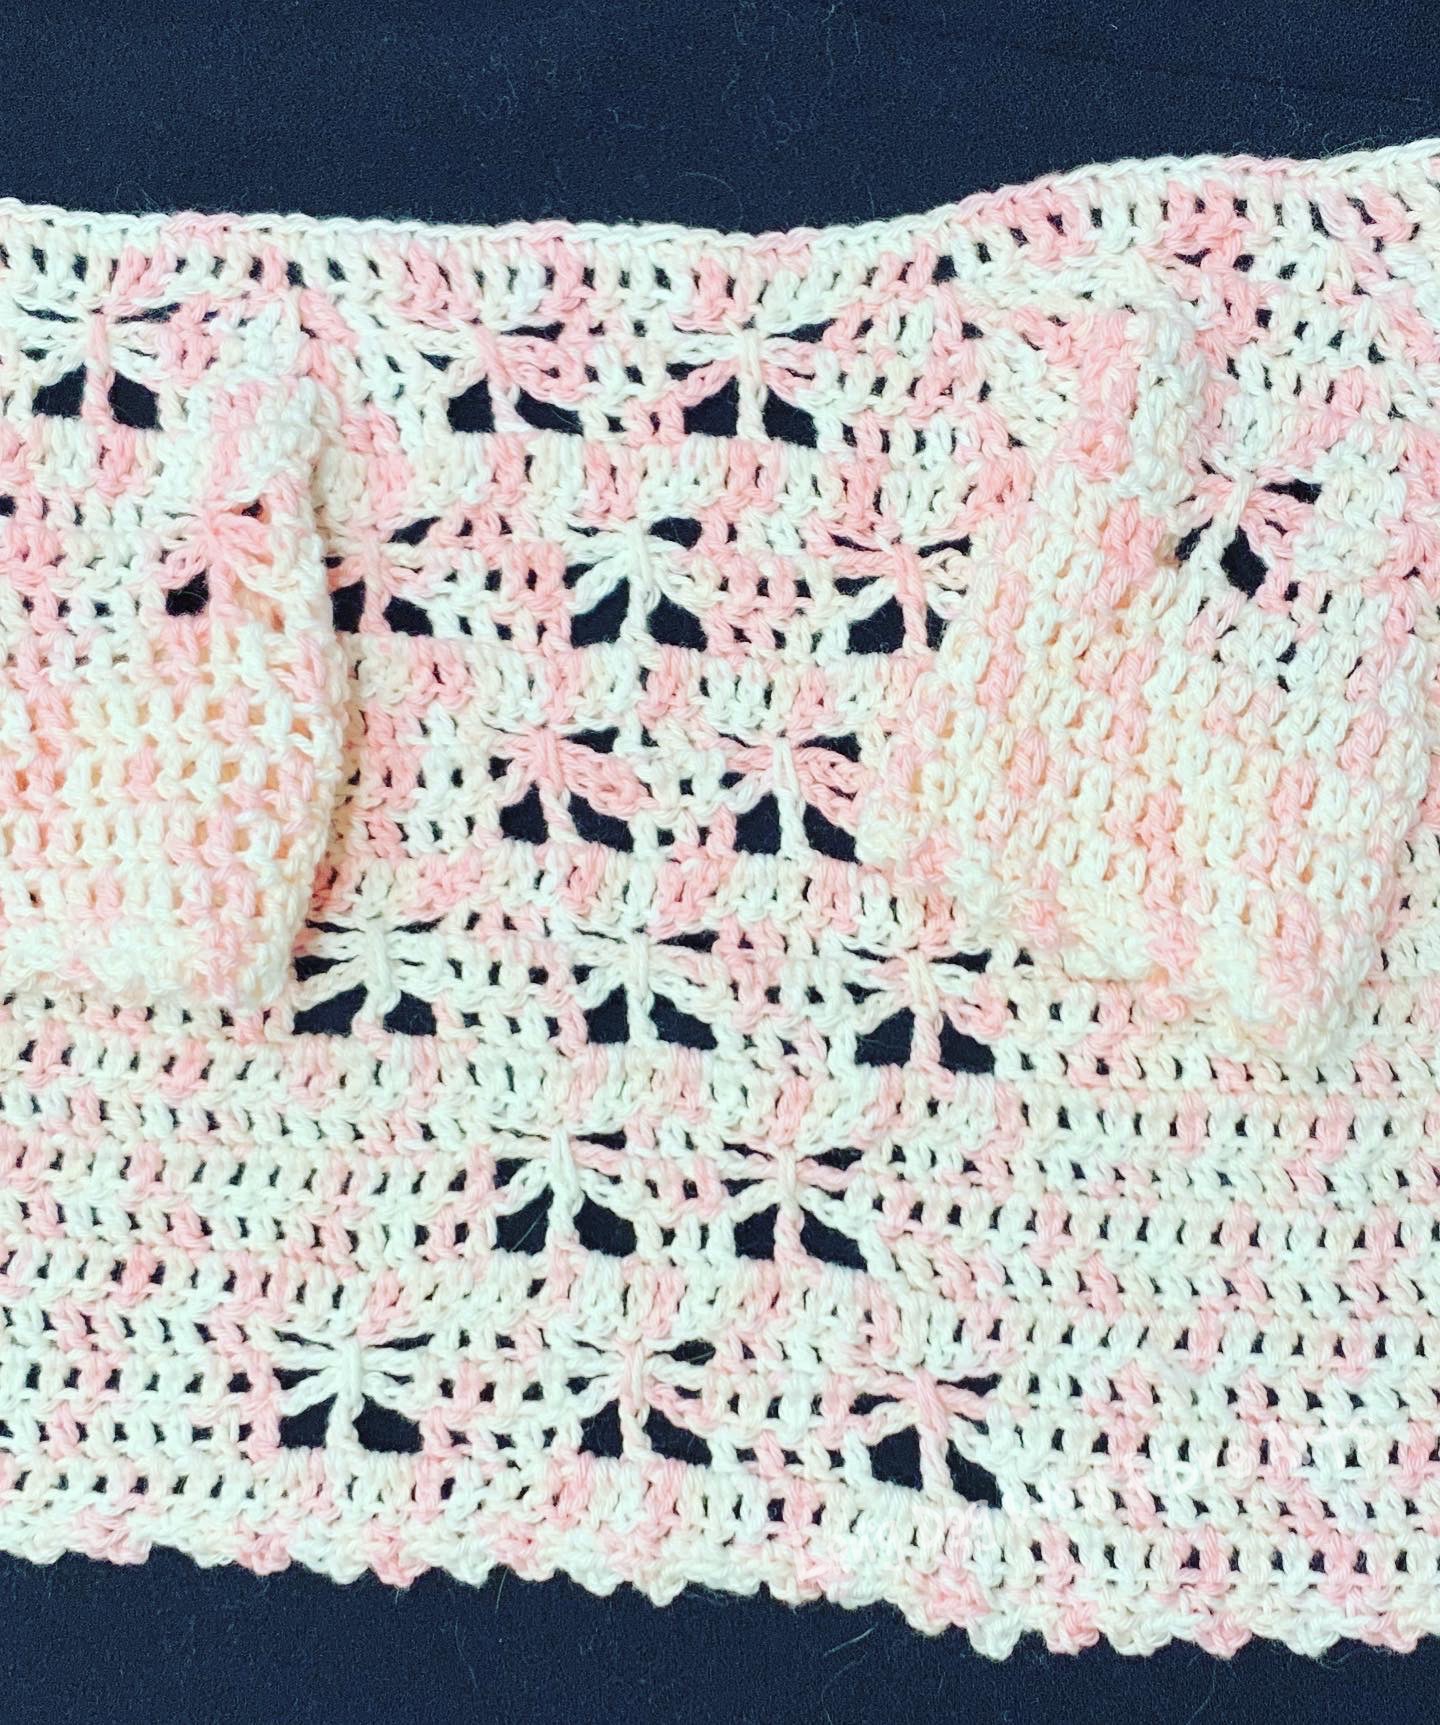
The variegated yarn adds visual interest from a distance – the butterflies come into their own when a solid colour shirt or singlet is placed under the cardigan to make them pop. This set can also be done in a solid colour yarn.
The pattern below is written in USA crochet terms. A free downloadable pdf of this pattern in your choice of UK or USA crochet terms is also available HERE.
PATTERN
Materials
- Katia Candy for Baby – 100% cotton , 50g, 180m – approximately 1.5 balls needed for cardigan and hat for a 3 month old size.
- 3.5mm Crochet Hook
- Yarn Needle
Yarn Substitution Information:
Katia Candy for Baby is a Fine weight yarn (Category 2). This is what was used for the pink , blue and white version pictured. Moda Vera Gelato yarn was used in the blush and cream colour version in the photos. I did find that the Katia was much softer than the Gelato so you might want to check the feel of the yarn you choose and make sure it is soft enough for babies and toddlers. The Katia was fabulous to work with. You can also make this out of other fibres (acrylic, bamboo cotton, merino) as long as the what you choose is a FINE (weight 2) yarn.
Abbreviations and Explanations
Sizes: Newborn, 3 months, 6-12 months
Directions are given for Newborn first (A), with differences for 3 months (B) and 6-12 months (C) in parenthesis in this form: A (B-C)
Gauge: 20 hdc stitches = 4” (10 cm), 16 hdc rows = 4” (10cm)
Stitches used:
- Ch – chain
- Sc – single crochet
- Dc – double crochet
- Slst – slip stitch
- Ch-st – chain stitch
- Ch-sp – chain space
- Sp – space
- v-st – v stitch (see below)
- Picot (see below)
- finish bf – finish butterfly motif (see below)
Special Stitches Used:
Picot: ch 3, slst in first ch-st (does not count as a stitch so do not skip any sts).
V-stitch: [worked in one stitch (first row) or in chain space of the v-stitch on the previous row] double crochet, ch 1, double crochet.
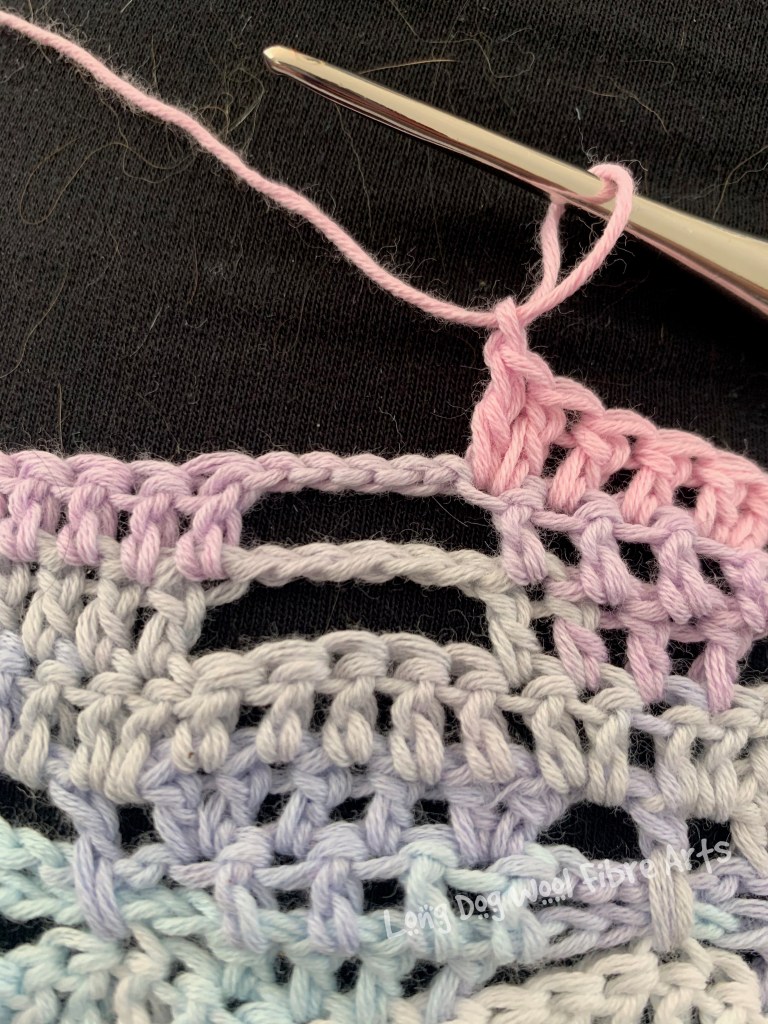
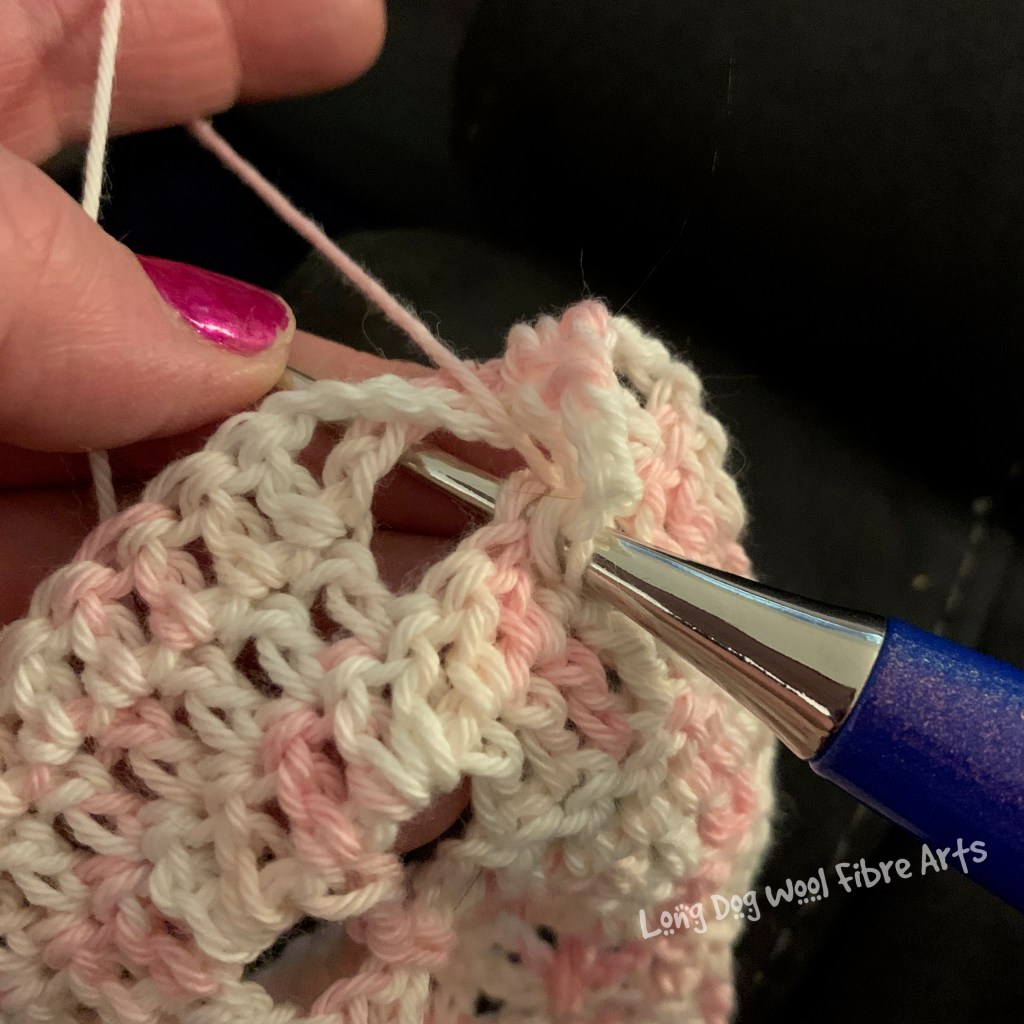
Finish Butterfly Motif: 2dc in next st, ch 1, dc in st of row below the first ch5 in the st that aligns with the middle of the ch5, capturing the two chain rows within it, ch1, 2dc in next st.


Cardigan Instructions
For each section, R1 is the right side.
Foundation: ch 48 (54-54)
R1: dc in 4th ch from hook, dc in each of next 5 (6-6) ch, v-st, dc in each of next 6 (8-8) ch, v-st, dc in each of next 14 (16-16) sts, v-st, dc in each of next 6 (8-8) ch, v-st, dc in next 7 (8-8) ch, turn.
R2: ch3 (counts as first st here and throughout), dc in next st, ch 5, sk 5, dc in next 1 (2,2) sts, v-st in ch space, dc in next 1(2,2)sts, ch 5, sk 5, dc in next 2 (3,3) sts, v-st, dc in next 1 (2,2) sts, ch 5, sk 5, dc in next 4 sts, ch 5, sk 5, dc in next 1 (2,2) sts, v-st, dc in next 2 (3,3) sts, ch 5, sk 5, dc in next 1 (2,2) sts, v-st, ‘ dc in next 1 (2,2) sts, ch 5, sk 5, dc in next 2 (3,3) sts, turn.
R3: ch3, dc in next st, ch 5, sk 5, dc in next 2 (3,3) sts, v-st in ch space, dc in next 2 (3,3) sts, ch 5, sk 5, dc in next 3 (4,4) sts, v-st, dc in next 2 (3,3) sts, ch 5, sk 5, dc in next 4 sts, ch 5, sk 5, dc in next 2 (3,3) sts, v-st, dc in next 3 (4,4) sts, ch 5, sk 5, dc in next 2 (3,3) sts, v-st, dc in next 2 (3,3) sts, ch 5, sk 5, dc in next 2 sts, turn.
R4: ch3, [2dc in next st, ch 1, dc in st of row below the first ch5 in the st that aligns with the middle of the ch5, capturing the two chain rows within it (see photos for ‘finish butterfly motif’ at the end of this pattern), ch1, 2dc in next st. This will now be referred to as ‘finish bf’ throughout], dc in next 2 (3,3) sts, v-st, dc in next 2 sts, finish bf, dc in next 3 (4,4) sts, v-st, dc into next 2 sts, finish bf, dc into next 2 sts, finish bf, dc into next 2 (3,3) sts, v-st, dc into next 3 (4,4) sts, finish bf, dc into next 2 (3,3) sts, v-st, dc into next 2 (3,3) sts, finish bf, dc into last st, turn.
R5: ch3, 1dc in each st and ch-sp (the ones made by the butterfly wings), making sure to do a v-st in the ch of each existing v-st from the previous row, turn.
Go to the section for the size you are making.
For newborn only [rows 6 to 17]:
R6: ch3, dc in next 6 sts, ch 5, sk 5, dc in next (1,1) st, v-st in ch sp, dc in each st to next v-st, v-st in ch sp, ch 5, sk 5, dc in next 4 sts, ch 5, sk 5, dc in next 4 sts, ch 5, sk 5, dc in next sts, v-st in ch sp, dc in each st to next v-st, v-st in ch sp, ch 5, sk 5, dc in next 7 sts, turn.
Divide Arms and Body:
R7: ch3, dc in next 6 sts, ch 5, sk 5, dc in next st, dc in ch-sp of v-st from previous round, ch 6, sk 18 sts, dc in ch-sp of v-st from previous round, dc in next 2 sts, ch 5, sk 5, dc in next 4 sts, ch 5, sk 5, dc in next 4 sts, dc in next st, v-st in ch-sp, ch 6, sk 18 sts, dc in ch-sp of v-st from previous round, dc in next st, ch 5, sk 5, dc in next 7 sts, turn. (68 sts)
Continue with Body:
R8: ch3, dc in next 5 sts, finish bf, dc in next st, dc in each ch, dc in next st, finish bf, dc in next 2 sts, finish bf, dc in next 2 sts, finish bf, dc in next 2 sts, finish bf, dc in next 2 sts, dc in each ch-st, dc in next st, finish bf, dc in next 6 sts.
R9: ch3, dc in each st and ch-sp across to end, turn.
R10: ch3, dc in next st, ch 5, sk 5, dc in next 20 sts, ch5, sk5, dc in next 4 sts, ch 5, sk 5, dc in next 20 sts, ch5, sk 5, dc in next 2 sts, turn.
R11: ch3, dc in next st, ch 5, sk 5, dc in next 20 sts, ch5, sk5, dc in next 4 sts, ch5, sk5, dc in next 20 sts, ch5, sk5, dc in next 2 sts, turn.
R12: ch3, dc in next st, finish bf, dc in next 20 sts, finish bf, dc in next 3 sts, finish bf, dc in next 20 sts, finish bf, dc in next 2 sts, turn.
R13: ch3, dc in each st and ch-sp across to end, turn.
R14: ch3, dc in next 6 sts, ch5, sk5, dc in next 10 sts, ch5, sk5, dc in next 4 sts, ch5, sk5, dc in next 4 sts, ch5, sk5, dc in next 11 sts, ch5, sk5, dc in next 7 sts, turn.
R15: ch3, dc in next 6 sts, ch5, sk5, dc in next 11 sts, ch5, sk5, dc in next 4 sts, ch5, sk5, dc in next 4 sts, ch5, sk5, dc in next 10 sts, ch5, sk5, dc in next 7 sts, turn.
R16: ch3, dc in next 6 sts, finish bf, dc in next 8 sts, finish bf, dc in next 2 sts, finish bf, dc in next 2 sts, finish bf,dc in next 9 sts, finish bf, dc in next 6 sts, turn.
R17: ch3, dc in each st and ch-sp across to end, turn.
Repeat Rows 10-17 until garment measures 12 cm from the underarm to the bottom. End on Row 13 or 17.
Pro Tip: If for some reason it looks like you will reach 12.5 cm in the middle of a group of 4 rows (i.e. in the middle of a repeat of 10-13 or in the middle of a repeat of 14-17), then stop pattern at a repeat of row 13 or 17 and continue for the remaining 1-3 rows in the group using [ch3, dc in each st across, turn] for each row until the required length is reached. [For the yarn I used with my tension, 12 cm was reached at the end of a repeat of row 13]
Final Row: ch1 (does not counts as st), sc in first st, sc in next st, *picot, sc in next 2 sts, repeat from * until end. Do NOT Fasten off.
Go to “Buttonhole Band” section.
For 3 months and 6-12 months only:
R6: ch3, dc in next 6 sts, ch 5, sk 5, dc in next (1,1) st, v-st in ch sp, dc in next (2,2) sts, ch 5, sk 5, dc in next 3 sts, ch 5, sk 5, dc in next (3,3) sts, v-st in ch sp, dc in next (1,1) st, ch 5, sk 5, dc in next 4 sts, ch 5, sk 5, dc in next 4 sts, ch 5, sk 5, dc in next (2,2) sts, v-st in ch sp, dc in next (3,3) sts, ch 5, sk 5, dc in next 3 sts, ch 5, sk 5, dc in next (2,2) sts, v-st in ch sp, dc in next st, ch 5, sk 5, dc in next 7 sts, turn.
R7: ch3, dc in next 6 sts, ch 5, sk 5, dc in next 2 sts, v-st in ch sp, dc in next 3 sts, ch 5, sk 5, dc in next 3 sts, ch5, sk 5, dc in next 4 sts, v-st in ch sp, dc in next 3 sts, ch 5, sk 5, dc in next 4 sts, ch 5, sk 5, dc in next 4 sts, ch 5, sk 5, dc in next 2 sts, v-st in ch sp, dc in next 4 sts, ch 5, sk 5, dc in next 3 sts, ch 5, sk 5, dc in next 2 (3,3) sts, v-st in ch sp, dc in next 2 sts, ch 5, sk 5, dc in next 7 sts, turn.
R8: ch3, dc in next 5 sts, finish bf, dc in next 2 st, v-st in ch sp, dc in next 3 sts, finish bf, dc in next 2 sts, finish bf, dc in next 4 sts, v-st in ch sp, dc in next 2 sts, finish bf, dc in next 2 sts, finish bf, dc in next 2 sts, finish bf, dc in next 2 (sts, v-st in ch sp, dc in next 4 sts, finish bf, dc in next st, finish bf, dc in next 2 sts, v-st in ch sp, dc in next 2 sts, finish bf, dc in next 6 sts.
Divide Arms and Body:
R9: ch 3, 1dc in each st to v-st, dc in v-st sp, ch (6, 8) for underarm, sk next 24 dc for sleeve, 1 dc in ch1 sp of next v-st, dc in each st and ch-sp to next v-st, ch (6, 8) for underarm, skip next 24 sts for sleeve, dc in ch1 sp of next v-st, dc in each st and ch-sp to end, turn. (80-84 sts)
Continue with Body:
R10: ch3, dc in next st, ch 5, sk 5, dc in next (26-28) sts, ch5, sk5, dc in next 4 sts, ch 5, sk 5, dc in next (26-28) sts, ch5, sk 5, dc in next 2 sts, turn.
R11: ch3, dc in next st, ch 5, sk 5, dc in next (26-28) sts, ch5, sk5, dc in next 4 sts, ch5, sk5, dc in next (26-28) sts, ch5, sk5, dc in next 2 sts, turn.
R12: ch3, dc in next st, finish bf, dc in next (25-26)sts, finish bf, dc in next 2 sts, finish bf, dc in next (25-26) sts, finish bf, dc in next 2 sts, turn.
R13: ch3, dc in each st and ch-sp across to end, turn.
R14: ch3, dc in next 6 sts, ch5, sk5, dc in next (22-24) sts, ch5, sk5, dc in next 4 sts, ch5, sk5, dc in next 4 sts, ch5, sk5, dc in next (21-23) sts, ch5, sk5, dc in next 7 sts, turn.
R15: ch3, dc in next 6 sts, ch5, sk5, dc in next (21-23) sts, ch5, sk5, dc in next 4 sts, ch5, sk5, dc in next 4 sts, ch5, sk5, dc in next (22-24) sts, ch5, sk5, dc in next 7 sts, turn.
R16: ch3, dc in next 5 sts, finish bf, dc in next (20-22) sts, finish bf, dc in next 2 sts, finish bf, dc in next 2 sts, finish bf, dc in next (21-23) sts, finish bf, dc in next 6 sts, turn.
R17: ch3, dc in each st and ch-sp across to end, turn.
Repeat Rows 10-17 until garment measures (14-16.5) cm from the underarm to the bottom. End on Row 13 or 17. If for some reason it looks like you will reach the required length in the middle of a group of 4 rows (i.e. in the middle of a repeat of 10-13 or in the middle of a repeat of 14-17), then stop pattern at a repeat of row 13 or 17 and continue for the remaining 1-3 rows in the group using [ch3, dc in each st across, turn] for each row until the required length is reached. [For the yarn I used, with my tension, I reached 14cm for the 3 month old size at the end of a repeat of R17.]
Do NOT fasten off. Go to “Buttonhole Band – Neckband – Button Band” section.
Buttonhole Band – Neckband – Button Band (worked as one)
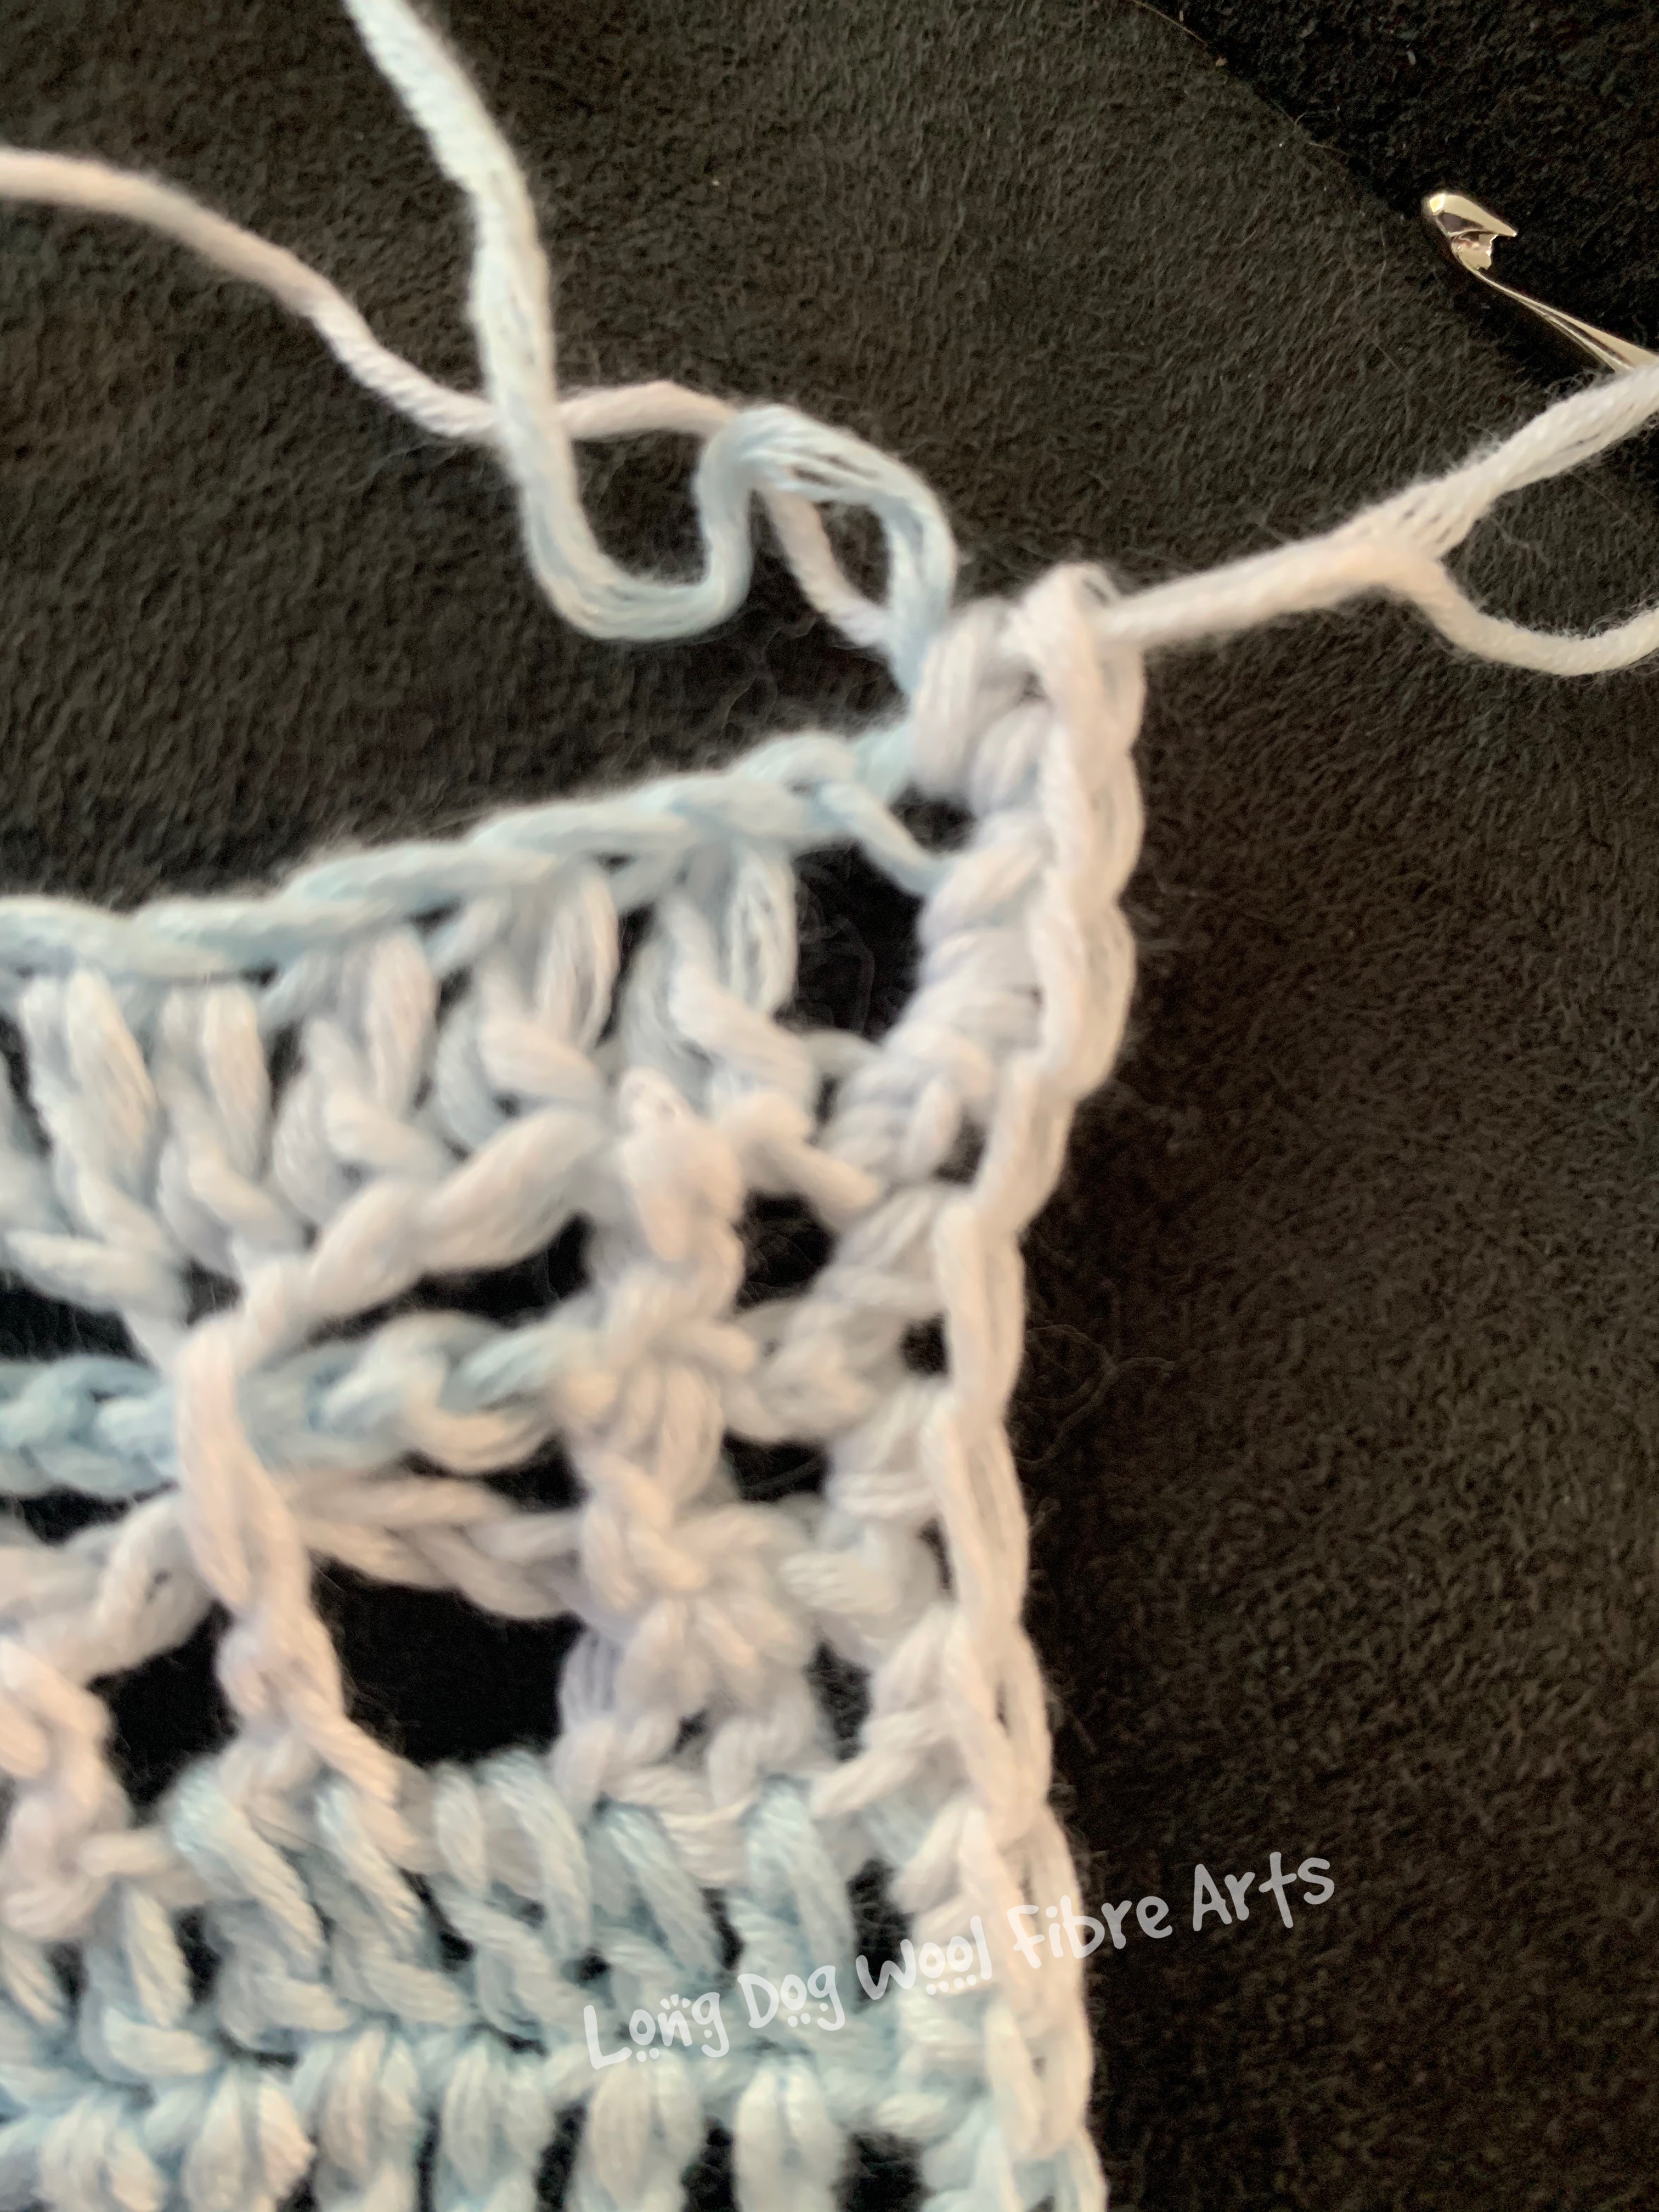
A note about stitch placement for the ‘raw’ edges (the sides of the garment) – The general rule of thumb is that when going up the ‘raw’ edge you put one sc in a row made of sc and 2 sc in a row that was made with dc (both sts in the same gap). However, the butterflies pull the rows in a bit which is what creates their shape. So, on rows where there is a butterfly near the edge, do 1 sc in that space and 2sc on rows without butterflies close to the edge. In the corners, do 3 sc in the corner to give corners a rounded edge.
R1: 2sc in same st you ended the body in (3 sts total, including the last stitch of the body). Work 1 row of sc evenly up the front left edge (button band), at the corner do 3sc, then sc along the neckband working stitches into space between the dc, at next corner (top of right buttonhole band) do 3sc in corner, then sc down the right edge to end finishing with a sc in the corner stitch itself rather than the space (see photos), turn.


R2: ch1 (does not count as st here or throughout), sc in each st to corner, 2sc in corner, sc along neckband to next corner, 3 sc in corner, sc in next st of buttonhole band, ch2, sk2 (buttonhole made), sc in each st down edge to bottom corner, turn.
R3: ch1, sc in next 2 sts, *picot, sc in next 2 sts, repeat to corner, in corner st do sc, picot, sc, slst in next st of neckband, slst in each st of neckband to next corner, slst and 2sc in corner, sc in next st of button band, *picot, sc in next 2 sts, repeat from * to corner, 2 more sc in corner (total of 3 sc in corner), sc in next st of bottom of body, *picot, sc in next 2 sts, repeat from * to end, slst to first st of the round.
Fasten Off. Weave in ends. Sew button in place on button band.
Sleeves
Note: Sleeves are optional. You can leave this cardigan without sleeves to make it a summer smock to put over dresses, etc in which case you are now finished! You can also make short sleeves for summer or long sleeves for cooler weather as per the pattern below.
R1: Join yarn with slst to center of underarm ch, ch 3 (counts as a st here and throughout sleeves), dc in each ch, dc, or gap around. Join with slst to ch3. Approximately 30 (36, 40) sts.
R2: Ch 3, dc in each dc around, join.
R3- 4(5-7): Repeat R2.
For long sleeves, keep repeating R2 until sleeve measures 12.5 (14, 16.5) cm then do R6.
R6: ch1 (does not count as st here), sc in same st, sc in next st, *picot, sc in next 2 sts, repeat from * to last st, picot, slst to first sc (not ch1).
Fasten off. Weave in ends.
Hat

R1: Make a magic ring, 8 hdc in ring. Do not join. Work in spiral. Use stitch marker to mark first stitch of each round.
R2: Ch 2 (does not count as st), 2 hdc in each st around. (16)
R3: *hdc in next st, 2 hdc in next st, repeat from * around. (24)
R4: *hdc in next st, 2 hdc in next st, 1 hdc in next st, repeat from * around. (32)
R5: *hdc in each of next 3 sts, 2 hdc in next st, repeat from * around. (40)
Go to R6 for whichever size you are making.
Size Newborn only:
R6: repeat R5. (50)
R7-14: hdc in each hdc around to end of round.
R15: hdc in each hdc around to last 2 sts, sc in next st of round, slst in last st.
R16: ch3 (does not count as st here or throughout), dc in same st as ch3, dc in next 4 sts, *ch 5, sk 5, dc in next 5 sts, ch 5, sk 5, dc in next 5 sts, ch 5, sk 5, dc in next 5 sts, ch 5, sk 5, dc in next 5 sts, ch 5, sk 5, dc in next 5 sts, slst to first dc of round (not the ch3).
R17: ch3, dc in same st as ch3, dc in next 4 sts, *ch 5, sk 5, dc in next 5 sts, ch 5, sk 5, dc in next 5 sts, ch 5, sk 5, dc in next 5 sts, ch 5, sk 5, dc in next 5 sts, ch 5, sk 5, dc in next 5 sts, slst to first dc of round (not the ch3).
R18: ch3, finish bf, dc in next 2 sts, finish bf, dc in next 3 sts, finish bf, dc in next 2 sts, finish bf, dc in next 3 sts, finish bf, dc in next 3 sts, slst to first dc of round (not the ch3).
R19: ch3, dc in each st and ch-sp around, join with slst to first dc of round (not the ch3).
R20: ch 1, sc in each st around, slst to first st of round (not ch 1).
Finish off. Weave in ends.
[Hat should measure 12.5cm from crown to brim and 30cm around the bottom circumference.]
Size 3 months:
R6: *hdc in each of next 2 sts, 2 hdc in next st, hdc in next 2 sts, repeat from * around. (48)
R7: *hdc in next 5 sts, 2 hdc in next st, repeat from * around. (56)
R8: *hdc in next 13 sts, 2 hdc in next st, repeat from * around (60)
R9-16: hdc in each st around.
R17: hdc in each hdc around to end of round, sc in first st of round, slst in next st.
R18: ch3 (does not count as st here or throughout), dc in next st, *ch 5, sk 5, dc in next 4 sts, ch 5, sk 5, dc in next 5 sts, ch 5, sk 5, dc in next 4 sts, ch 5, sk 5, dc in next 5 sts, ch 5, sk 5, dc in next 4 sts, slst to first dc of round (not the ch3).
R19: ch3 (does not count as st here or throughout), dc in next 1 st, *ch 5, sk 5, dc in next 4 sts, ch 5, sk 5, dc in next 5 sts, ch 5, sk 5, dc in next 4 sts, ch 5, sk 5, dc in next 5 sts, ch 5, sk 5, dc in next 4 sts, slst to first dc of round (not the ch3).
R20: ch3 (does not count as st here or throughout), finish bf, dc in next 2 sts, finish bf, dc in next 3 sts, finish bf, dc in next 2 sts, finish bf, dc in next 3 sts, finish bf, dc in next 3 sts, slst to first dc of round (not the ch3).
R21: ch 1, sc in each st around, slst to first st of round (not ch 1).
Finish off. Weave in ends. Hat should measure 14cm from crown to brim and 35.5cm around circumference of brim.
Size 6-12 months only:
R6: *hdc in each of next 2 sts, 2 hdc in next st, hdc in next 2 sts, repeat from * around. (48)
R7: *2 hdc in next st, hdc in each of next 5 sts, repeat from * around (56)
R8: *hdc in next 3 sts, 2 hdc in next st, hdc in next 3 sts, repeat from * around. (64)
R9: hdc in next 7 sts, (2 hdc in next st, hdc in next 9 sts) 5 times, hdc in next 8 sts. (70)
R10-20: hdc in each st around.
R21: hdc in each hdc around to end of round, sc in first st of round, slst in next st.
R22: ch3 (does not count as st here or throughout), dc in next st, *ch 5, sk 5, dc in next 4 sts, ch 5, sk 5, dc in next 5 sts, ch 5, sk 5, dc in next 4 sts, ch 5, sk 5, dc in next 5 sts, ch 5, sk 5, dc in next 4 sts, slst to first dc of round (not the ch3).
R23: ch3 (does not count as st here or throughout), dc in next 1 st, *ch 5, sk 5, dc in next 4 sts, ch 5, sk 5, dc in next 5 sts, ch 5, sk 5, dc in next 4 sts, ch 5, sk 5, dc in next 5 sts, ch 5, sk 5, dc in next 4 sts, slst to first dc of round (not the ch3).
R24: ch3 (does not count as st here or throughout), finish bf, dc in next 2 sts, finish bf, dc in next 3 sts, finish bf, dc in next 2 sts, finish bf, dc in next 3 sts, finish bf, dc in next 3 sts, slst to first dc of round (not the ch3).
R25: ch 1, sc in each st around, slst to first st of round (not ch 1).
Finish off. Weave in ends. Hat should measure 16.5cm from crown to brim and 40.5cm around circumference of brim. Go to “Ears”.
EARS [make 2]:
R1: Magic ring, 6 sc, (do not join), turn
R2: ch1 (does not count as st here and througout), 2sc in each st, turn (12)
R3: ch1, *sc in first st, 2 sc in next st, repeat to end, turn (18)
R4: Ch1, *sc in first st, 2 sc in next st, sc in next st, repeat from * to end, turn. (24)
R5: ch 1, *sc in next 3 sts, 2 sc in next st, repeat from * to end, turn. (30)
For Newborn Only:
R6: ch1, sc in next 14 sts, sc-dec in next 2 sts, sc in each st to end, turn. (29)
R7: ch1, sc in next 8 sts, sc-dec in next 2 sts, sc in next 8 sts, sc-dec in next 2 sts, sc to end, turn. (27)
R8: ch1, sc in each st to end. Fasten off leaving a long tail to sew to hat. Go to “Finish”.
For 3 months only
R6: ch1, sc in next 14 sts, sc-dec in next sts, sc in each st to end, turn. (29)
R7: ch1, sc in next 8 sts, sc-dec in next 2 sts, sc in next 8 sts, sc-dec in next 2 sts, sc to end, turn. (27)
R8: ch1, sc in next 7 sts, sc-dec in next 2 sts, sc in next 7 sts, sc-dec in next 2 sts, sc to end, turn. (25)
R9-10: ch1, sc in each st to end. Fasten off leaving a long tail to sew to hat. Go to “Finish”.
For 6-12 months only
R6: ch1, sc in next 14 sts, sc-dec in next sts, sc in each st to end, turn. (29)
R7: ch1, sc in next 8 sts, sc-dec in next sts, sc in next 8 sts, sc-dec in next sts, sc to end, turn. (27)
R8: ch1, sc in next 7 sts, sc-dec in next 2 sts, sc in next 7 sts, sc-dec in next 2 sts, sc to end, turn. (25)
R9: ch1, sc in next 6 sts, sc-dec in next 2 sts, sc in next 6 sts, sc-dec in next 2 sts, sc to end, turn. (23)
R10-12: ch1, sc in each st to end. Fasten off leaving a long tail to sew to hat. Go to “Finish”.
Finish (all sizes)
Weave in end from start. Use long tail to sew to hat. Position ear on side of hat with one end right at the top circle (Round 1 of hat). Use a stitch marker for the bottom of the ear to keep it aligned as you sew.
I hope you enjoy making this pattern. I would love to see your version so please consider sharing photos of your work on the Long Dog Wool Fibre Arts Facebook Page! Happy hooking!
A free downloadable pdf of this pattern is available on Ravelry in your choice of UK and USA crochet terms. Find it HERE.


Leave a comment