
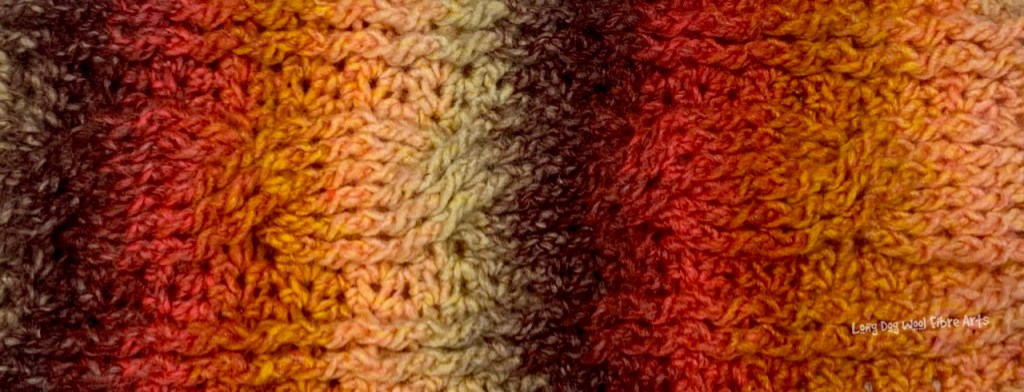
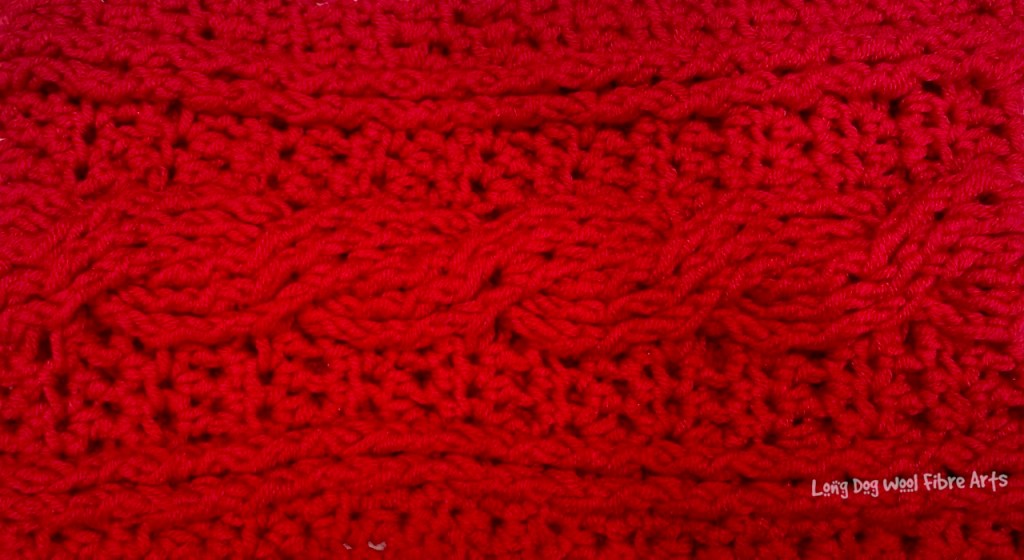
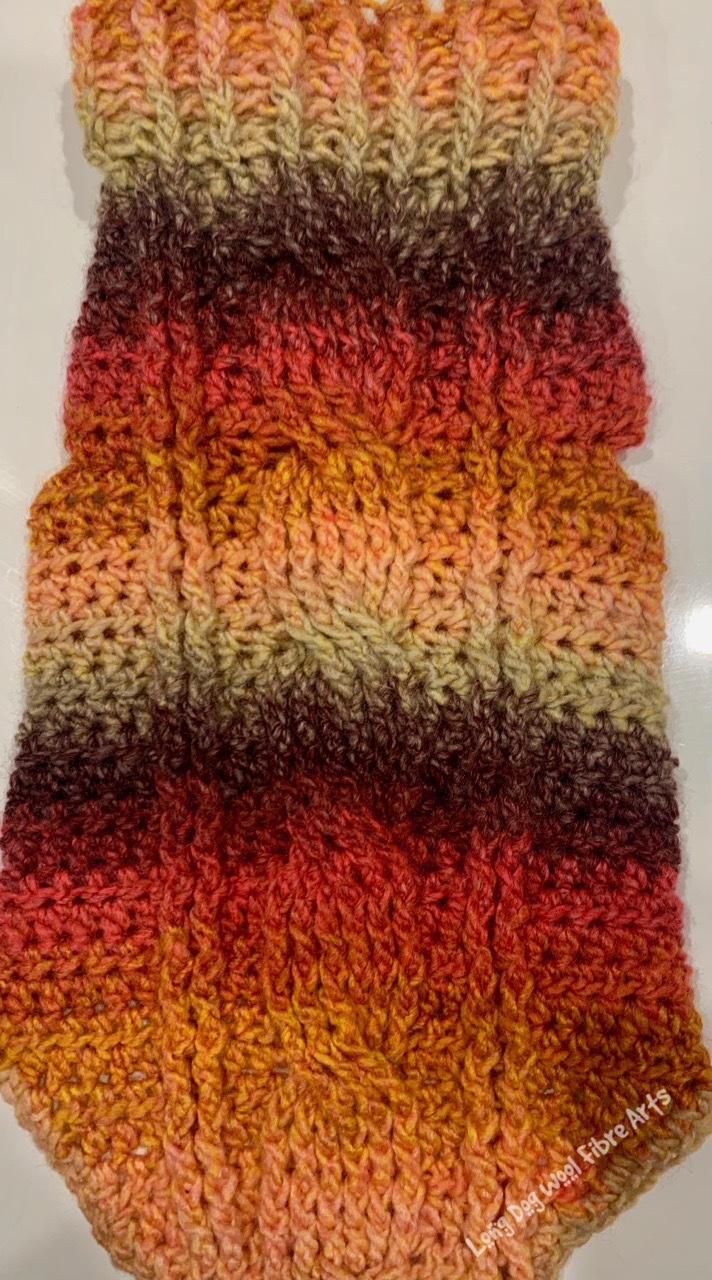
One of the features of knitting that I love is the beautiful cable stitches that adorn sweaters, scarfs and other handmade items. I learned to knit and crochet at the same time, when I was five years old, and have somehow always preferred crochet (so much easier to recover a dropped stitch…or two…or fifty!) but I also love cable stitches. Fast forward a ‘few’ years (like 40 or so) and I discovered front post and back post double crochet stitches (front post and back post treble crochet for my friends who use UK terms) when I was learning to do overlay crochet. It wasn’t long before I discovered… hookers can have their hooks and cables too! There IS a crochet version of cable stitches! Hallelujah! Once you know how to do a basic 6-stitch, single direction, cable, you can use the same technique to create more elaborate cable patterns.
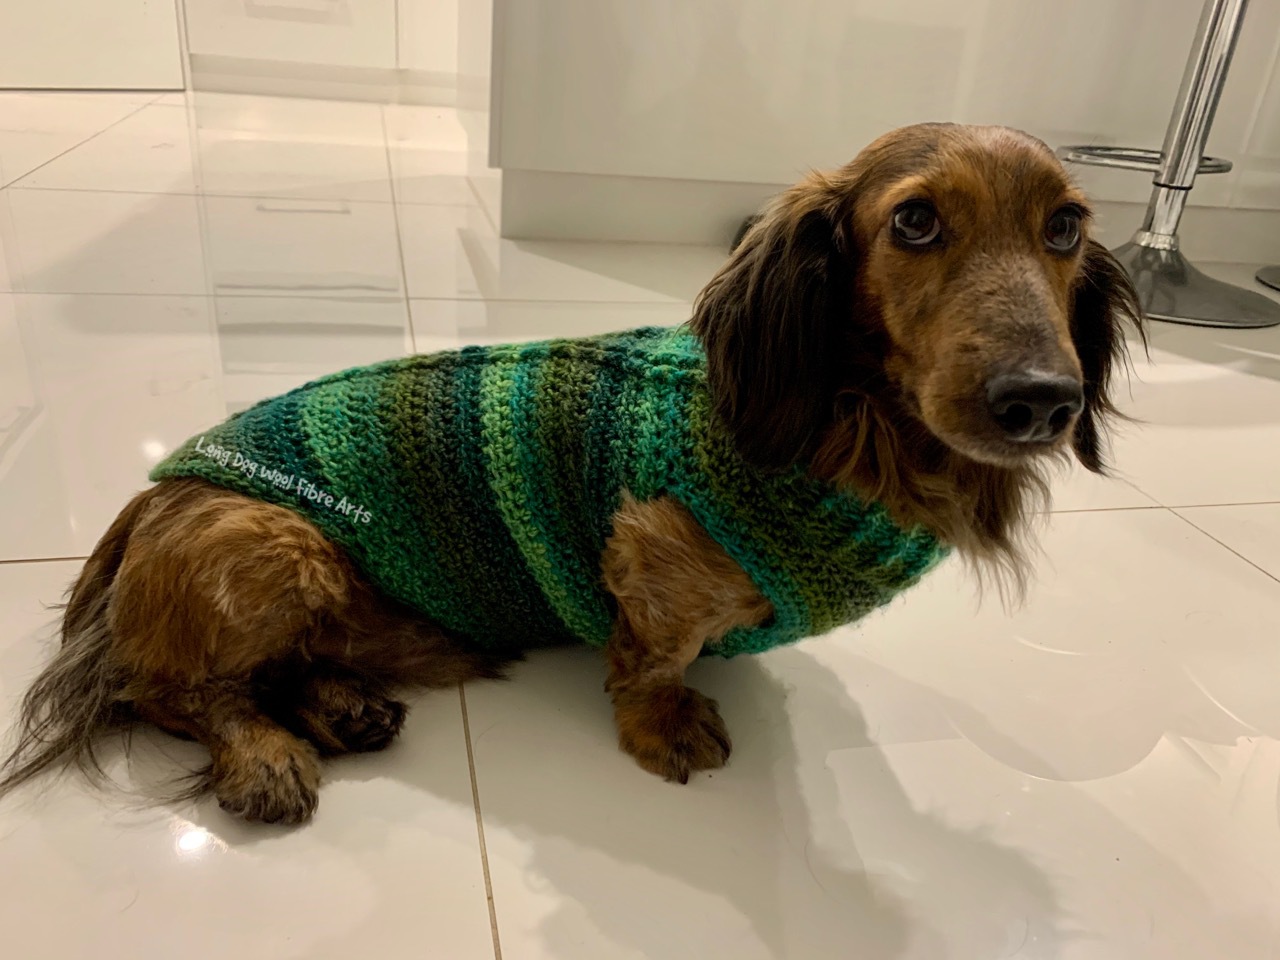
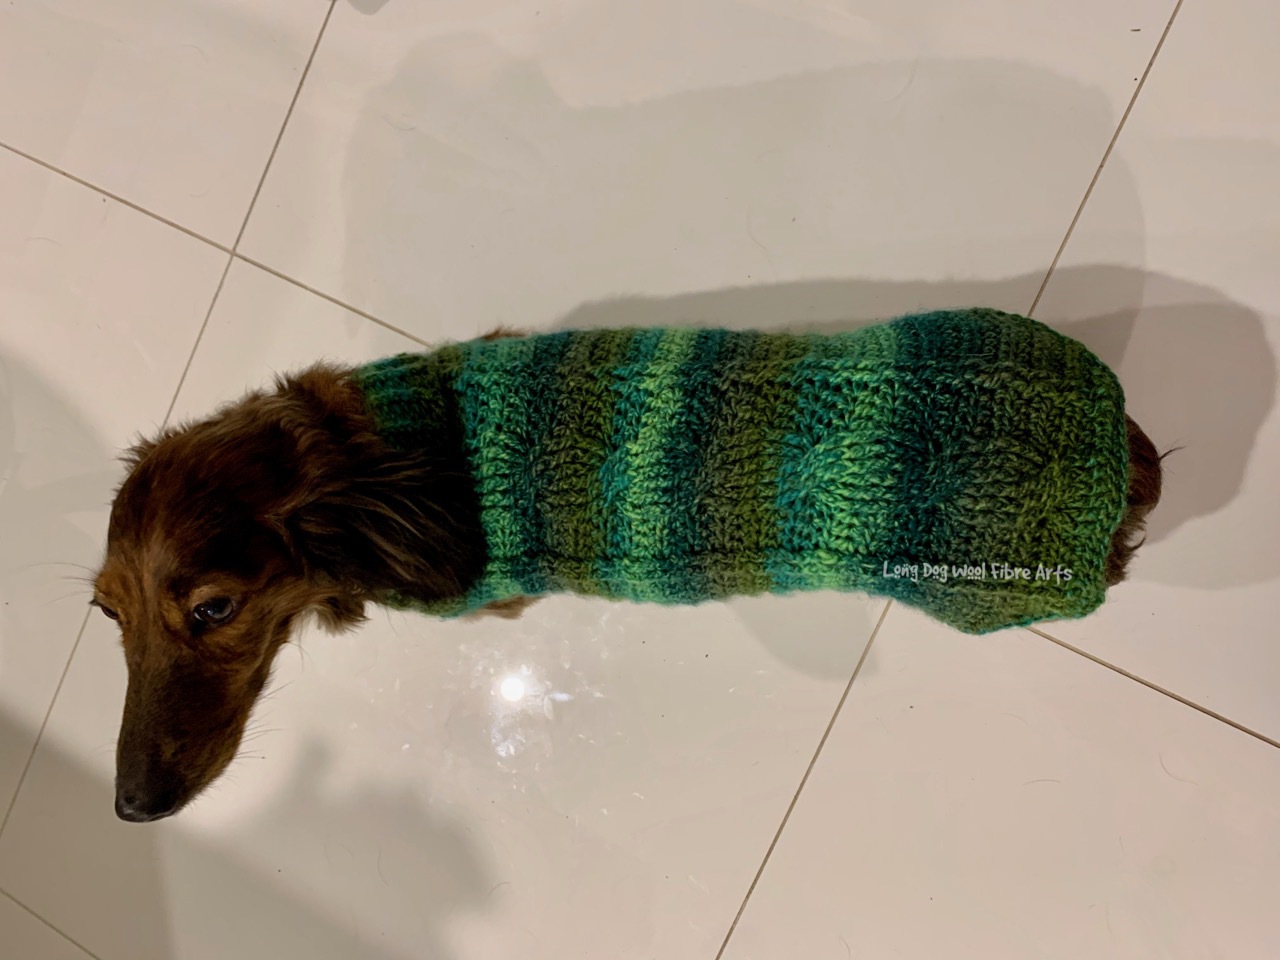
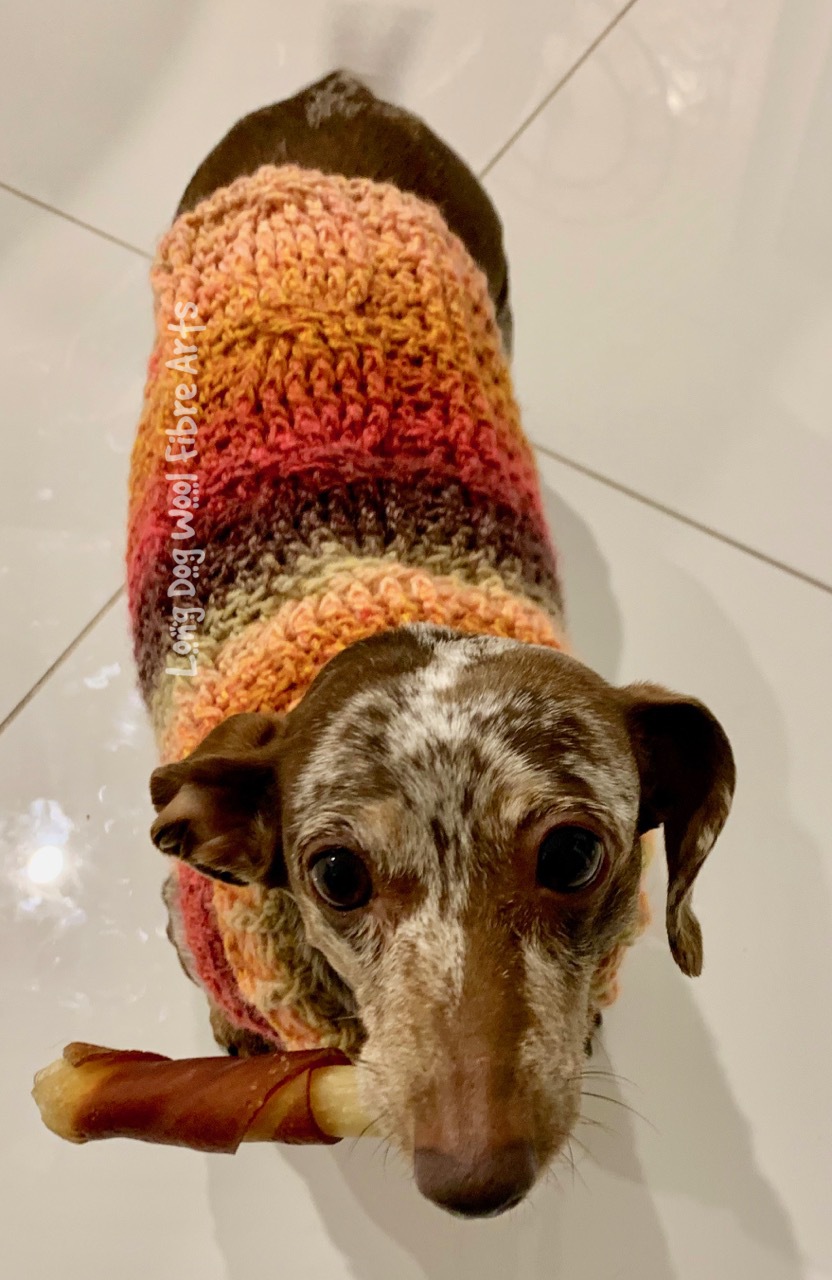
I’ve been incorporating cables into projects ever since, including the recent sweater I designed for my dachshunds – Roxy and Marcus. Don’t let Marcus’ sad eyes fool you. He really loves this sweater. A little more than he loved me at this moment since he was snuggled up in a blanket on the couch next to me and I made him stand on the cold tiles to model the sweater. Boy, does he know how to work those eyes to make me feel guilty!

So, how do we crochet a cable stitch? Well, there are a few key things to keep in mind before we get into the actual mechanics. First, you need to be comfortable with front post and back post double crochet stitches. If you aren’t familiar with these, you can see the Long Dog Wool Tutorial for them HERE.
Second, because cables use post stitches, any stitches in the same row need to be shorter to make sure the row is an even height. So if you use front post and back post double crochet, the other stitches need to be half double crochet. If you use front/back post triple crochet, then the other stitches should be double crochet.
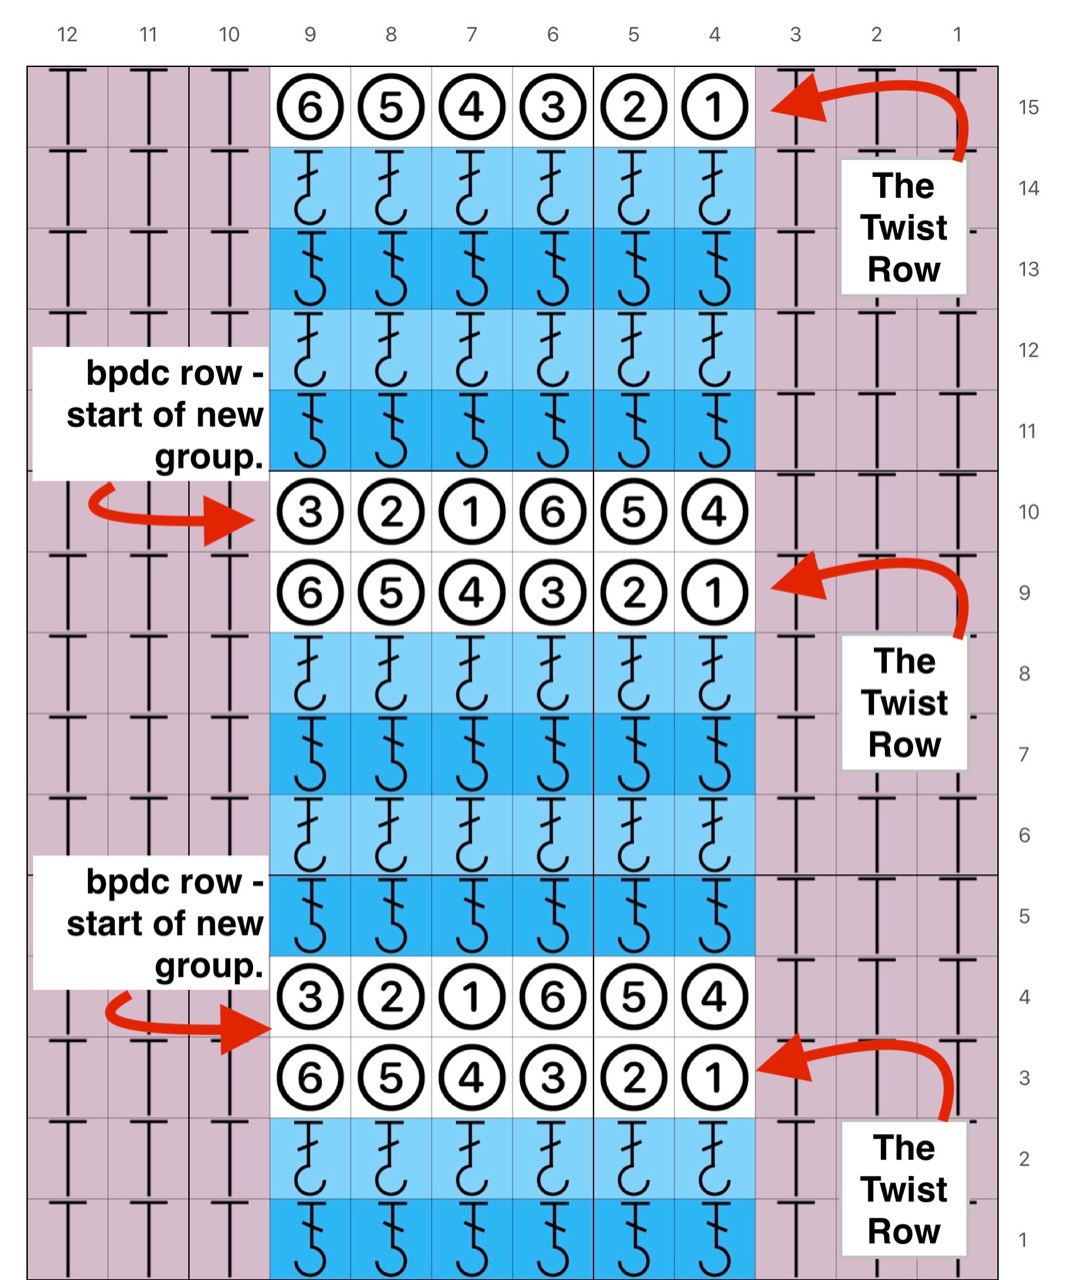
Third, on a basic cable, always twist in the same direction and be consistent on how many rows are between twists. In the video tutorial below, I am demonstrating a 6-stitch, 6-row, single direction twist. The ‘twist’ row is done on Row 3, then every 6th row after that. The shorter start (and similar end) gives a nicer finish to the final piece rather than putting the twist on Row 1. But, the rest of the way, the cable is done in groups of 6 rows.
Of course, rules are made to be broken so some patterns may tell you to do something different, but as a general rule, this is what we do.
Now for the technical stuff… the video below demonstrates how to do the cable stitch. Watching the video AND reading the information below together will help you get your head around this stitch.
The cable in the video is made up of six stitches – front post double crochet on the front side of the fabric, and back post double crochet on the wrong side of the fabric. The fabric is 12 stitches wide which allows for 3 stitches on either side of the cable, and has a 3 row ‘entry’ and a 6 row repeat, so the twist happens on row 3 and then every sixth row as follows:
Stitch abbreviations used:
hdc = half double crochet. (UK half treble crochet)
fpdc = front post double crochet (UK front post treble crochet)
bpdc = backpost double crochet (UK back post treble crochet)
st(s) = stitch(es)
ch = chain
- Row 1: ch 1, hdc in first st, hdc in each of next 2 sts, fpdc in each of next 6 sts, hdc in each of next 3 sts, turn.
- Row 2: ch 1, hdc in first st, hdc in each of next 2 sts, bpdc in each of next 6 sts, hdc in each of next 3 sts, turn.
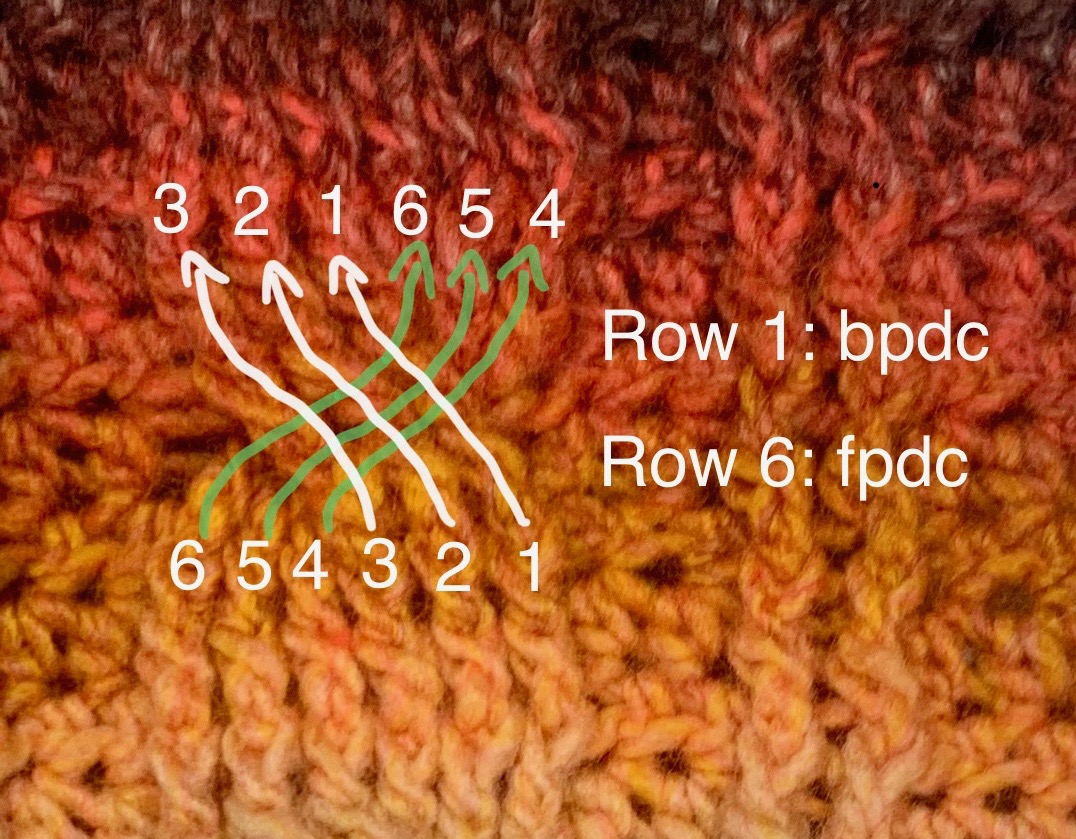
- Row 3 [The Twist]: ch 1, hdc in first st, hdc in each of next 2 sts, skip the next three post sts and fpdc in stitches 4, 5, and 6, then fpdc in stitches 1, 2 and 3 that you just skipped, turn.
- Row 4: ch 1, hdc in first st, hdc in each of next 2 sts, bpdc into the 3 post stitches that are now sitting on ‘top’ of the fabric, then bpdc into the 3 post stitches ‘hiding’ behind them [if you look from the side, you will see a little ‘pocket’. If you stick your finger in it you will be able to more clearly see the 3 post stitches you need to work around], hdc in each of the next 3 sts, turn. ROW 4 IS NOW THE FIRST ROW OF THE NEXT GROUP OF 6 ROWS.
- Row 5 (second row of group): ch 1, hdc in first st, hdc in each of next 2 sts, fpdc in each of next 6 sts, hdc in each of next 3 sts, turn.
- Row 6 (third row of group): ch 1, hdc in first st, hdc in each of next 2 sts, bpdc in each of next 6 sts, hdc in each of next 3 sts, turn.
- Row 7 (fourth row of group): ch 1, hdc in first st, hdc in each of next 2 sts, fpdc in each of next 6 sts, hdc in each of next 3 sts, turn.
- Row 8 (fifth row of group): ch 1, hdc in first st, hdc in each of next 2 sts, bpdc in each of next 6 sts, hdc in each of next 3 sts, turn.
- Row 9 (sixth row of group) [The Twist]: ch 1, hdc in first st, hdc in each of next 2 sts, skip the next three post sts and fpdc in stitches 4, 5, and 6, then fpdc in stitches 1, 2 and 3 that you just skipped, turn.
- Repeat Rows 4-9
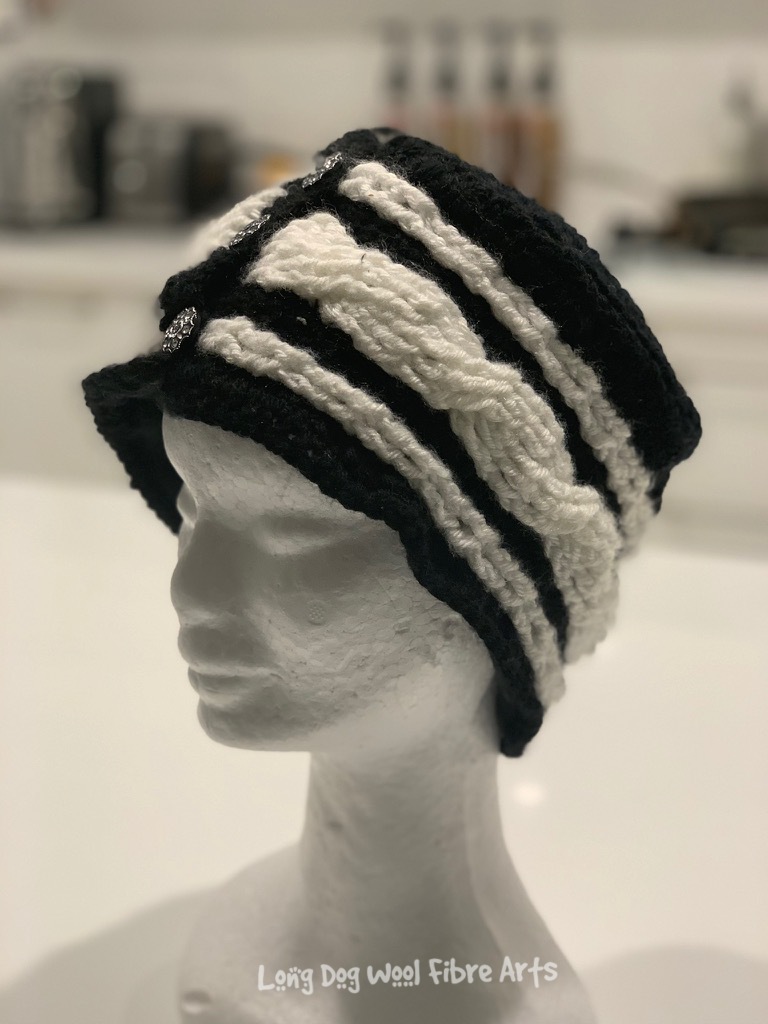
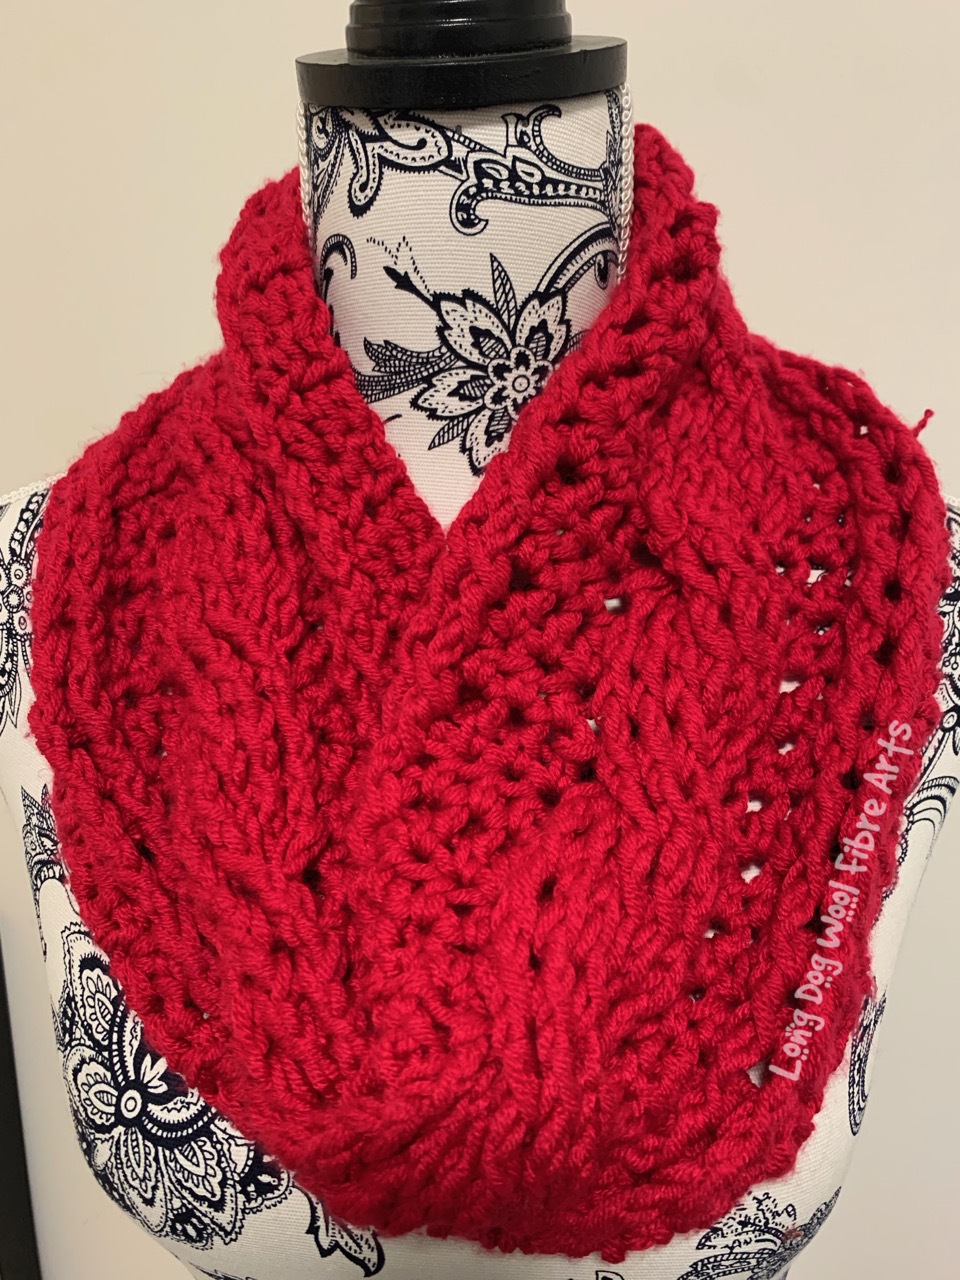
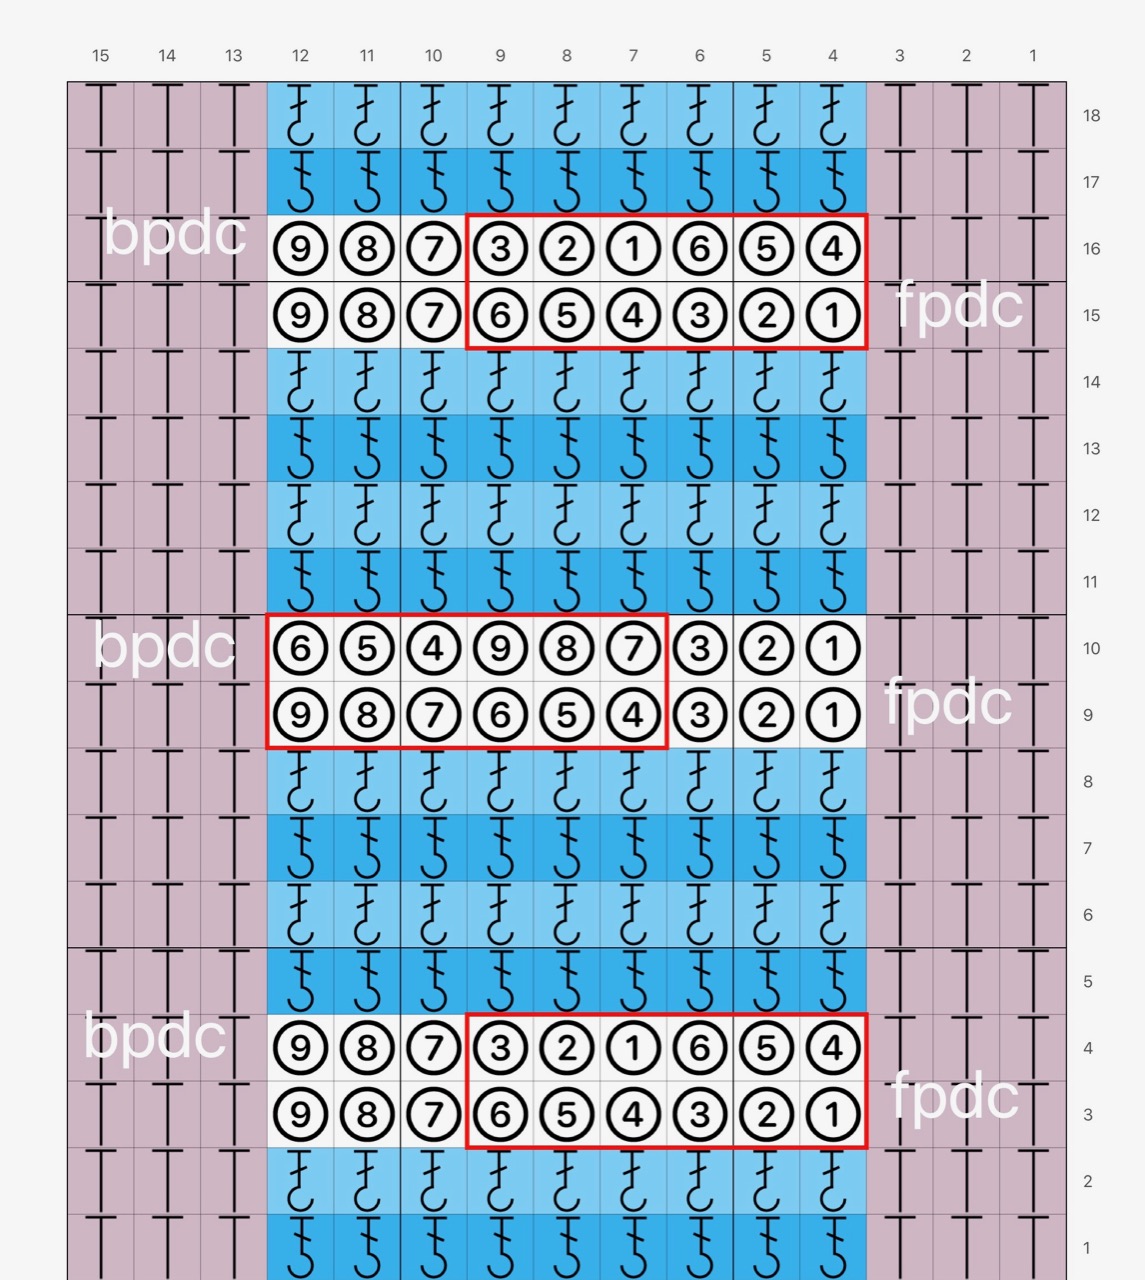
Once you an do this basic cable stitch, it is easy to apply these techniques to other types of cables – like the 9-stitch double twist cable or 4 stitch thin cables.

What project are you going to use your cable stitch in? Why not visit the Long Dog Wool Fibre Arts Facebook Page HERE and show off your work? I’d love to see photos of your cabled projects! Happy hooking!


Leave a comment