One Sheet Fun Fold
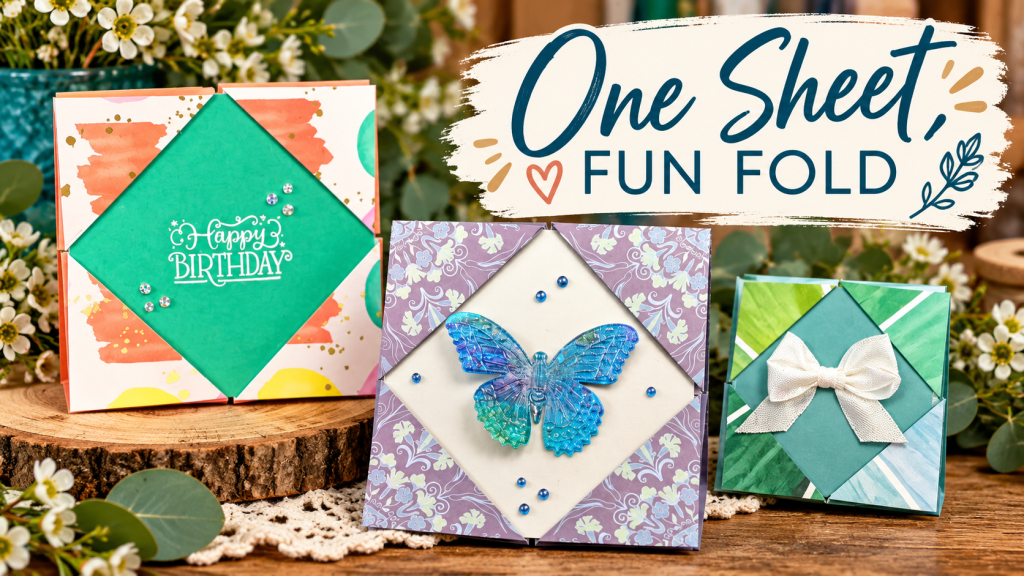
I love a card fold that looks far more complicated than it actually is — and this One Sheet Fun Fold definitely falls into that category!
The whole structure begins with just one square sheet of double-sided patterned paper. With some simple folding, that single sheet becomes the basis of a dimensional card that shows off both sides of the paper beautifully. Add a few embellishments and a sentiment, and you have something that looks wonderfully elaborate without requiring complicated construction.
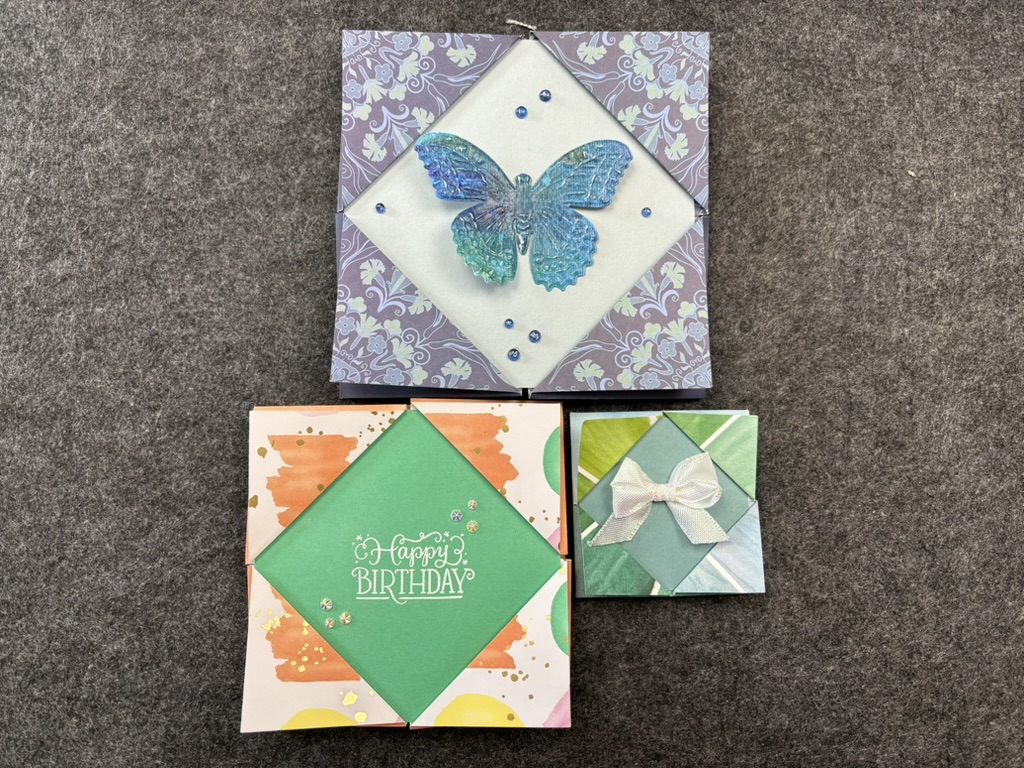
Even better, the fold is easily adapted to different sizes:
- A 12 x 12″ sheet of paper will give you a 6 x 6″ card
- A 10 x 10″ sheet of paper will give you a 5 x 5″ card
- A 6 x 6″ sheet of paper will give you an adorable 3 x 3″ card
This is also one of those projects where choosing the paper is half the fun. Because both sides remain visible in the finished fold. Double-sided patterned paper does much of the design work for you — and changing the paper, sentiment and embellishments can completely change the personality of the finished card.
Below you’ll find the video tutorial, and the written instructions and measurements so you can work through the project at your own pace.
So, find a piece of patterned paper you’ve been saving because it’s too pretty to cut up — this might just be the project for it. 😊
Video Tutorial
Instructions
Cut Plan
| 3 x 3” Card | 5 x 5” Card | 6 x 6” Card | |
| DSP | 6 x 6” | 10 x 10” | 12 x 12” |
| Inside Mat | 2.75 x 2.75” | 4.75 x 4.75” | 5.75 x 5.75” |
| Inside Writing Panel | 2.5 x 2.5” | 4.5 x 4.5” | 5.5 x 5.5” |
| Front Piece | 2.75 x 2.75” | 4.75 x 4.75” | 5.75 x 5.75” |
Scoring Plan
Pro Tip: Precision is the key to getting this to fold easily and accurately. Make sure your score lines are as precise as possible.
| 3 x 3” Card | 5 x 5” Card | 6 x 6” Card | |
| DSP – score 1 | Score all four sides at 1.5” from edge | Score all four sides at 2.5” from edge | Score all four sides At 3” from edge. |
| DSP – Mark each side in the exact middle…. | 3” | 5” | 6” |
| DSP – score 2 | Score from mark to mark on the diagonal around all four corners. | ||
Assembly
Pro Tip: Choose which side of the DSP you want to be the inside and the outside. On this card, because of the wa it folds, the inside is the main star and the outside should be in the supporting role. But you can orient your DSP any way you want!
The inside of your DSP should be facing up for scoring:
Score as per score plan.
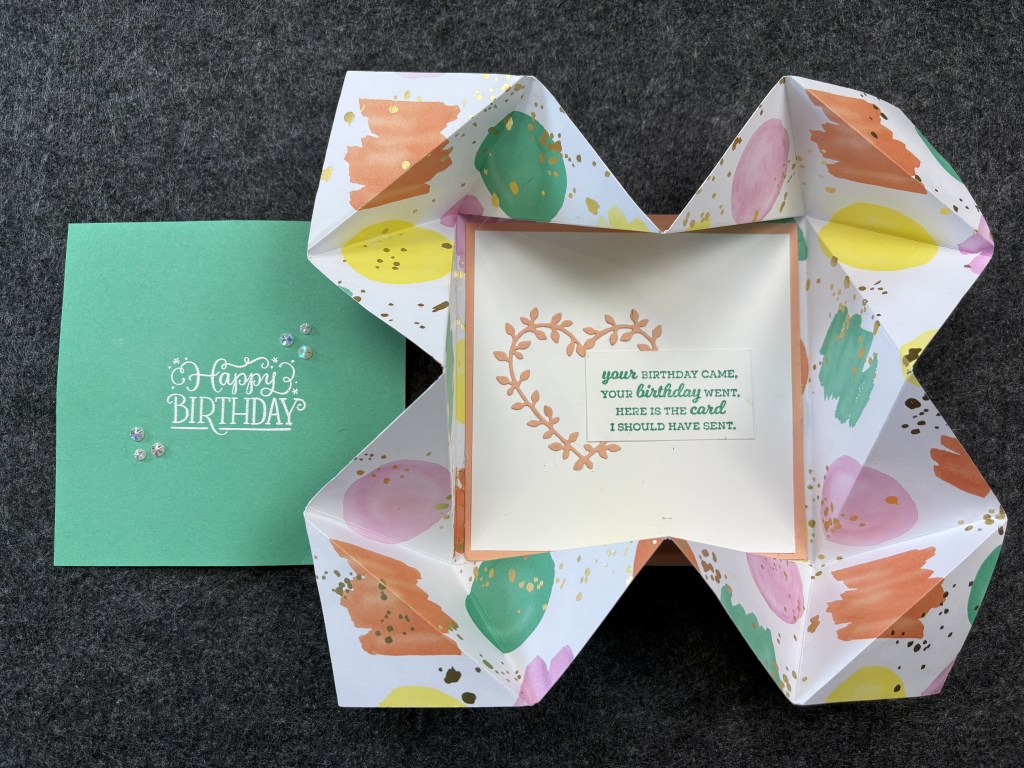
Fold diagonal scores toward the back (away from you). Open folds up.
Pro Tip: Use a bone folder to do all the folds. You want them as crisp as possible.
Fold along the straight scores toward the front, (toward you) one at a time, and open each fold up before moving to the next one.
Pull from the middle of each straight edge toward the centre – the corners should all fold down nicely. The outside of the DSP now shows.
Pro Tip: If this doesn’t make sense, or isn’t working easily, I highly recommend watching the video!
Fold each of the corners back on themselves diagonally and align with edges of the card, leaving a very narrow margin at the edge.
Embellish, stamp or otherwise decorate the inside writing panel (or leave it blank to write a message on).
Affix inside writing panel to the inside mat.
Affix the inside mat to the centre of the inside of the card.
Decorate the front piece with your choice of dies, stamps, embellishments, etc.
Option: You can also layer a piece of white or neutral cardstock over the front piece and decorate it.
Slip the front piece into the four corner pockets created by the corner folds.
This will help keep the card ‘closed’.
Idea: For my grandkids, I added a little money pocket to the back of this Front Piece with some money in it for them as a surprise. 🙂

You did it!
I hope you enjoyed making your One Sheet Fun Fold! One of the things I love most about this design is how different it can look simply by changing the size, paper and embellishments.
If you make one, I’d love to see what you create. And if you found this tutorial helpful, please feel free to share it with another crafty person who might enjoy giving it a try.
Marcus, Polly & Hugo would also like to remind you to follow Drunk Dog Creative here and on socials so you don’t miss the next crafty adventure!
Sit. Stay. Create. Good human. 🐾
Need supplies?
If you’d like to recreate this project — or put your own spin on it — you can shop for Stampin’ Up! papercraft supplies through my online store.
Shop Stampin’ Up! with Bridget A
And, of course, you don’t need to use exactly what I used. Use what you have, make it your own, and have fun with it.
Happy Inking!
Bridget A.




Leave a Reply